

Create a Floral Frenzy!
From recycled plastic to wearable art
Remember all the fun shapes and characters you'd make in an afternoon with a small toaster oven and a few sheets of Shrinky Dink? Countless, I am sure. While Shrinky Dink is still on the market, Cassie LaGreca, owner of Better To Gather did a little experimenting and discovered one way to make this fun and colorful jewelry at low or no cost. Basically, in this case, being a scavenger could land you the resources for some seriously fun, creative and one-of-a-kind jewelry.
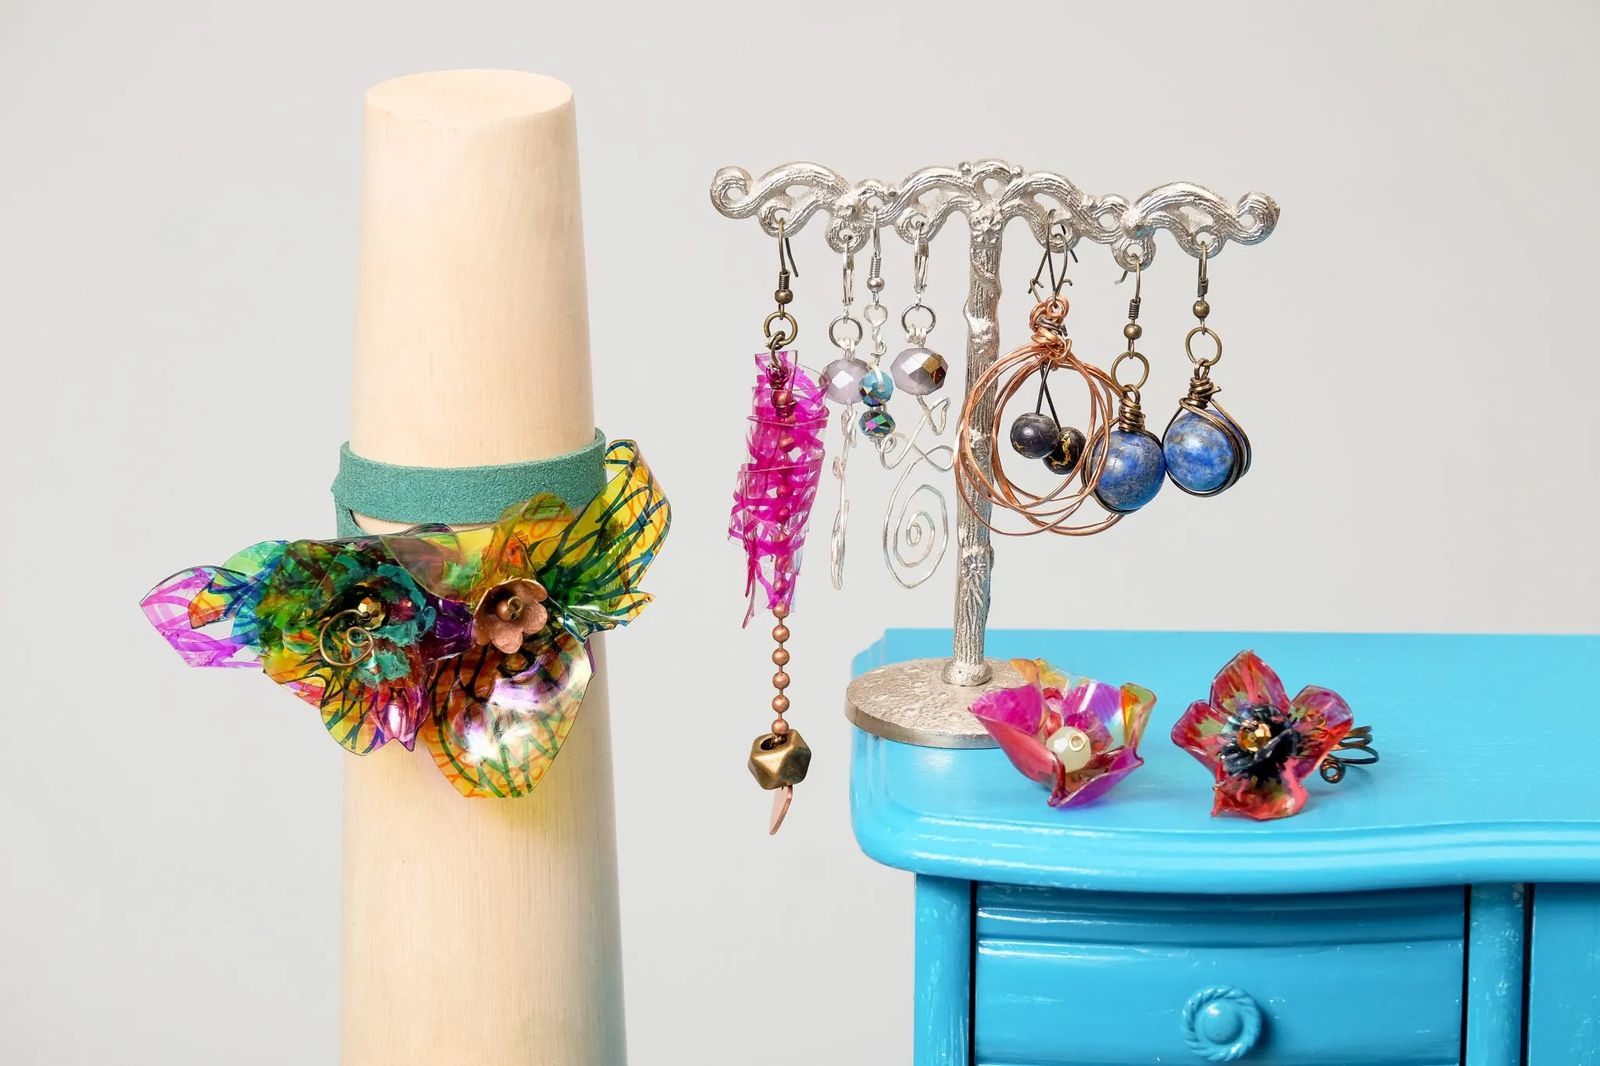
"You can hold up a water bottle and say, from this" Cassie says as she points to a brightly colored floral Poppy ring, "to this!" In the end, the bottle was cut, colored, heated, molded and shaped into a true work of art. It's bedazzled with sparkly beads and jewelry-making wire to create a real show stopper of a piece.
"It was so much fun," Cassie says."The process just started with how do I get the colors that I want? How do I melt the plastic into specific shapes?" With a smile on her face she says, "It really is something that just requires you to play!"
In the end, Cassie settled on a heat embossing tool that you can find at your local craft store. Armed with some heat resistant work gloves and a long set of tweezers, she had the tools it took to turn used plastic cups and bottles into earrings, rings, necklaces, bracelets or even a funky drawer pull or two.
"When I do this project here, I am going to do the rings with everyone," Cassie says of Better To Gather's upcoming class in June. "This is super gratifying and you can get this project done pretty quickly. I will teach them the flower bead, the basics of the other beads and I will show them the other samples so that it kind of opens their mind to play outside of here."

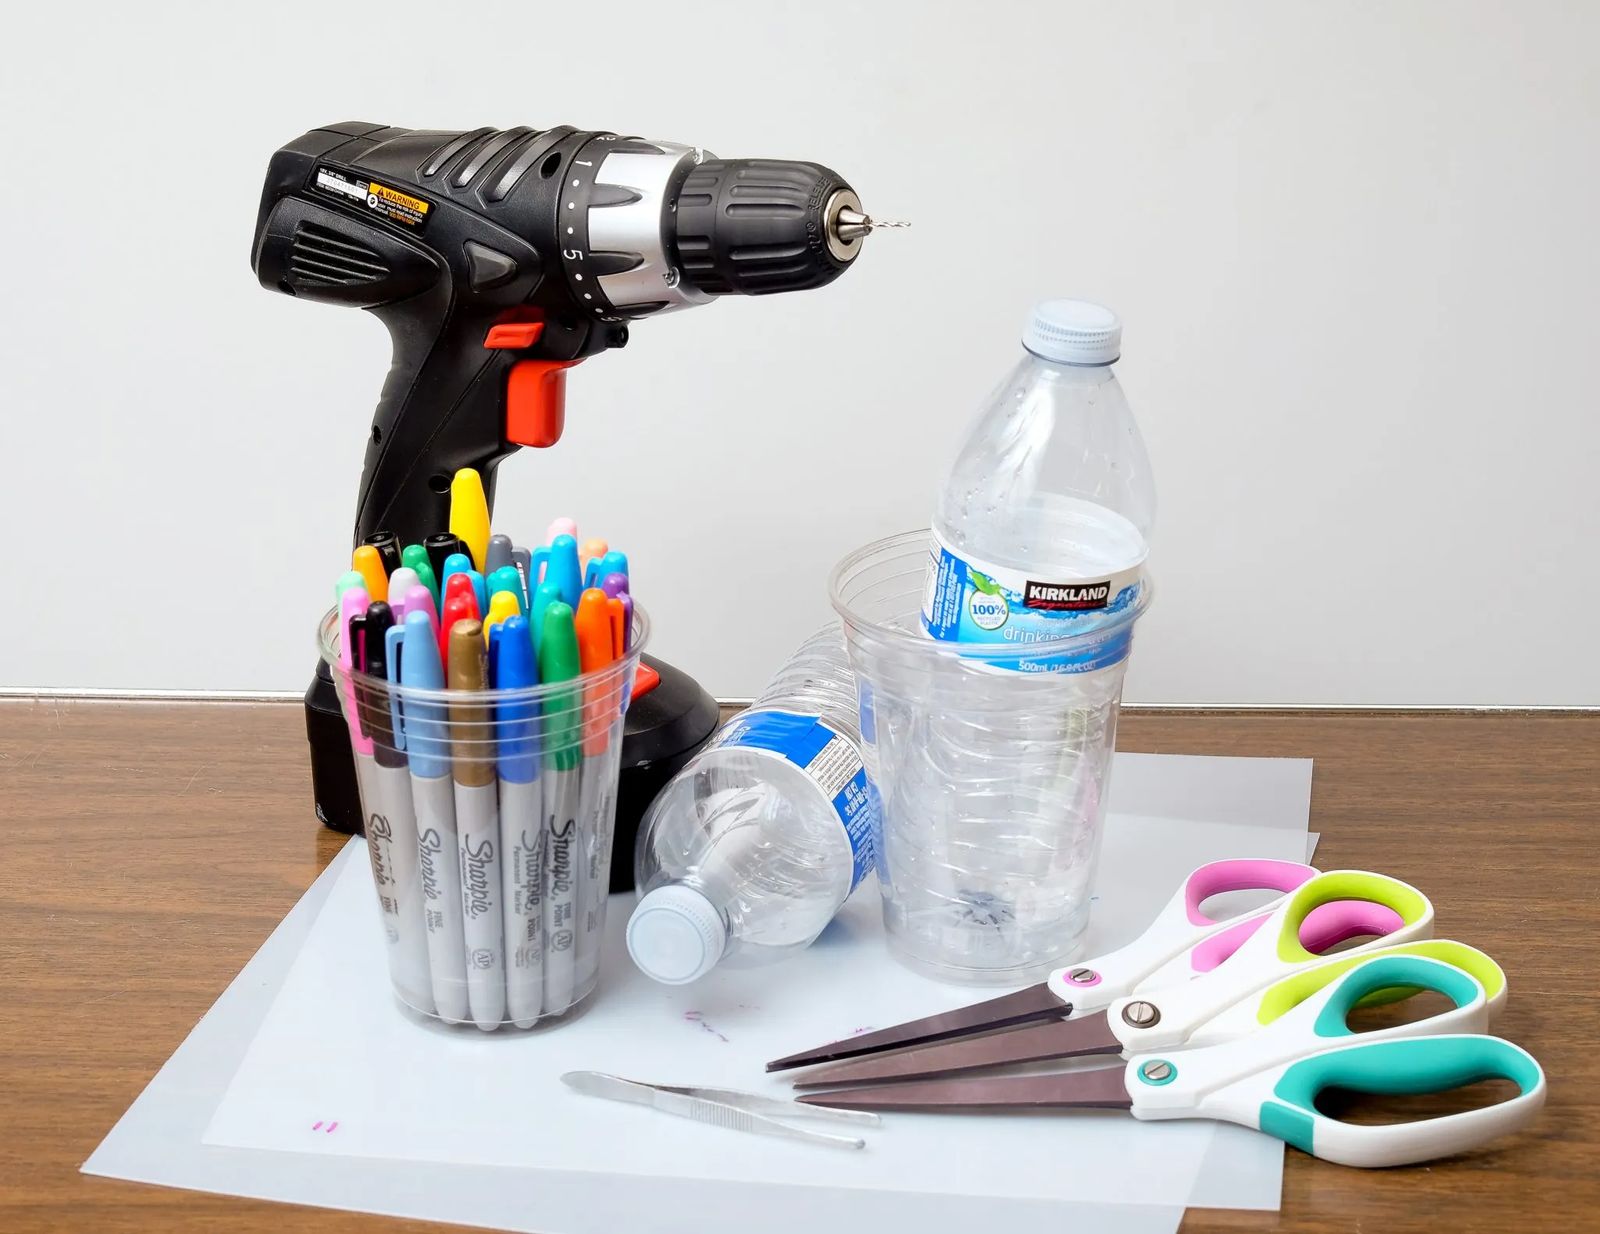
WHAT YOU NEED
Sharpie permanent markers or paint pens in solid or metallic colors
Scissors
Plastic bottles, cups or sheets of PETG Thermoform Plastic Sheets in .02" thickness
Drill with a 1/8" drill bit suitable for drilling plastic
Jewelry Wire in a 19 or 20 gauge thickness
Extra beads to embellish your piece
Needle nose pliers or jewelry-making tools to bend and shape wire
Heat Embossing Tool

HOW TO CREATE THE LOOK
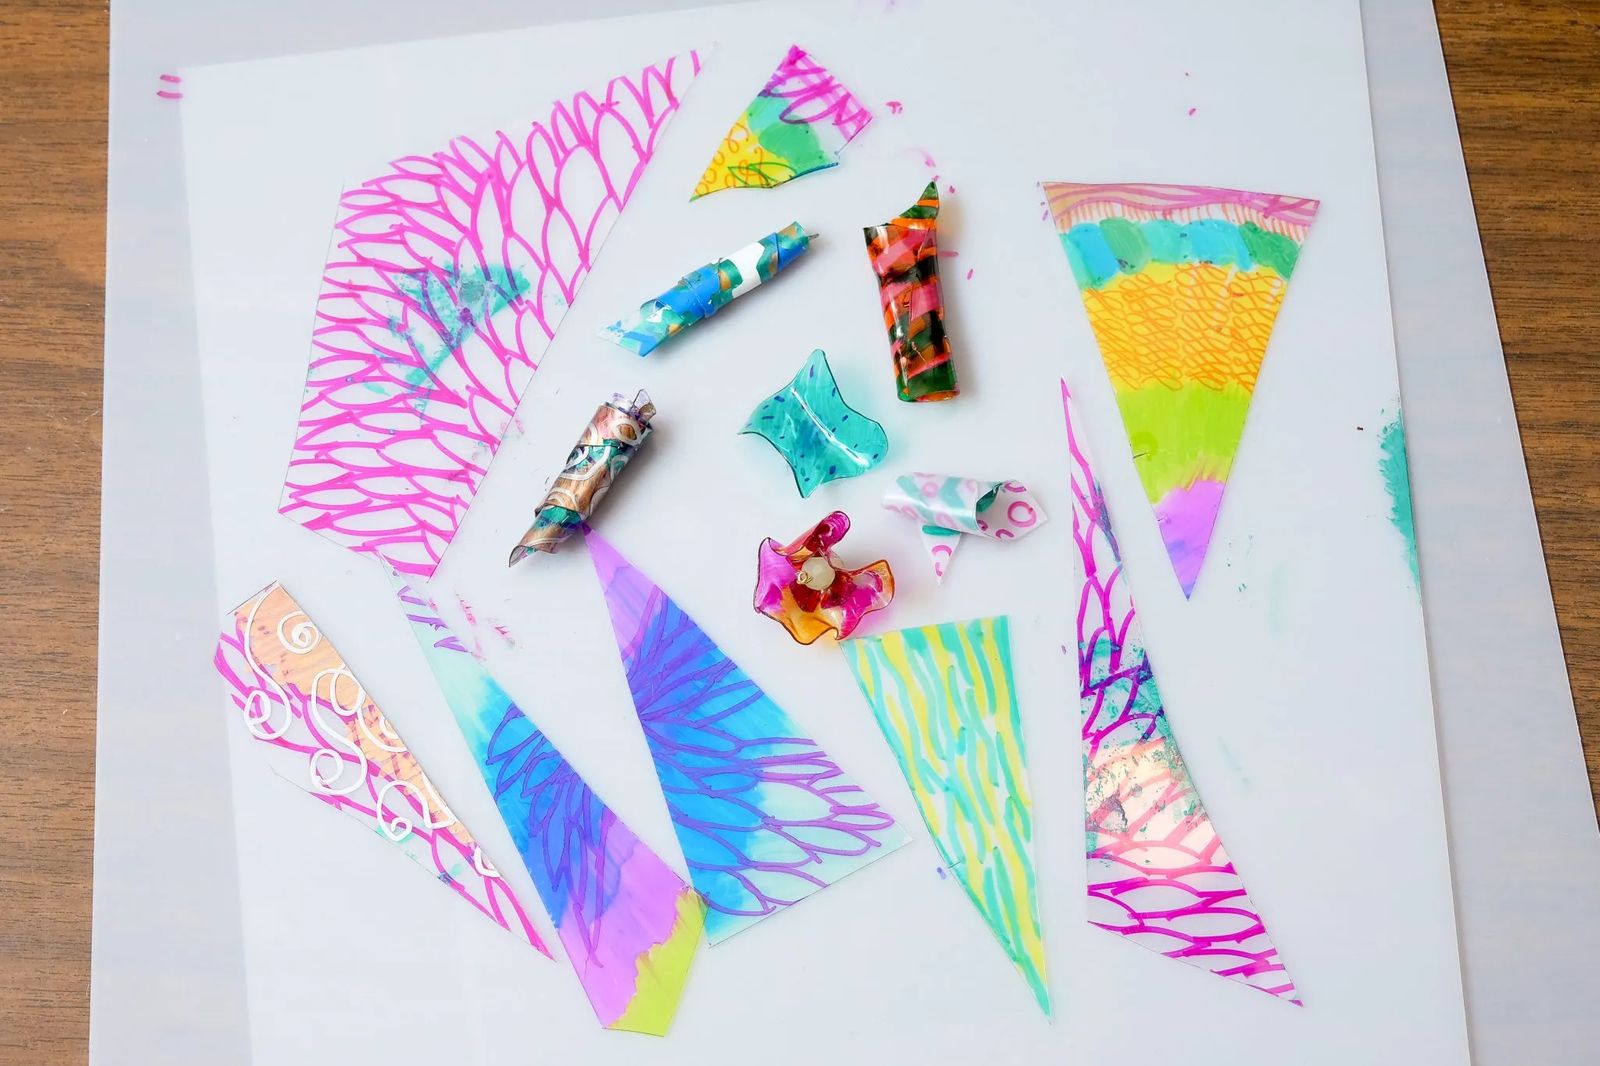
Start by choosing the plastics you want to mold and fashion. Old water bottles or plastic cups are a great starting point. If you want to jump in without saving these used items, you can purchase PETG Thermoform Plastic Sheets on Amazon.com.
After you've chosen your "canvas," you can get to coloring or cut the shape you'd like to mold into art. Flowers can be transformed from squiggly circles or if you'd like to make beads, Cassie says, "I recommend cutting very slim acute triangles. Those make great beads!" After you heat up the triangle, the beads are created by rolling the pliable plastic from the widest end of the triangle toward the point of the triangle.
Once your shapes are cut, time to add a splash of color. Add bold hues with Sharpie markers or with paint pens for a more opaque look.
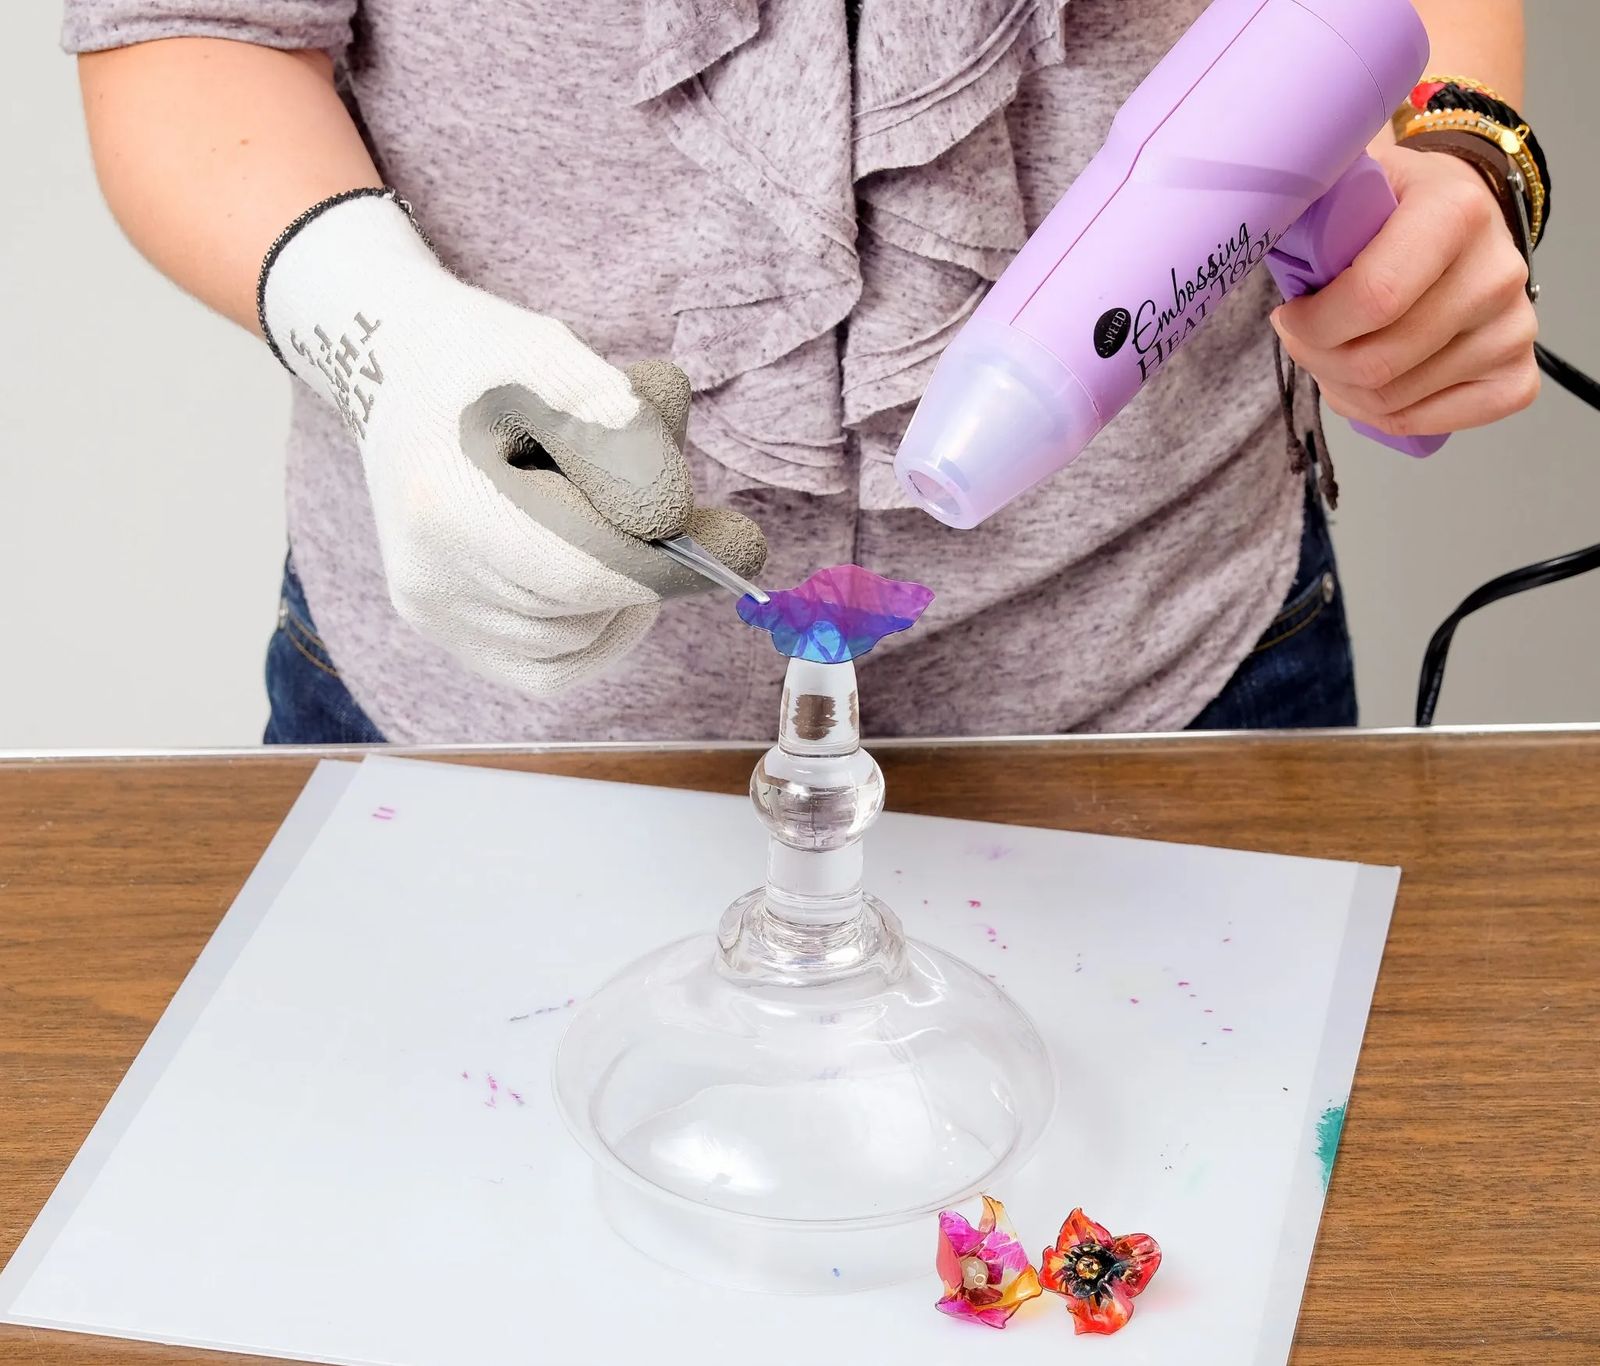
To mold your plastic, you can use a heat embossing tool to heat it up and make it pliable. Cassie says you can use oven safe glass or porcelain items to mold your plastic. She used a glass apothecary jar top to create her fluid and flowing flowers by heating up the plastic and laying over top the pointed jar top. Keep working the plastic pieces until you've achieved the look you like. Make sure you protect your hands in the process by using heat resistant work gloves or silicone finger protectors. You can also keep the heat at bay by using extra long tweezers.
From here, you need to decide how you want to use your work of art. Cassie explains, "Once you've made the beads, that's when it gets a little trickier. You need to decide what you want to do with them. So, if you are going to make a ring, or a bracelet or earrings, you will want to take a drill and drill a hole where you want to strand or string your beads." If you want to make it easier, Cassie says, you can use stretch elastic and string your beads on the elastic cording.
Once you're done stringing and embellishing, the only thing left to do is wear and enjoy!

NEED A LITTLE HELP CREATING?
Join Better To Gather for their Make & Take Project
If you'd like a little helping hand in making this flower power ring, expertise can be found at Better To Gather located at 2402 Montana Avenue. The shop will offer this project for a small fee during the month of June during their open studio hours every Tuesday, Wednesday or Thursday from 3 to 7 PM. This project will also be offered in a class setting on June 18th from 6 to 9 PM. For more crafty fun, log onto bettertogather.com and click on the Get Creative! tab for more on workshop events.
CRAFTING ON THE PATIO
Open air crafting on tap at Better To Gather
Love the thought of getting crafty under the summer sky? Look for the white tent in the patio area between Better To Gather and Trailhead Spirits. Cassie plans to have impromptu outdoor studio hours during the summer as well as regular crafting on the patio sessions every second Friday during the summer from 5 to 9 PM.


