

Dress Up Your Bathroom
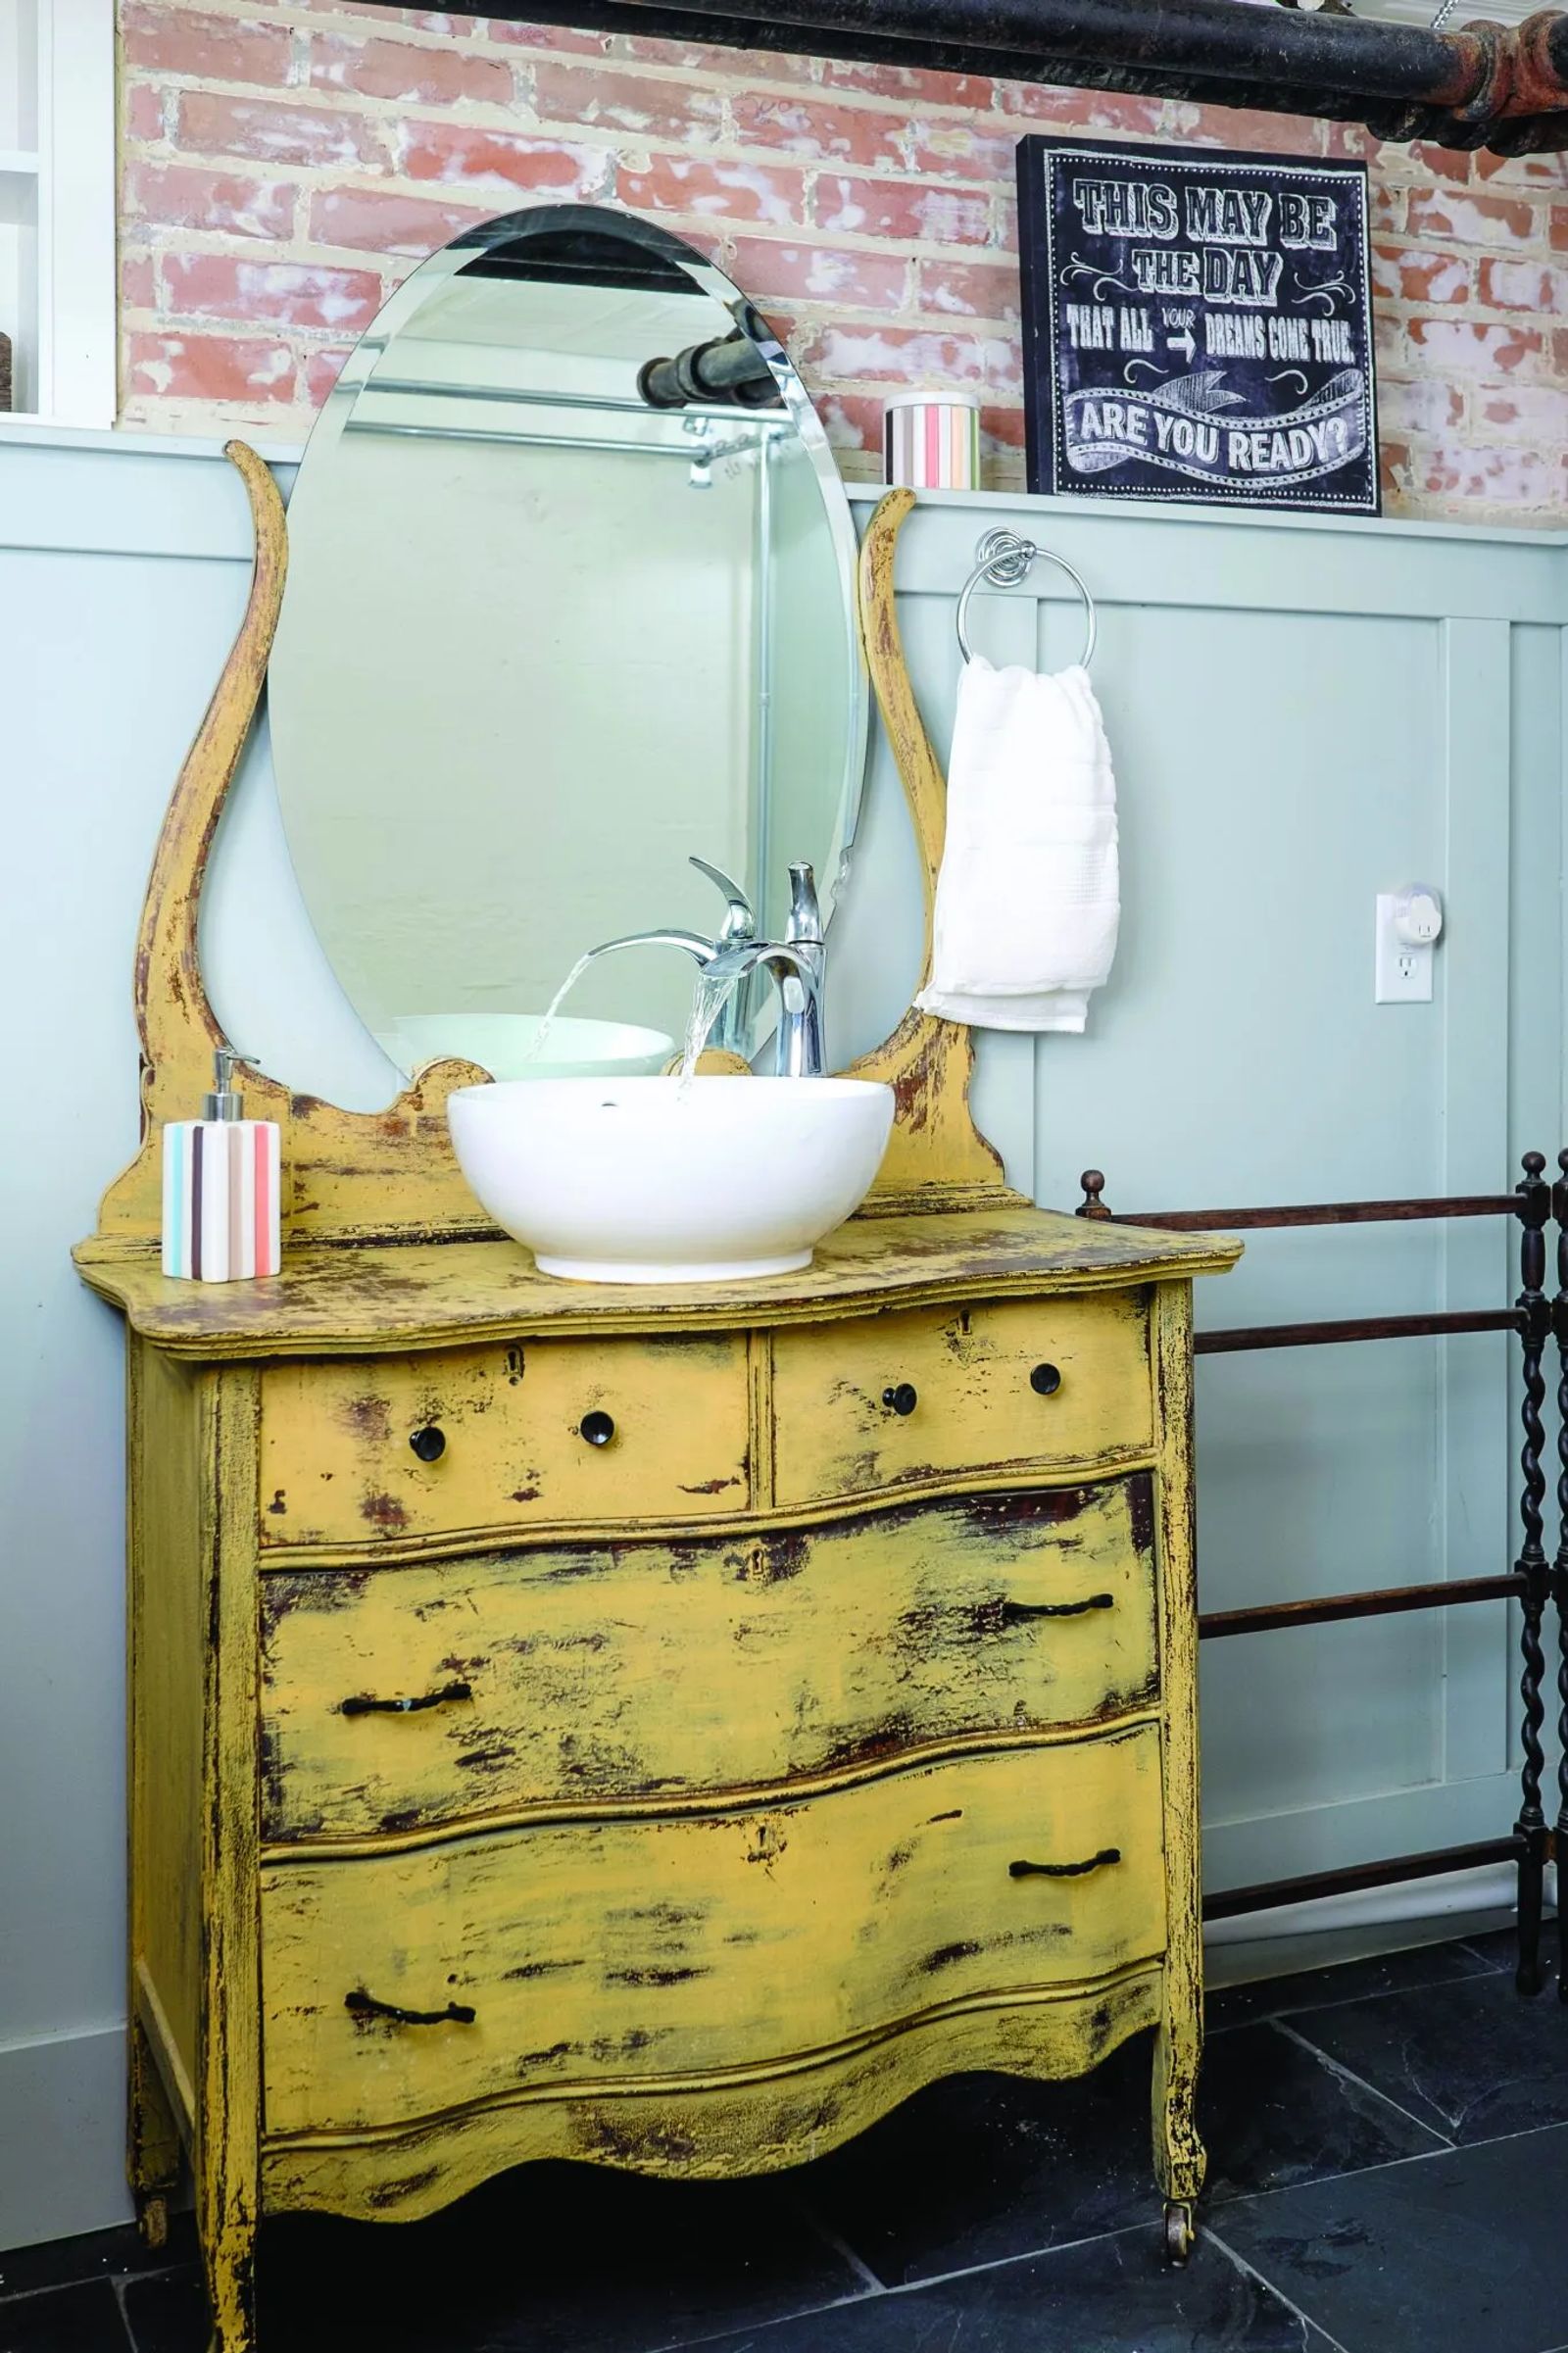
Old chest of drawers adds character and pizazz
Always looking for a new way to use old things, I stumbled upon a decorating trend that can easily add character to a ho-hum bathroom. In the market for a new bathroom vanity, I discovered that some designers were giving new life to old dressers by fashioning them into vanities. A fun vintage piece that started its life as one thing, can easily turn into another. Not only beautiful, this trend is functional as well. You have the look of a furniture piece but with plenty of storage as well. This is much better than your built-in traditional bathroom cabinet in my book. It’s exactly why my husband and I decided to tackle this for our own bathroom.
WHAT YOU NEED
Old dresser
Sink
Plumbing supplies
Paint/stain
Jig saw
Water based polyurethane
Clear silicone caulk

HOW TO GET THE LOOK
Keep in mind, this project is not fit for a fine antique or a family heirloom. This is a project for a sturdy well-worn piece of furniture that needs a new life. Try searching garage and estate sales and think about your space and what kind of height, width and size would do well in your bathroom. Make sure to check the sturdiness of the piece as well since the goal is to drop a sink in it. It’s also a good idea to pick a sink first and then search for a dresser that has the width necessary to hold it.
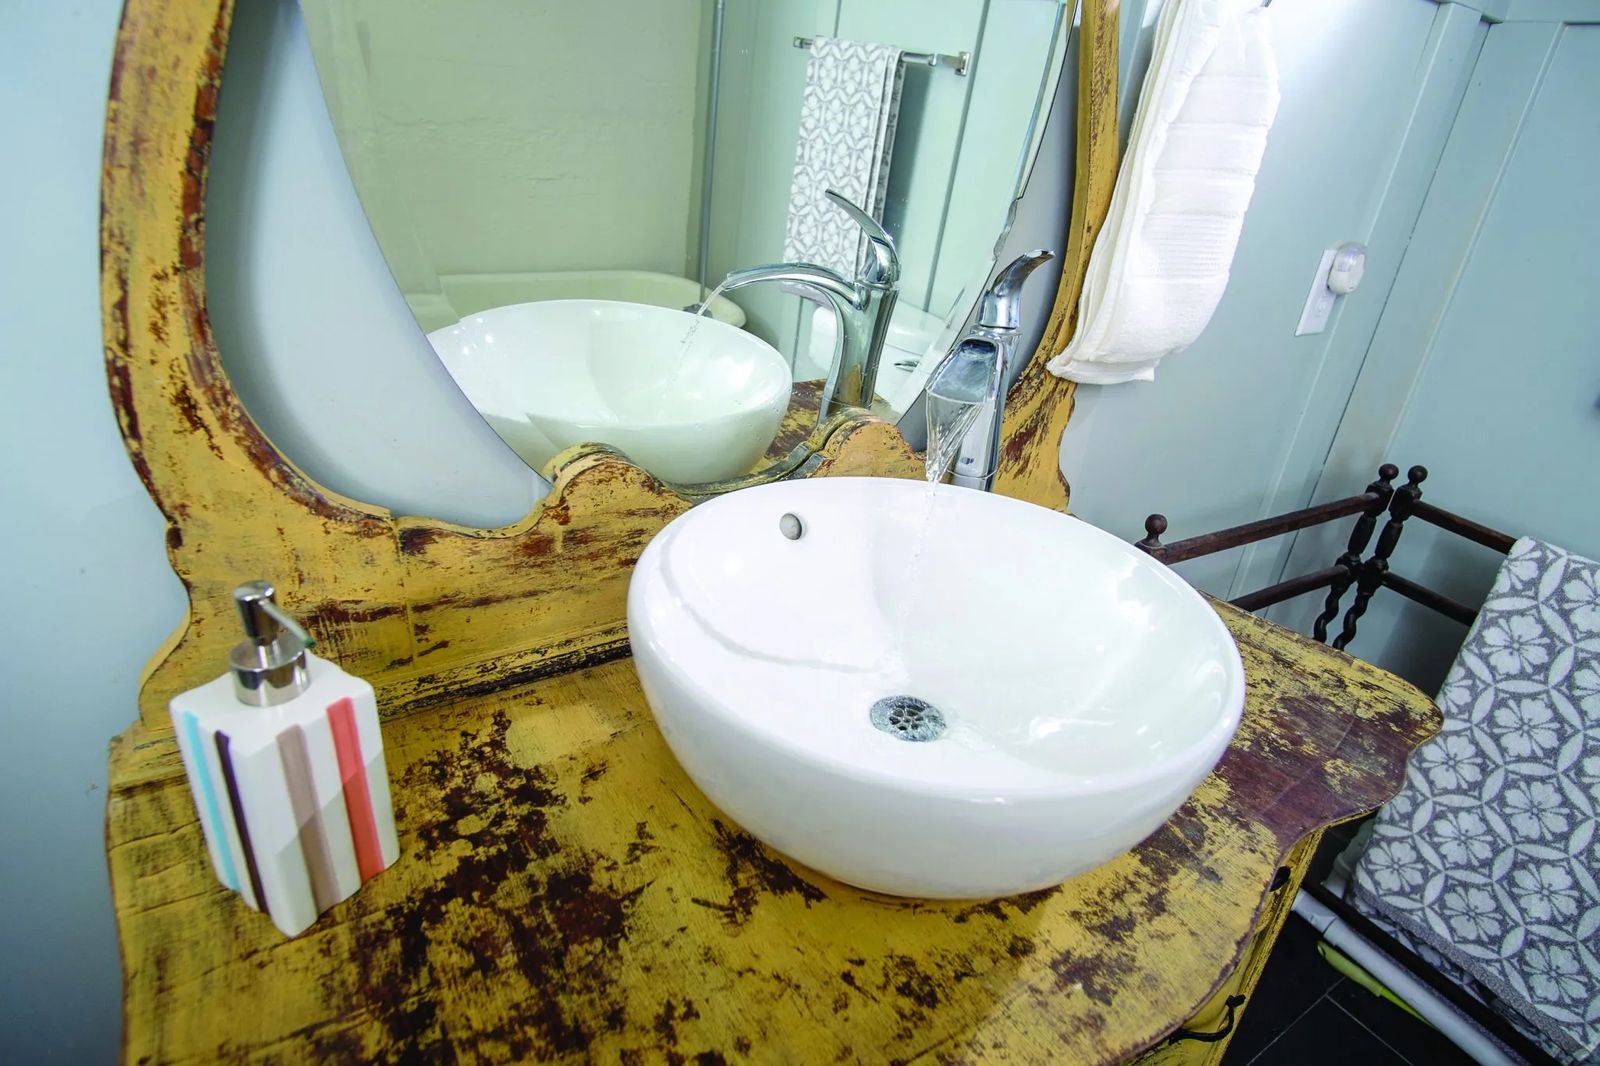
Once you’ve found your match, remove all of the dresser’s drawers. Place a template of the sink on top of the dresser, find the center and trace the template on top. Cut out the shape using a jig saw. Don’t forget your safety glasses! Test fit the sink by placing the sink in the hole. After you’ve secured the fit, remove the sink and set aside.
Now, it’s time to paint or stain if you like. Remove all of the knobs and sand the piece lightly to prep for paint or stain. After you’ve painted or stained, apply 4-5 coats of a water based polyurethane on the top (where the sink sits). Since this area will get a lot of water exposure, this step is imperative for protection. Attach the sink top by first applying a bead of silicone caulk around the sink hole. Set the sink in the hole, press it down firmly and allow about 24 hours for the caulk to set and dry. Set the vanity close to its eventual spot, and begin measuring where the plumbing will hit on the back of the dresser. Mark a square big enough for the plumbing to fit through.
Keep in mind the functionality of each drawer as you go. This will vary because of each dresser’s unique measurements and drawer depth. Mark and use a jigsaw to cut out the back. Move the dresser to its permanent position and attach the faucet and plumbing. Find the studs in your wall and screw two screws through the back of the vanity into the studs to firmly attach to the wall.
To customize the drawers so they fit around the new plumbing, it will depend on your chosen vanity. I chose to permanently attach the top drawers by gluing and nailing the drawer face into the dresser. I simply took apart the drawer to do this. For the middle drawers, we shortened the length of the drawers and reattached the backs. After your drawers have been adjusted, reattach the knobs and slide the drawers back in. This is a great way to give your bathroom a one-of-a-kind look and a distinct character, without spending a ton of money.


