

Waterproof & Washable
A DIY Floor Cloth adds a splash of pizazz
If you’re looking for a refreshing way to dress up your floors, vinyl floor cloths are not only one of the easiest DIYs but can add a bit of vintage flair to your kitchen, hallway, entry or basically any place that withstands high traffic. You can even create a floor cloth for spaces outdoors to add a visual pop of color or a graphical punch. As a bonus, they protect hard surface flooring just like a rug but can be easily swept or mopped, meaning you won’t have to lug out the vacuum every time there’s a spill.
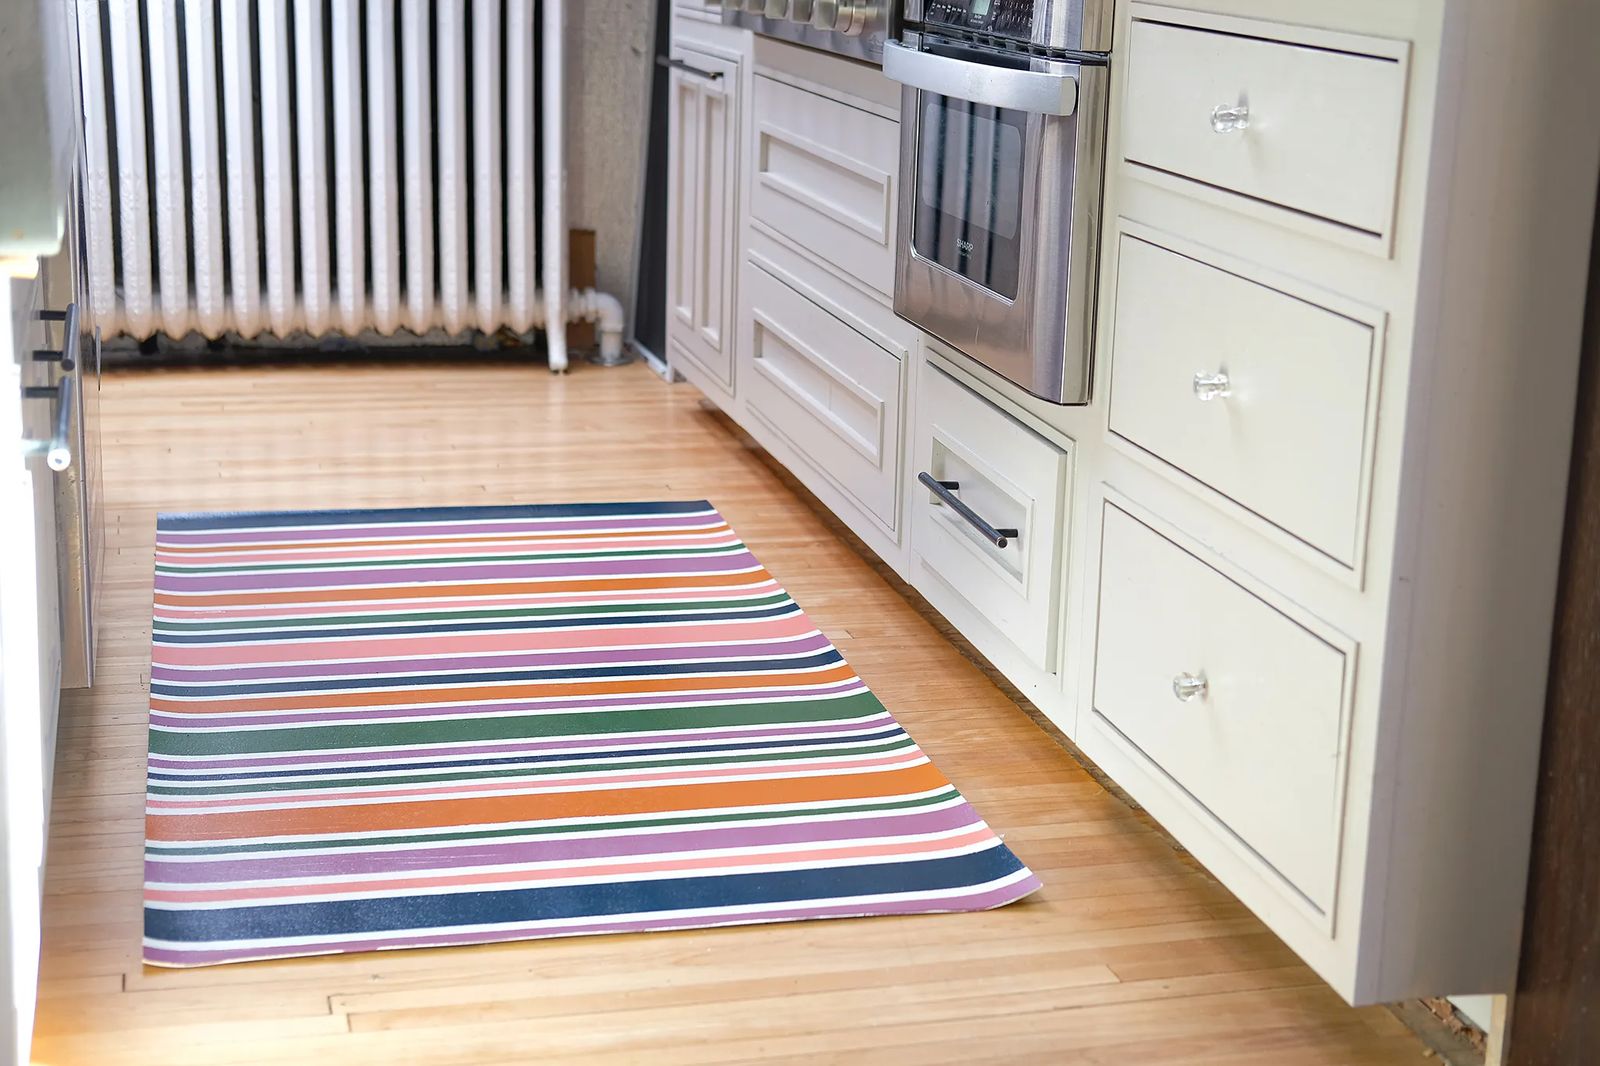
I made mine to be used next to the kitchen sink to add a pop of color and interest. What I love most is the fact that these floor cloths can cost a pretty penny in stores or online but the DIY version is so easy and, better yet, inexpensive. Since you can customize your own in a snap, making one for yourself is almost a no brainer!
WHAT YOU WILL NEED
A small remnant of sheet vinyl flooring
Razor knife
Straight edge
Masking tape
Disposable brushes
Primer
Paint
Polyurethane topcoat

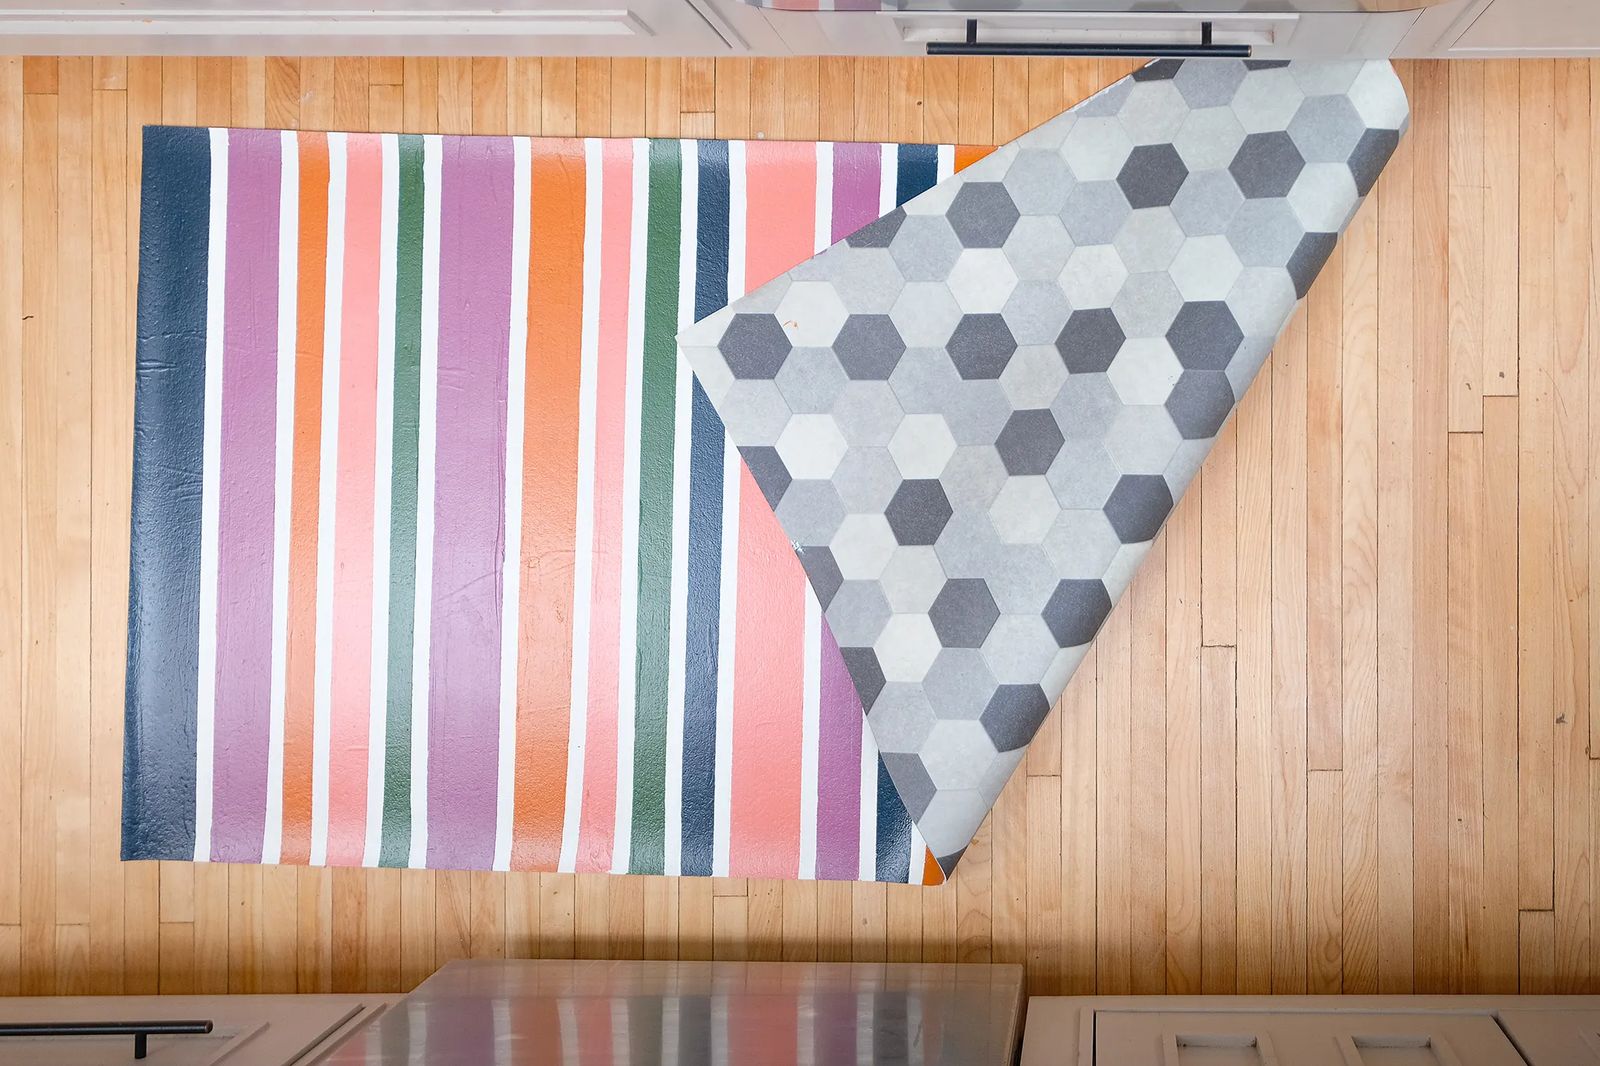
I used a leftover piece of vinyl flooring for my project, but you can always check the big box or flooring stores for small pieces they might have left over from a project. If you have to purchase some sheet vinyl, it can run as low as 70 cents per square foot. Since you’ll be painting over the floor, the design doesn’t matter, allowing you to choose the cheapest option possible.
For my cloth, I decided on a 3-by-6-foot size. It’s an easy size to slip next to a kitchen sink or by the back-door area. Start by marking the decorative side (this will be the back of your floorcloth) with the measurements of your mat. You’ll be using a straight edge and a razor knife to get that even, straight cut. Flip over your floor cloth and prime the top with a good quality paint primer. I used the Kilz brand and let it dry overnight.
When it came time to start painting my design, I decided on random stripes. I used little hash marks in pencil to mark out where I wanted my stripes to land. After I’ve marked out the stripes, I used masking tape from one end of the rug to the other, lining up my tape along the marks before adhering. This creates a magic straight line that you can use as your guide for paint. Continue to mask before starting to paint. I chose acrylic paints and let my sections fully dry before lifting off the tape to add more stripes. I repeated this process until my cloth was covered and the paint was dry.
While I chose a striped look, you can opt for a hand-painted design, pick up a stencil to serve as your graphic design or even write your favorite quote or house number on your floor cloth. Be bold and think outside the box!
Now that everything is painted and dried, It's time to polyurethane the floor cloth. Using a small foam roller, add three to five thin coats of the polyurethane, letting your cloth dry between each coat. In this case, I do think more is better. This is a layer designed to protect your beautiful artwork. Depending on the style of vinyl you use, you may have to add a bit of silicone to the edges to make sure this rug stays put and doesn’t slide on your flooring underneath.
This is an awesome project that adds your personality to your home in any size or style or for any holiday you like. It's durable, easy to keep clean and protects the floor below at a fraction of the cost of a store-bought floor cloth. That’s a lot of bang for your buck!


