Gnome Sweet Gnome
Create holiday whimsy with this DIY centerpiece
Have you gotten on the gnome craze hitting holiday décor? Well, instead of buying this bit of whimsy, why not put the hustle and bustle of the season aside and bring this quick homemade holiday gnome to life? This guy was so quick and easy and, better yet, most of the materials can be found around the house.
WHAT YOU WILL NEED
● Beard material
● ½ yard of flannel fabric
● 2 pompoms
● Several types of faux pine or fir greenery
● Hot glue gun and glue sticks
● Cardboard tree form
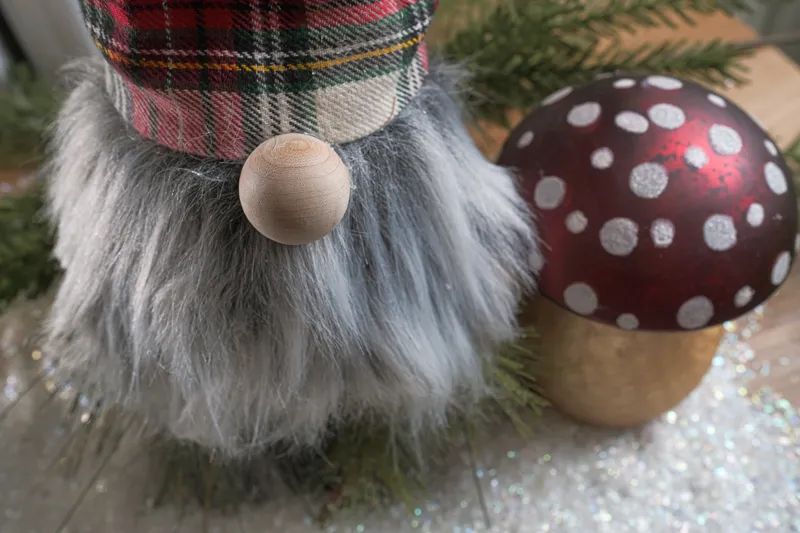
● Round wooden knob
HERE’S HOW TO MAKE IT
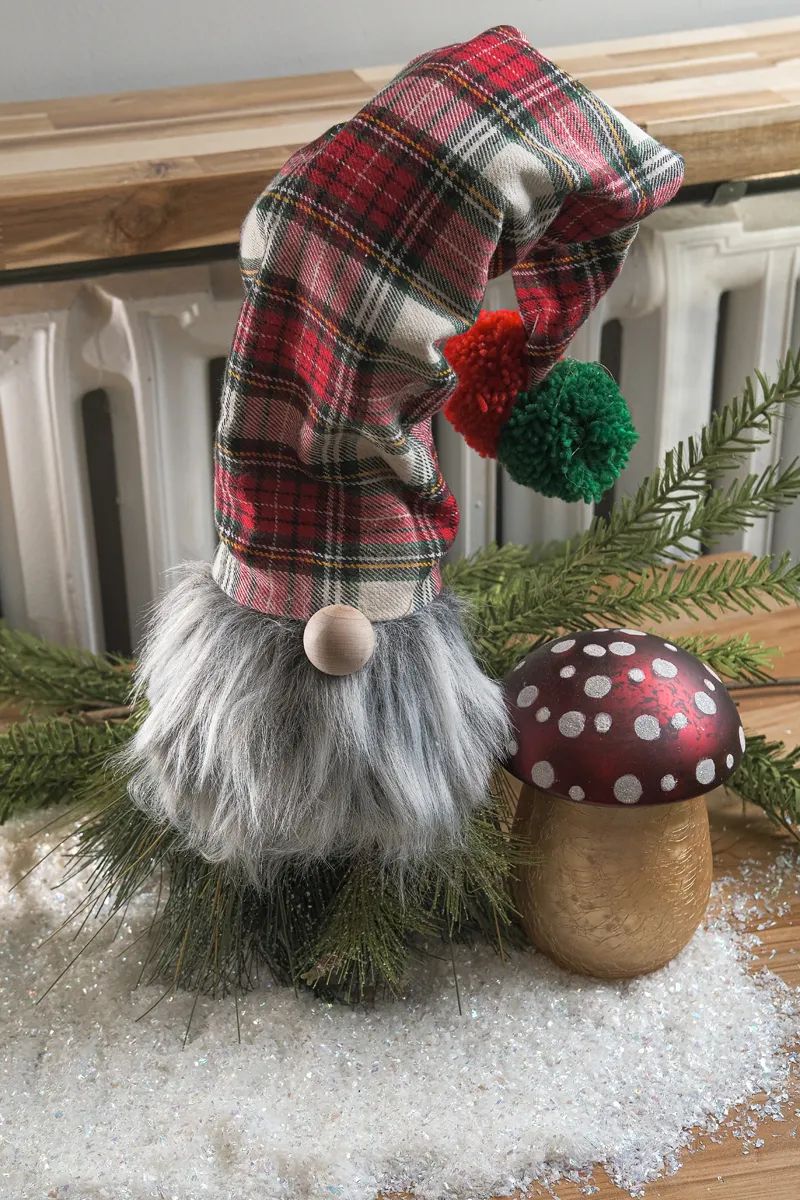
To start, I found the tree form in the Christmas section of a local craft store. You’ll want to take the form and cut off the top three inches, carefully using a box cutter or serrated knife. Deconstruct the faux greenery, creating single branches and set them aside in like groups. You’ll want to use several different types of stems to create a little interest. I chose stems with both long and short needles and looked for varying colors of green.
Hot glue two stems in the hole created when you cut the top off the tree form, add enough glue so that the stems are very secure. Make sure you use some stems that have a little height to them. From here, glue more stems around the base of the tree form, covering all sides. Varying the stems will give you good coverage and will add dimension.
Cut the beard material into a 4-inch square. From here, round out the edges so the material has a beard shape before gluing it about halfway up the tree form.
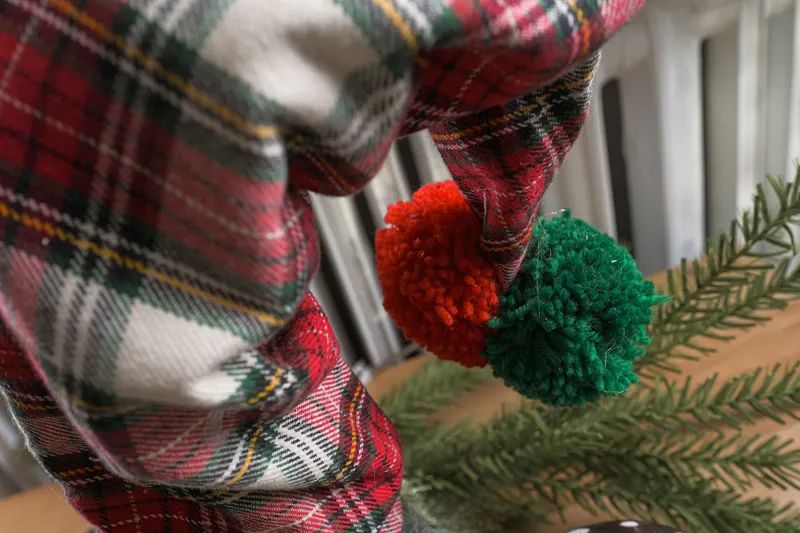
Now it’s time to take that bit of flannel (you can even use an old flannel shirt) and create the gnome’s hat. I measured the circumference of the tree form at the level of the beard, added an inch and cut to that measurement. I glued and folded the edge on top of the beard all the way around. The flannel should cover and hide the greenery that we glued into the top hole of the form. The stems underneath help give the hat structure. When you reach the end of the flannel, you should have created a point to the hat. Embellish it by gluing a pompom on each side of the top of the hat. You’ll want to play around with the shape of your flannel. I liked adding a few wrinkles for a bit of charm. Now all that’s left is to use the wooden knob as the gnome’s nose and glue it in place.
This little guy was so quick and easy, with no sewing! The cost can be minimal if you recycle some of the materials. A holiday gnome is a great way to cheer up a corner, spruce up a bathroom or even put at the center of a table. Depending on what type of flannel you use, your gnome can even stick around all winter. Happy Holidays to your gnome, sweet gnome!