

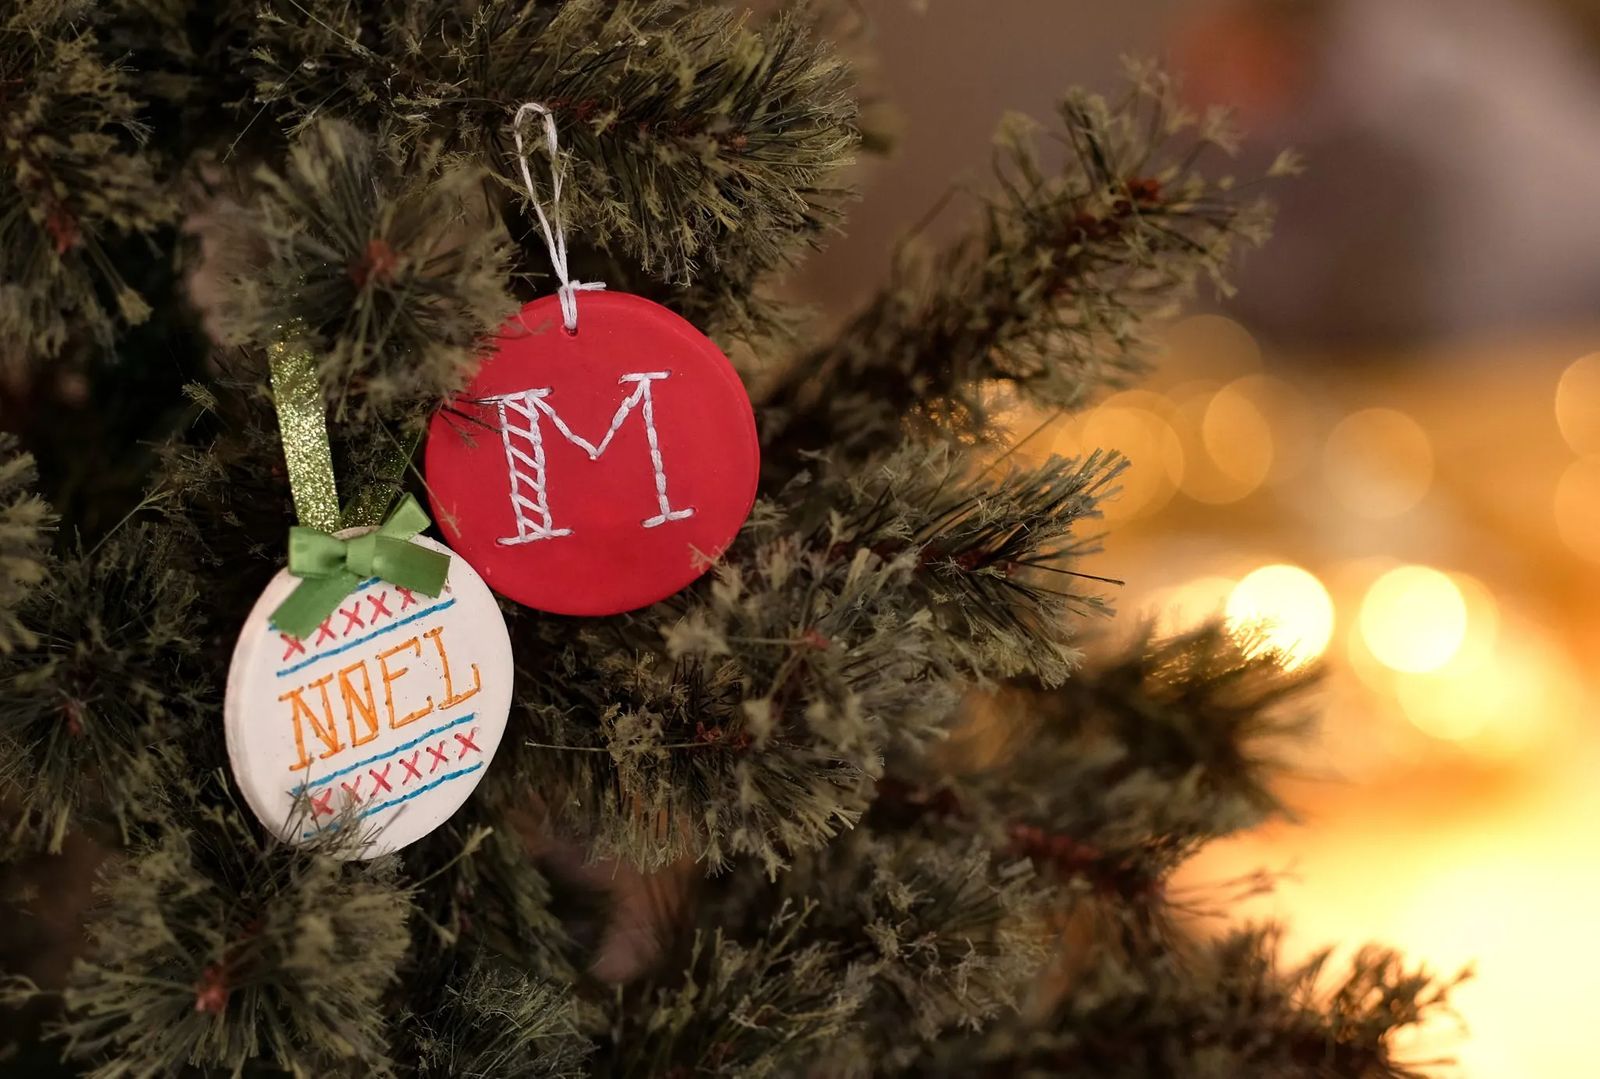
Homespun Holiday
DIY stitched clay ornaments
Crafter Ashley Michel is no stranger to making her own holiday ornaments. In fact, each year she chooses a new way to make an entire line that she will sell at craft fairs or in private sales. Each one has its own flair and this year’s creations are no exception. To get us ready for the cheer of the holiday season, she shows us a DIY project that mixes the modern edge of paper clay with old time embroidery techniques. “I thought this project would be good for Christmas ornaments because you could have a kind of traditional feel but dress each one up a little differently,” Ashley says as she gets ready to show us how this ornament is made.
To start, the paper clay is your blank canvas and all you need to do is hunt down some embroidery designs to use as your inspiration. Plot out your monogram on a bit of graph paper, or search for free embroidery designs that are available online. The cost on this project is minimal and other than a little bit of clay drying time, this project could have you whipping up dozens of tags and ornaments in just an afternoon. It probably goes without saying that this project could create the perfect family keepsake or even help dress up and personalize packages before you slip them under the tree.
WHAT YOU WILL NEED
Paper clay, we used the Creative Paper Clay brand
Rolling Pin
Tissue paper
Graph paper
Large and small tip needles
Embroidery floss
Shape cutter like cookie cutters or the top of a Mason jar
Sharpie or felt tip pen
Acrylic paints
Ribbon
HOW TO CREATE YOUR PAPER CLAY ORNAMENT
STEP 1: Trace the shape that you plan to use for your ornament on graph paper. Ashley used a graph paper that had 10 squares to 1 inch.
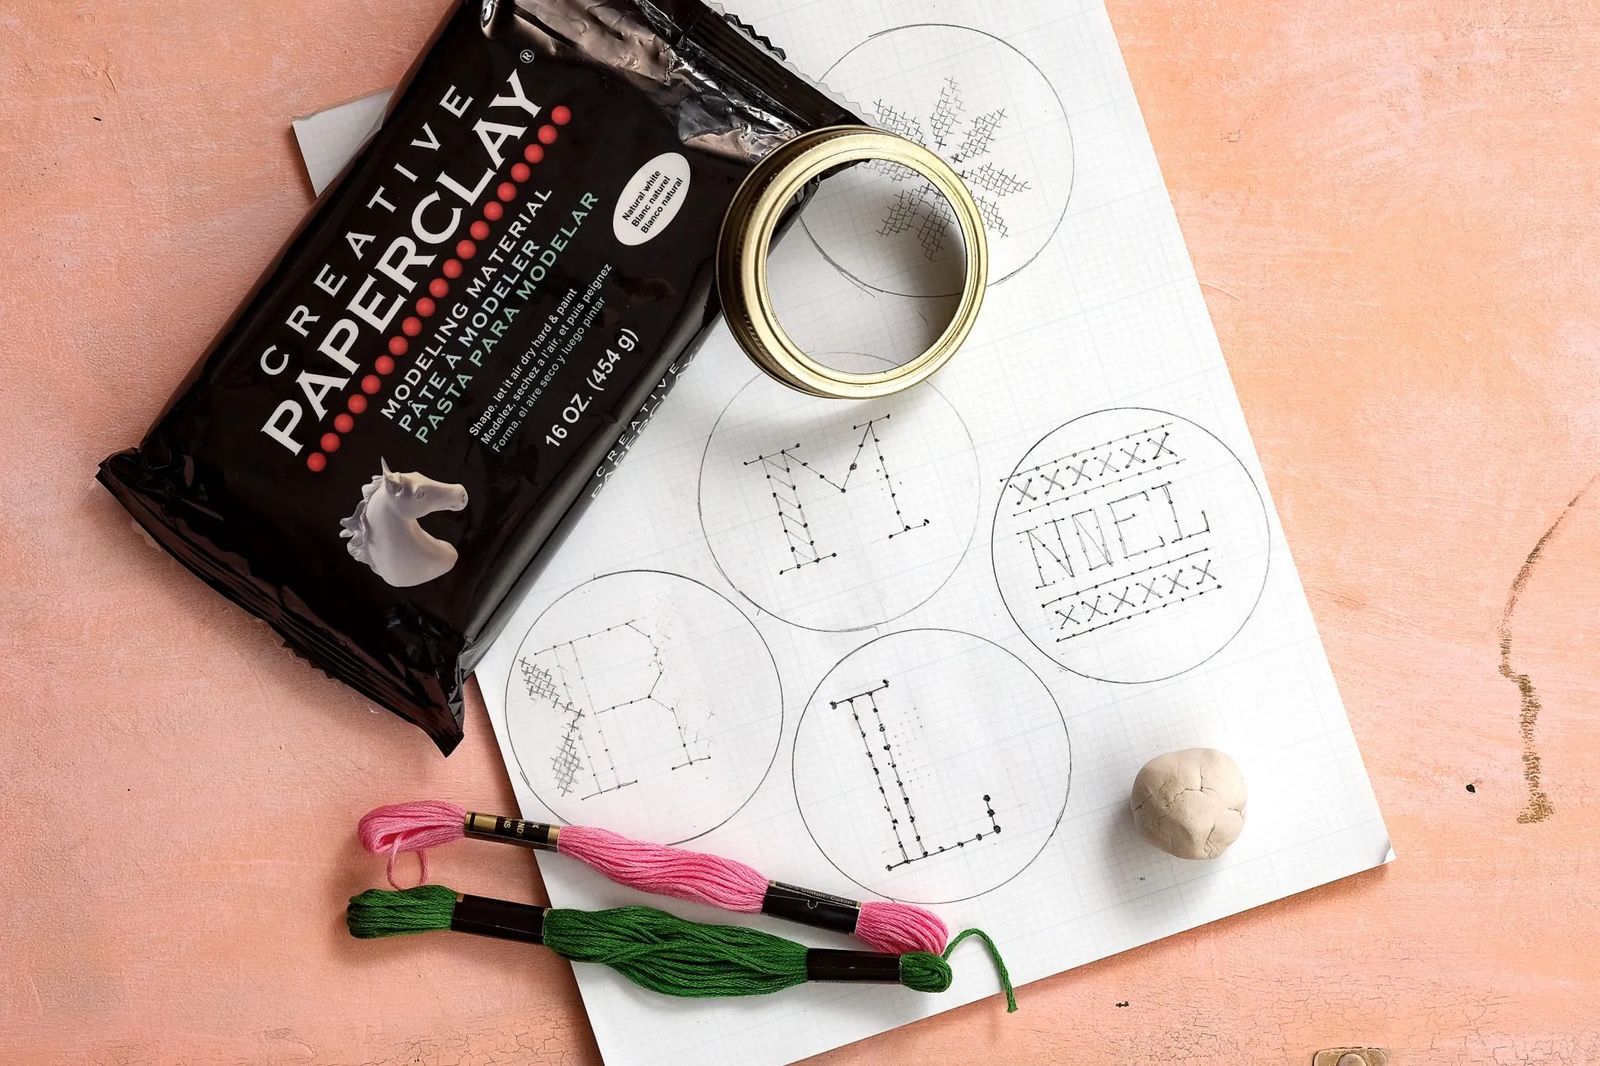
STEP 2: Create your design on the graph paper that is inspired by either cross stitch or embroidery designs.
STEP 3: Roll out your paper clay so that you have it at a thickness of roughly ¼”. If you are having trouble getting a level piece of clay, try setting down two wooden rulers and rolling the pin over top of the two rulers to make sure your clay rolls into a nice, uniformly flat surface.
STEP 4: Cut out your clay using your chosen shape. We used the lid from a mason jar, but you could use cookie cutters as well.
STEP 5: Using tissue paper cut out the same shape as your finished ornament, lay this over the top of your graph paper design and using a felt tip or Sharpie marker, transfer the “dots” onto the tissue paper. This will be your needle poking guide since it is much easier to poke a needle through this light weight paper.
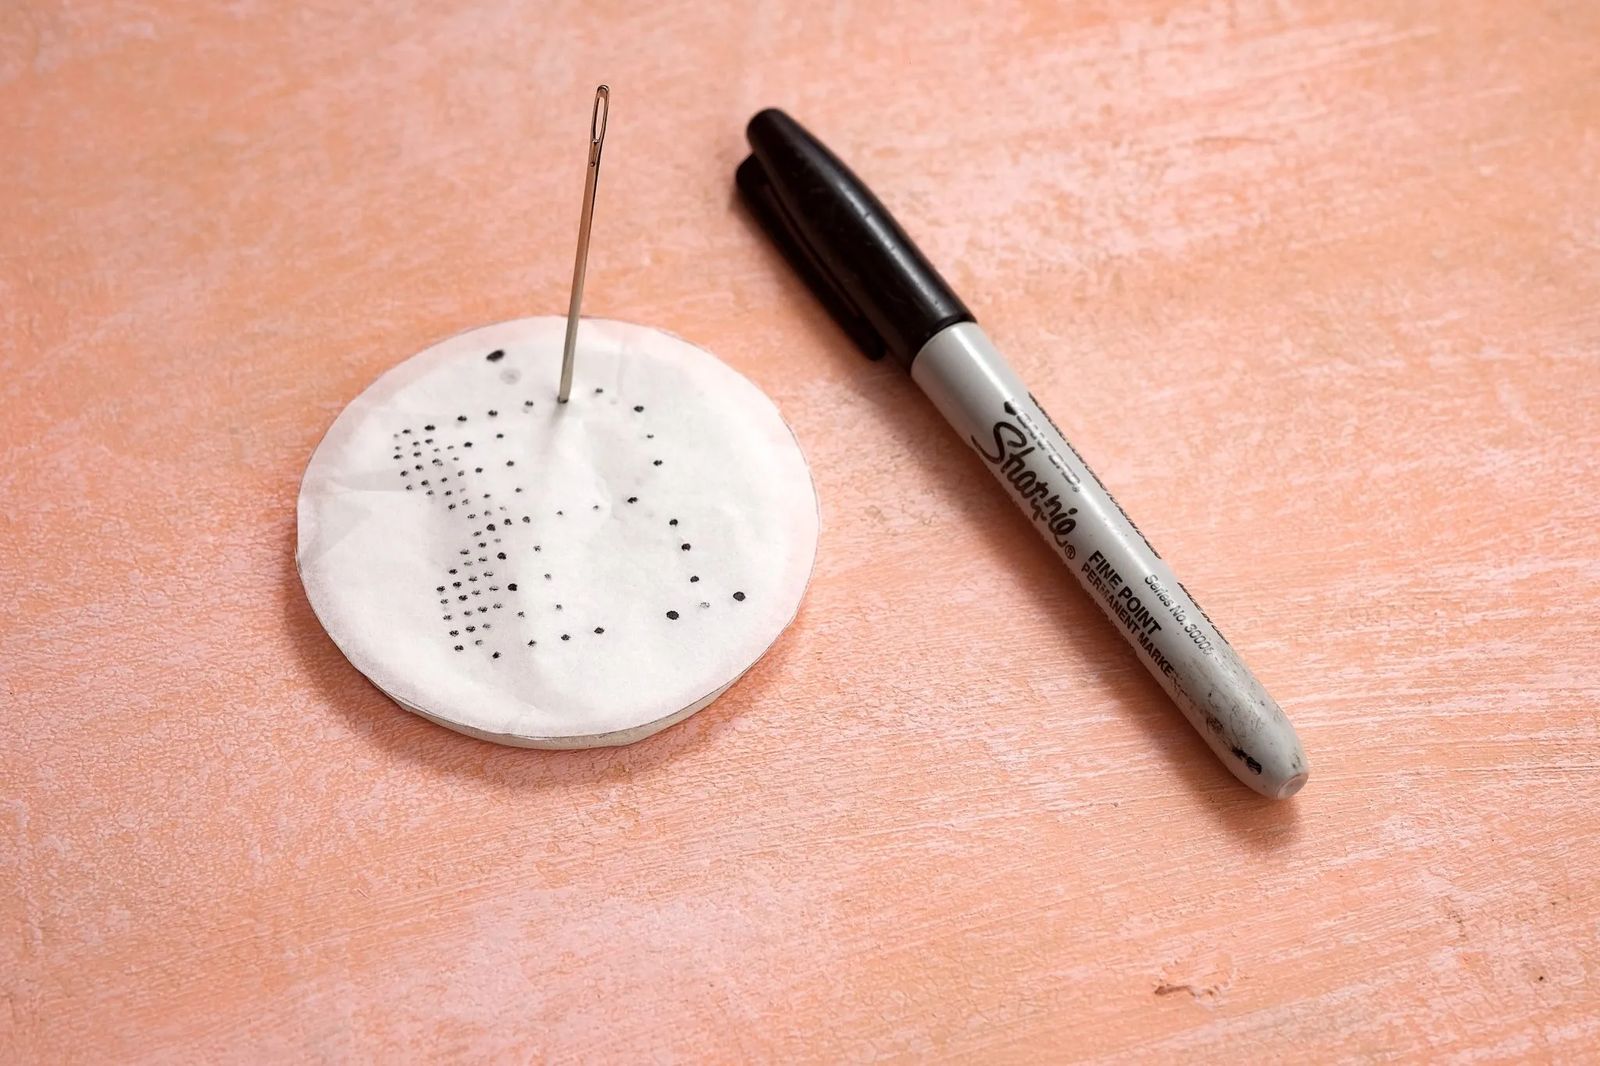
STEP 6: Poke the holes through your tissue paper guide using a slightly larger needle than you plan to use for your embroidered design. Once finished, don’t forget to add a larger hole at the top of your ornament for stringing twine or ribbon through later to hang your finished ornament on the tree.
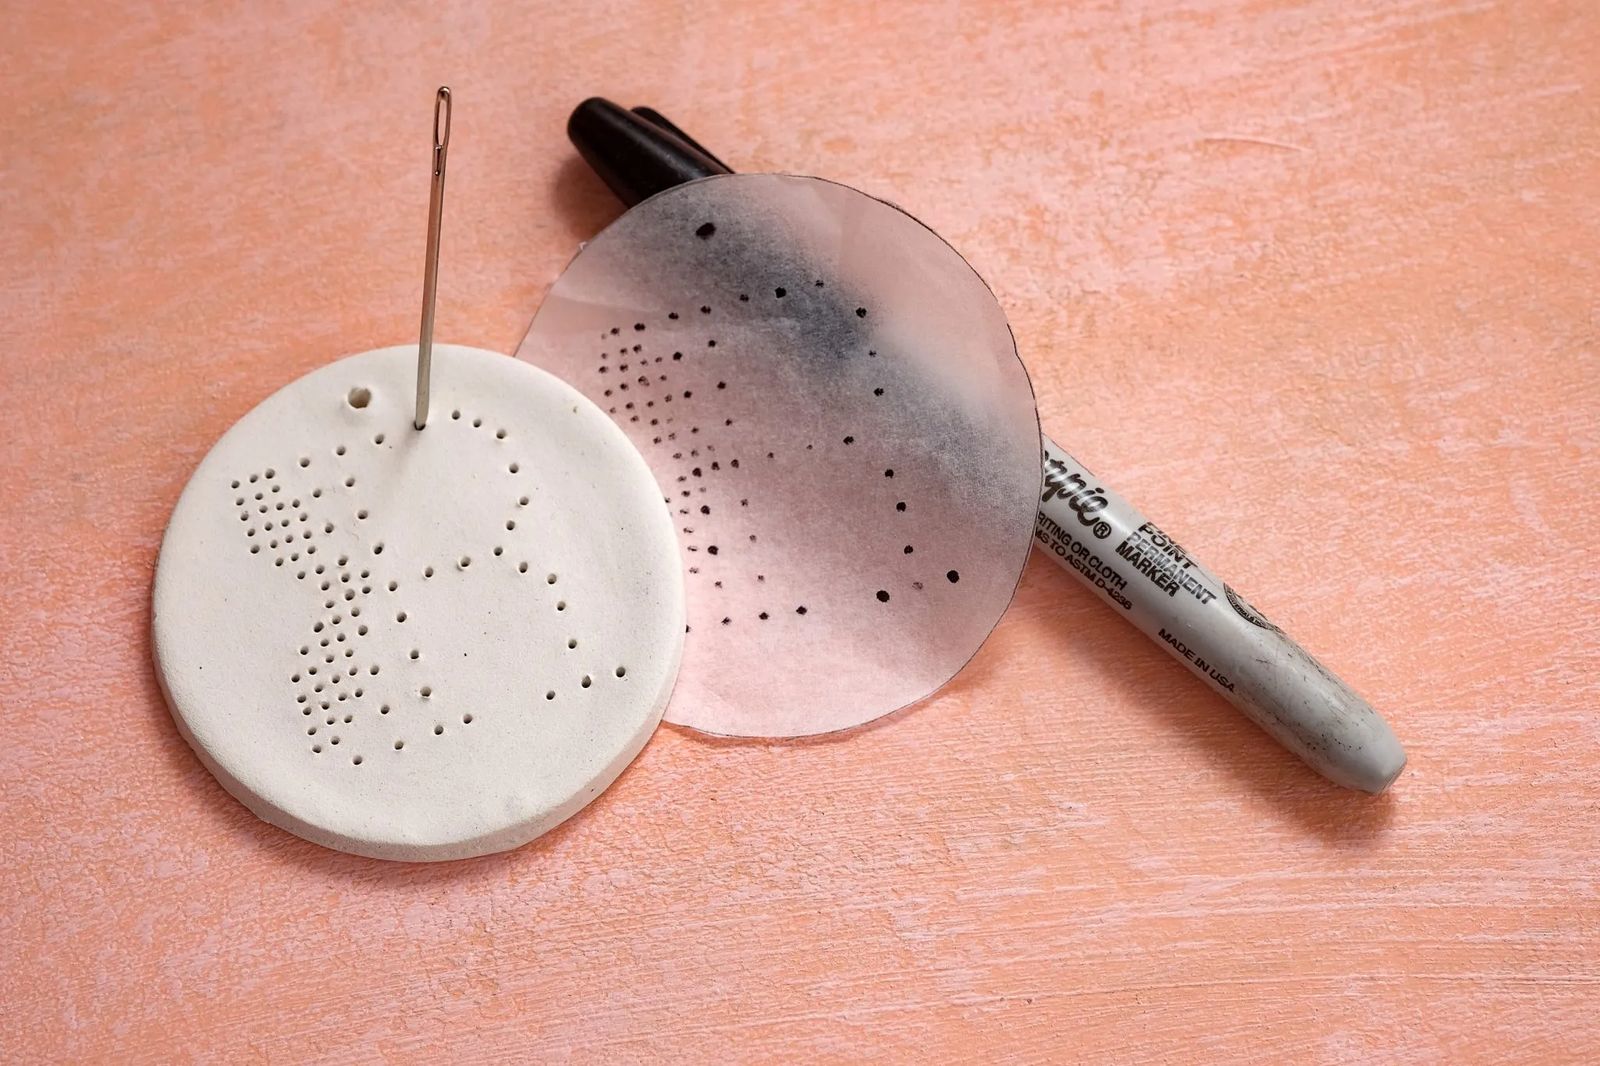
STEP 7: Remove the tissue paper and let air dry for 24 to 48 hours or put it in the oven and bake for 30 minutes at 250 degrees. If the ornament is not completely dry, you can flip the ornament over to dry from the other side.
STEP 8: Once the paper clay is dry, you can paint the ornament using acrylic paint or, if you plan to keep the base white, now it is time to start stitching. Use a variety of colors or even metallic floss for a little bit of glitz.

STEP 9: Divide your embroidery floss so that you are using 3 strands total for your design. You can choose to cross stitch your design or back stitch for one uniform line. You’ll want to start and stop your stitches on the back side of your ornament and knot the floss once you are finished to secure loose ends.
STEP 10: If you want to cover the back side of your ornament to hide the “wrong side” of your stitches, add a little water to a small ball of paper clay and smooth over the back with your finger until you have a flat and smooth surface. Let this air dry. You don’t want to ruin your embroidery by putting it in the oven to bake.
STEP 11: Add a string or ribbon to the stop of your ornament and embellish with any kind of fun and crafty elements. You can add self-stick rhinestones, gold foil details, mini pom-poms, buttons, anything that appeals to your creative eye!


