


Creating Homespun Charm
Transforming Mason Jar lids into a little slice of Christmas
The holiday season brings out the craftiness in all of us – hand stitched goodness, home baked goodies to share and even newfound ways to deck the halls with just a piece of ourselves woven into the mix. We didn’t have to travel far to find inspiration for one way to dress the tree with a homespun flavor. In fact, the base of this ornament can be found in many of our pantries. Check out the three ways we dressed up a wide-mouth Mason jar lid to usher in a little extra holiday spirit in the home. Best yet? All of these ornaments can be done within minutes.


PEACE ON EARTH
Making this ornament couldn’t get much easier and this version is super easy to mass produce. We started by spraying the Mason jar band with Krylon’s Glitter Blast spray paint in Cherry Bomb. After setting this aside to dry, we traced the rubber interior lid onto the backside of holiday-themed Christmas paper, making sure the sentiment on the paper was centered. From there, we cut out the circle using detail scissors and glued this to the top of the lid. Once the glitter painted band was dry, we strung some silver cording through, tying it into a slip so this could be later hung on the tree. We hot glued the scrapbook paper covered lid into place. To finish up the ornament, simply hot glue a festive bow on top near the hanger for a little extra flair.

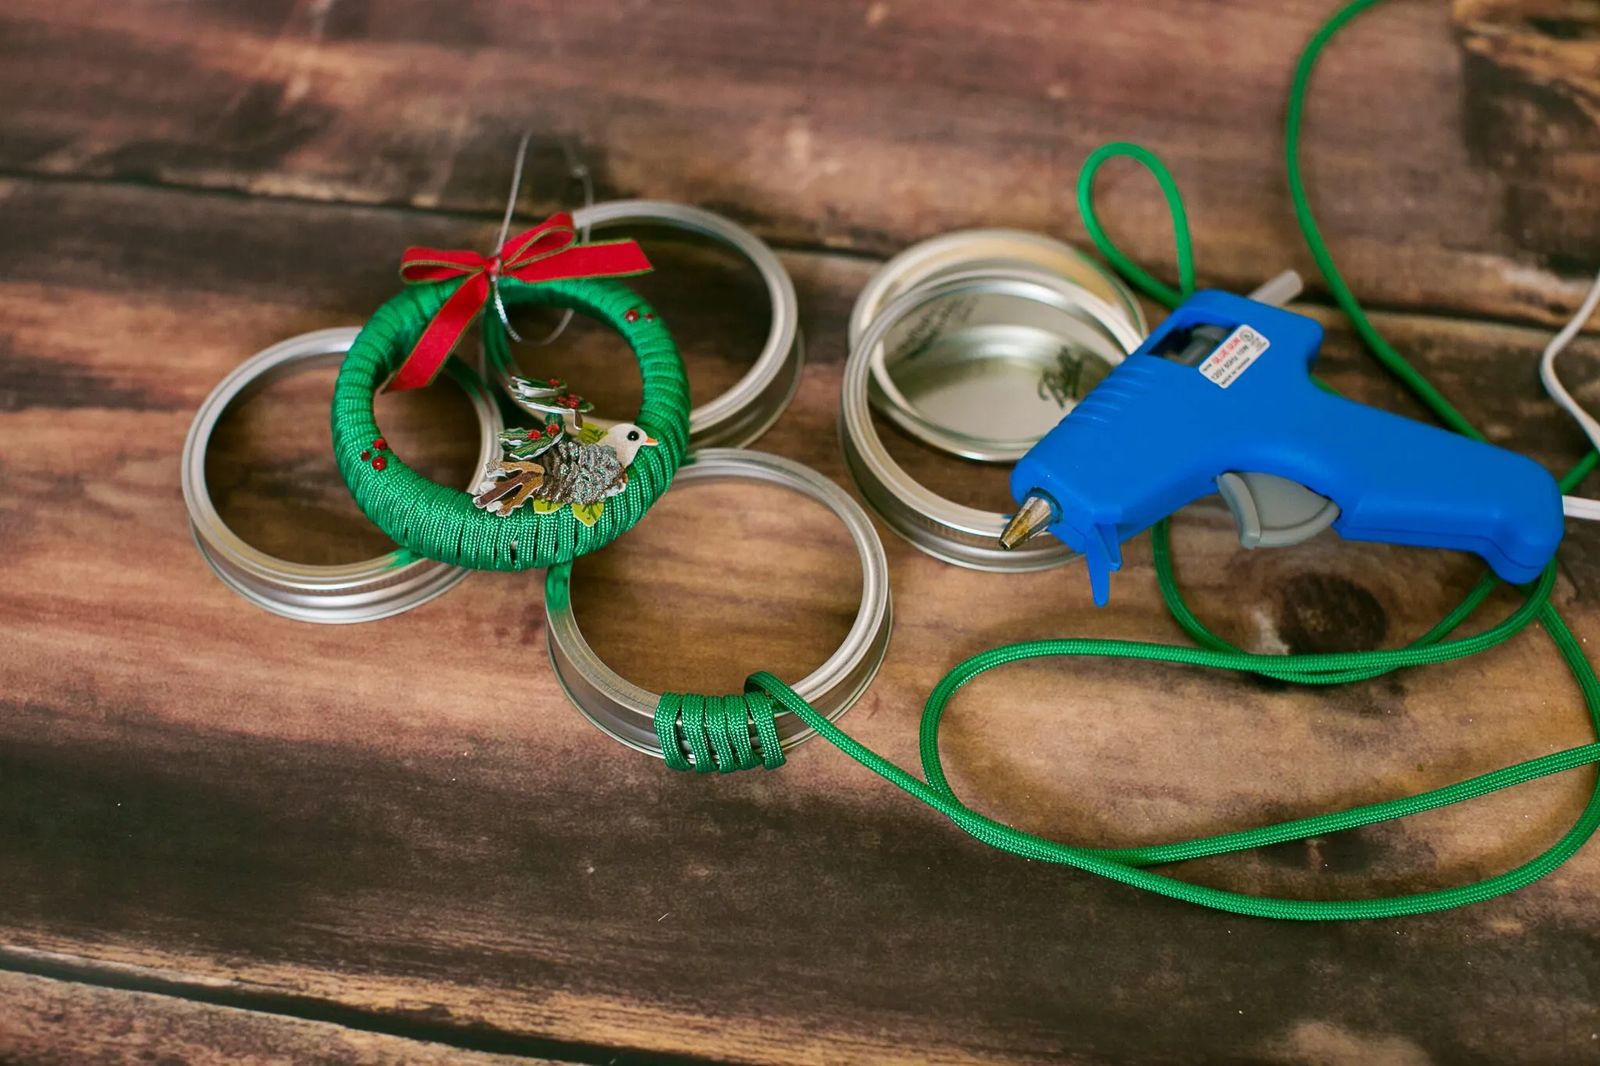


WRAPPED IN THE HOLIDAY
To mimic the look of a mod wreath, we wrapped the outer band using bright green parachute cord. Once you hot glue the first bit in place, simply wrap the cording all the way around the lid until it’s fully covered. We strung silver cording through to act as an ornament hanger, hot glued on a festive bow and accented with small red self-stick rhinestones and a chipboard Christmas sticker adorned with even more bling. If you really want to mix things up, instead of using cording, try earthy colored jute or even holiday-themed ribbon for a little variety on your tree.

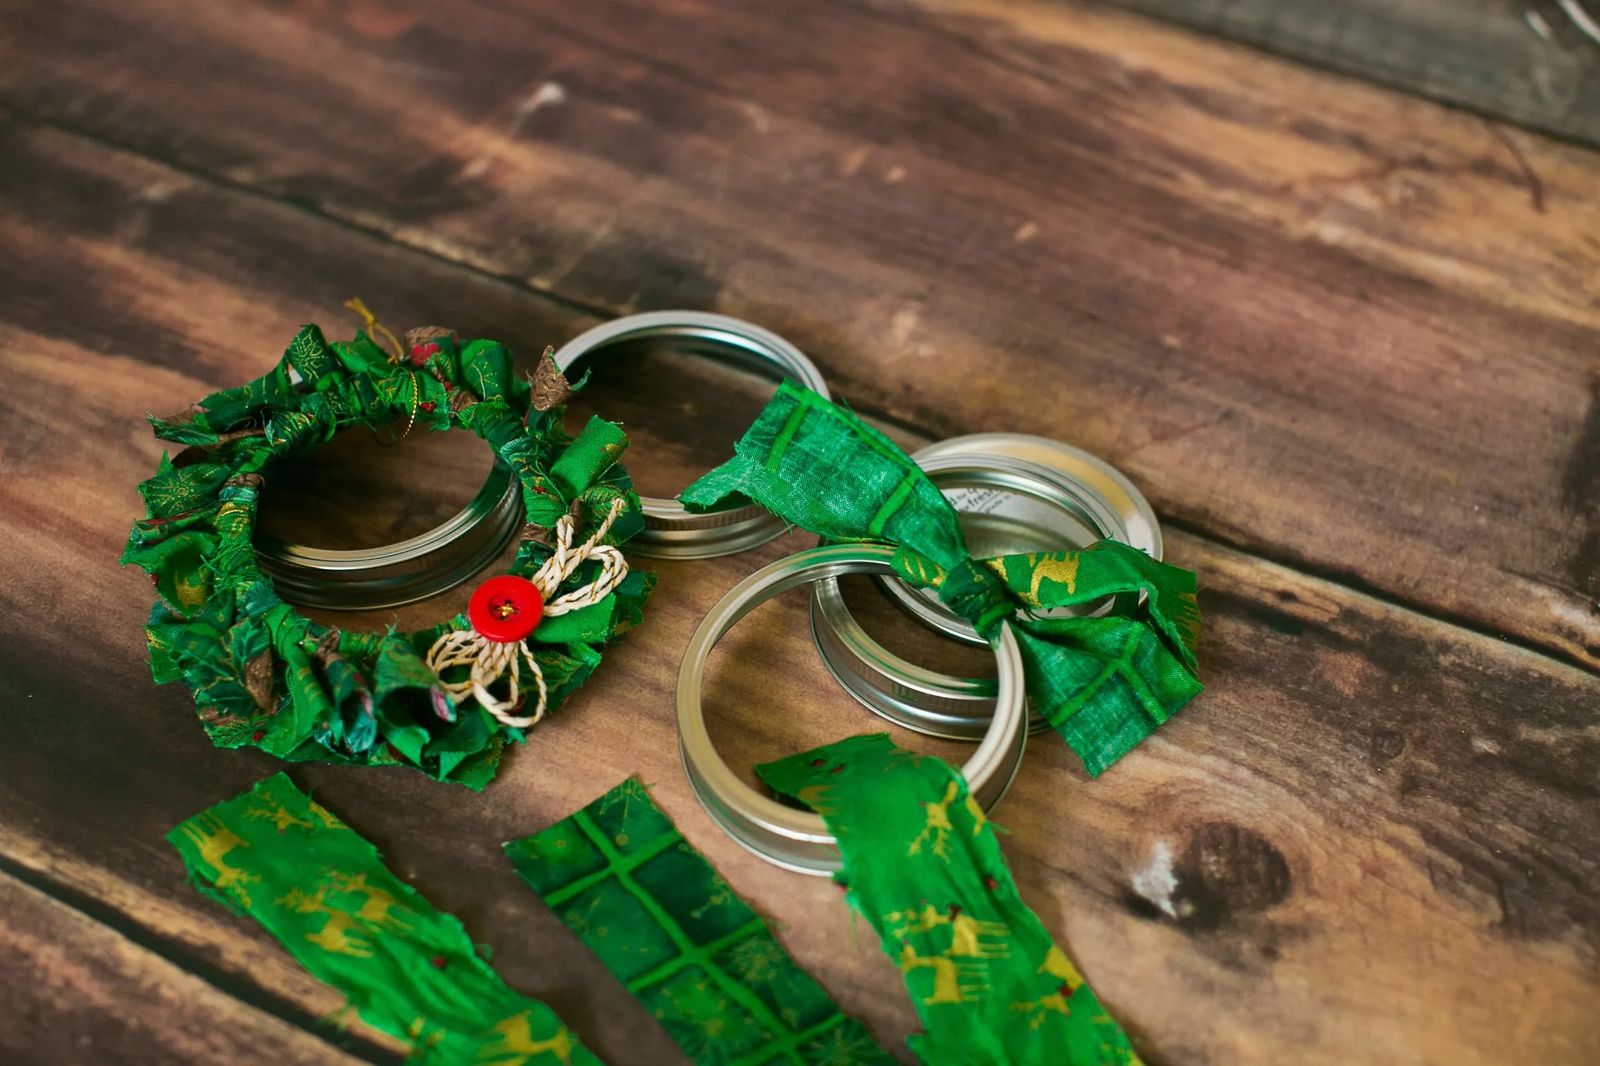


SCRAPPY FABRIC WREATH
If you’re like me, you have scraps of fabric on standby, just waiting for the right time to put them into play. Well, this is the perfect project for those scraps. Cut strips of fabric measuring at least 1” wide and 6” long. I used three different patterns just to mix things up a bit. After you have roughly 30 scraps, tie onto your Mason jar band. Depending on the weight of your fabric, you may end up using a few more or a few less fabric strips to fully cover the entire rim. From there, tie on each piece of fabric using a simple tie, similar to the first step in tying your shoelace. I alternated between patterns just to add a little more visual interest as I went along covering the band. To make this look more like a wreath, I tied some baker’s twine into a flouncy bow and added a button for a pop of red. String gold cording through the center of the band and tie in a slipknot to serve as your hanger.


