

DIY Snowglobes!
Jar up family memories with a bit of glitz
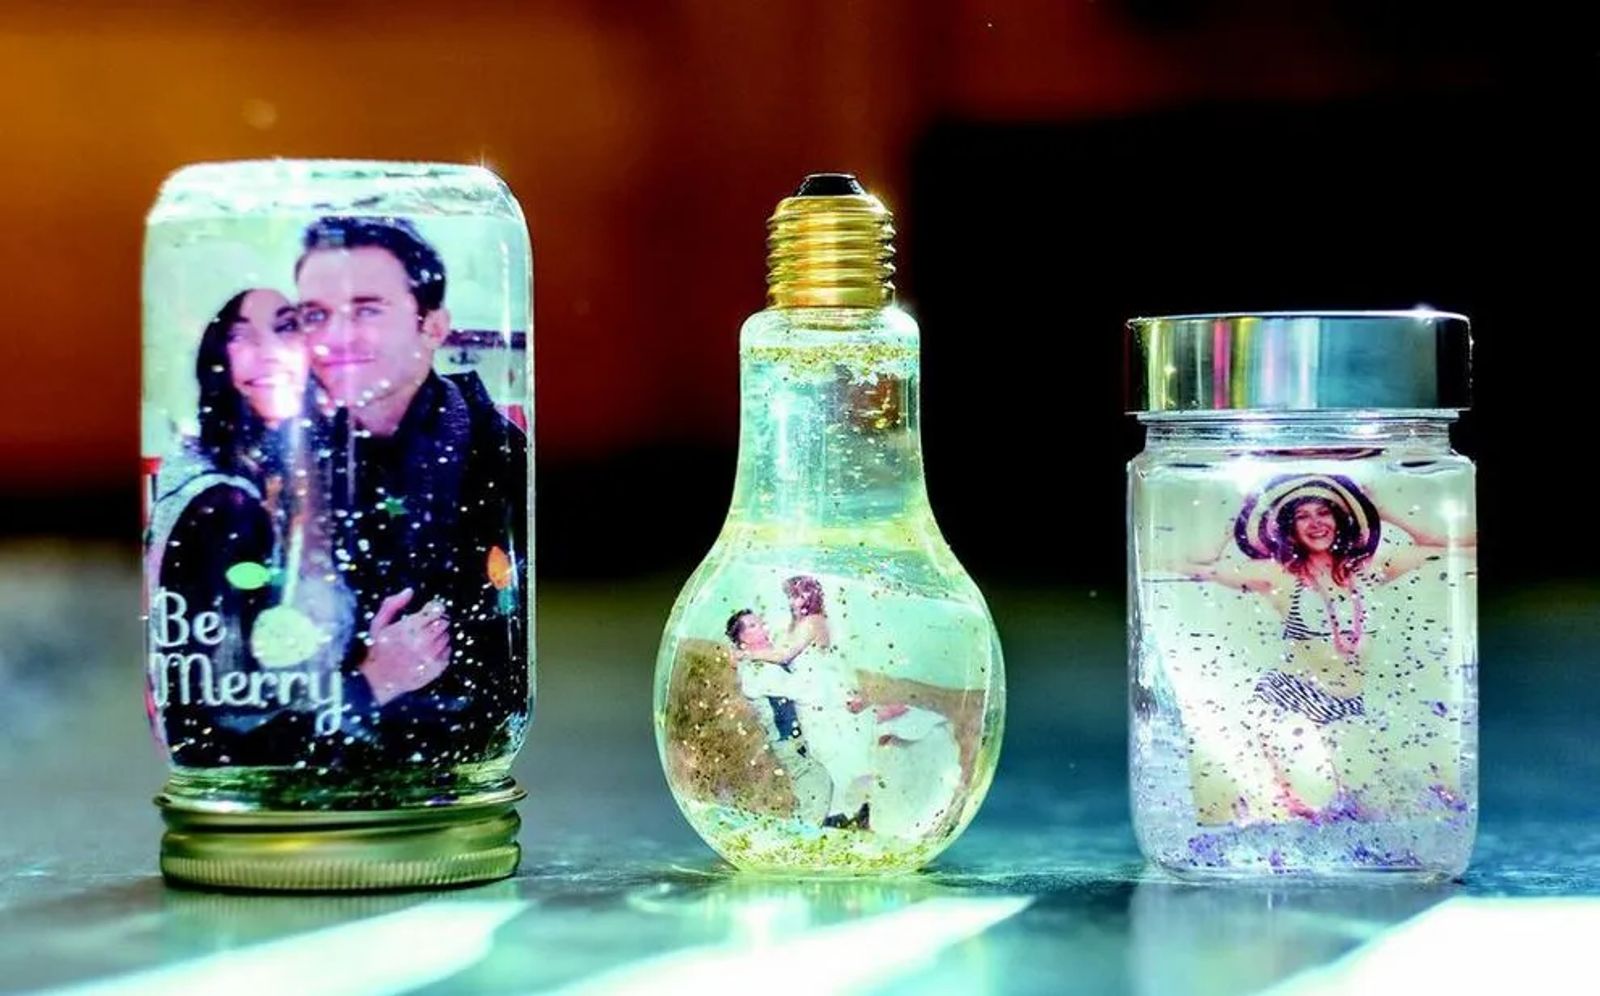
There's nothing quite like the whimsy and wonder that a treasured snow globe brings. With just a shake, the glitter and glitz swirls and cascades, catching the eye. Now you can take those memorable moments in your life and immortalize them in do-it-yourself photo globes. Cassie LaGreca, owner of Better To Gather, whipped up these splashes of sparkle and you can too — giving you a one-of-a-kind way to hold those memories close.
"It's fun to encounter those photos or that memorabilia in a totally different way," Cassie says. "Instead of putting up your Christmas village one year, maybe you do this. You can scatter a cluster of ornaments around them, put them on mirrored trays or display them on a bookshelf." The result will be family moments remembered in a truly unique way, bringing joy to the season. Cassie adds, "It's such a cool way to keep those snow globe moments of life encapsulated — those moments you wish you could always go back to or honoring those people that make you feel warm and fuzzy."
WHAT YOU NEED:
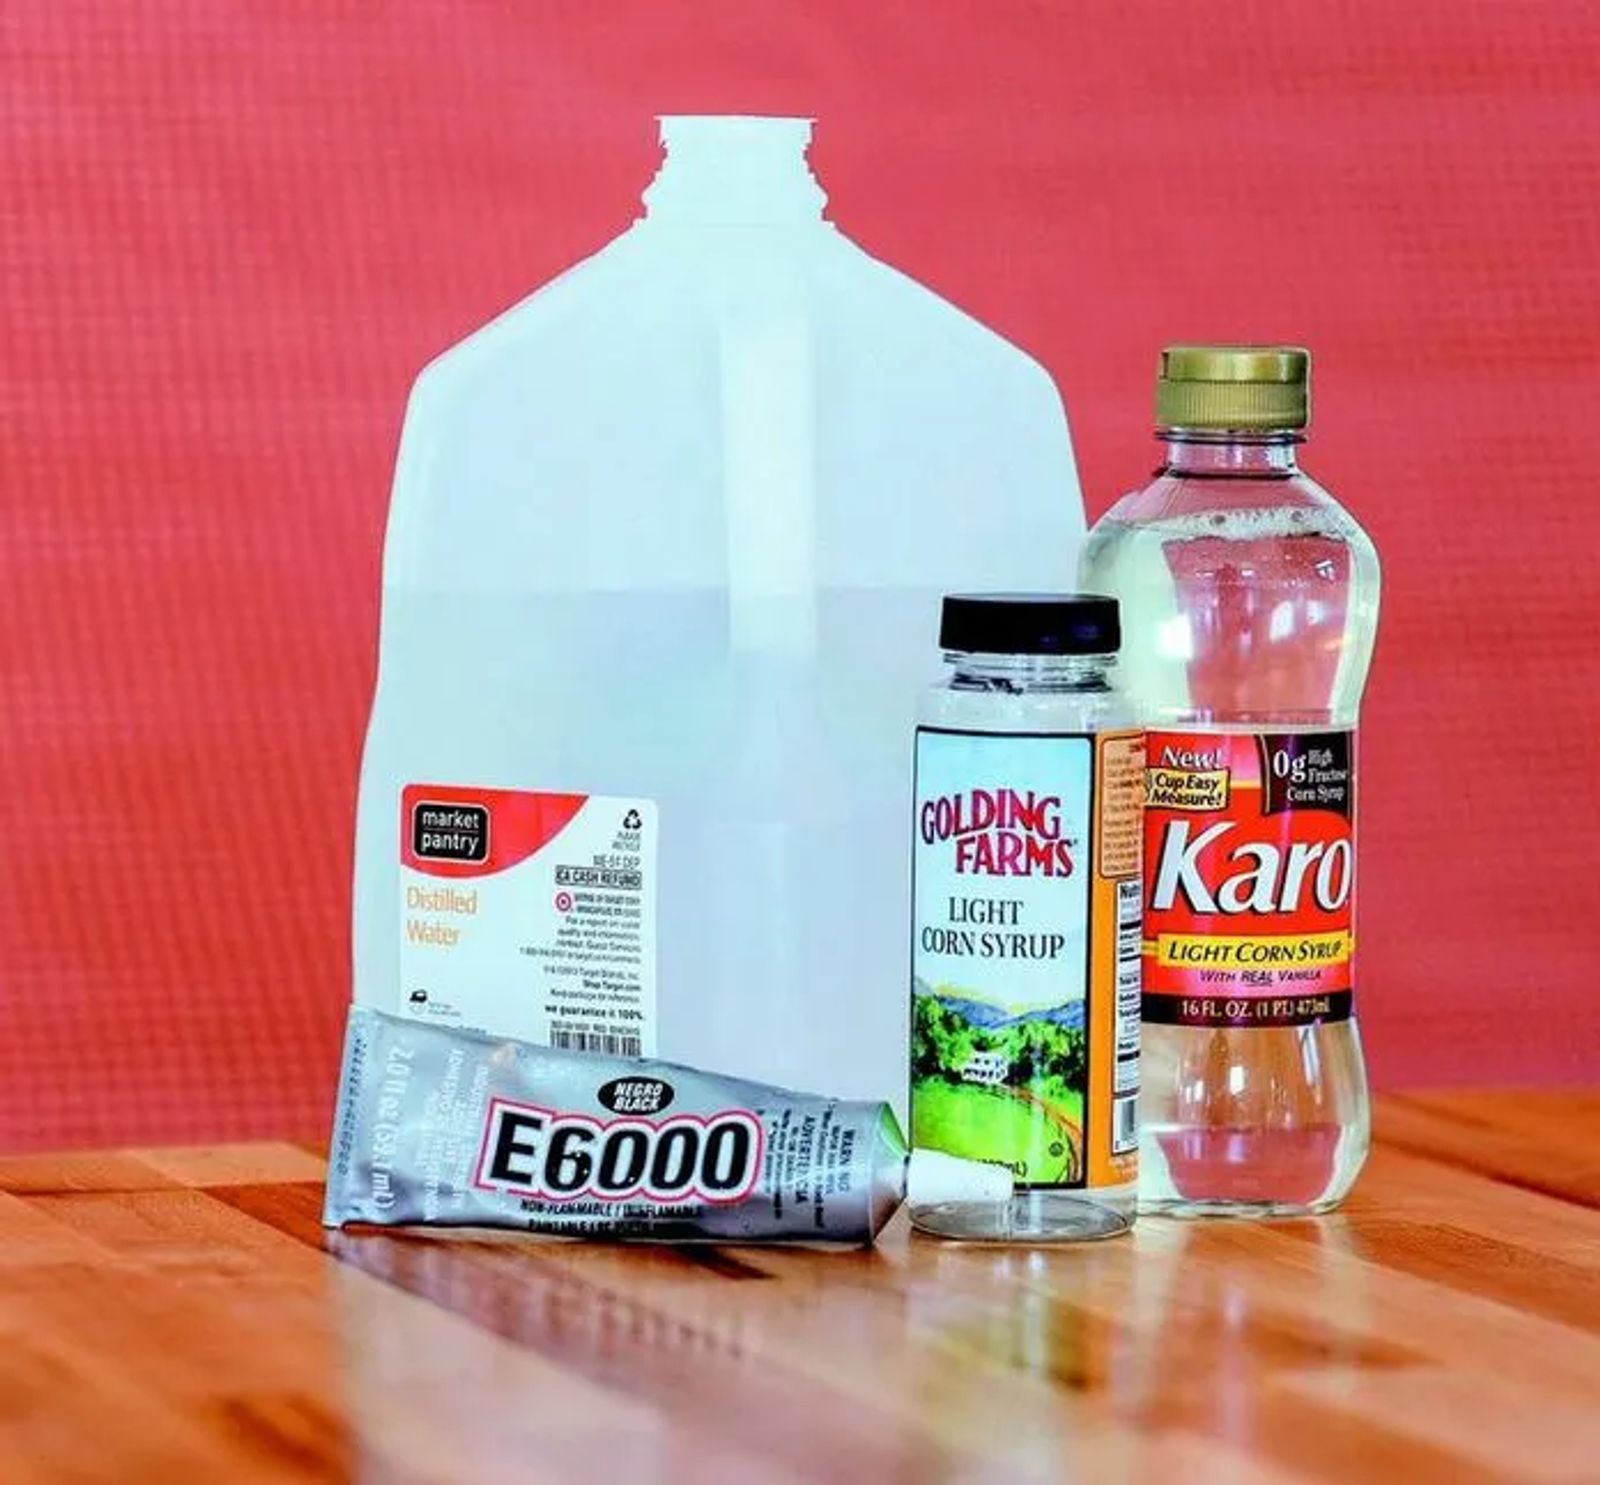
Jars, set aside old pickle, salsa or even canning jars for this project
Adhesive remover like Goof Off to do away with sticky labels
Glitter, confetti, artificial snow or small sparkly rocks
Silicone glue like E6000
Packing tape or a laminator
Family photos (2 photos per jar for a front and back image)
Figurines (optional)
Light corn syrup
Distilled water
FUN TIP: The dollar store is a great place to find glitter and other Christmas doo dads to accent your snow globes!
DIRECTIONS

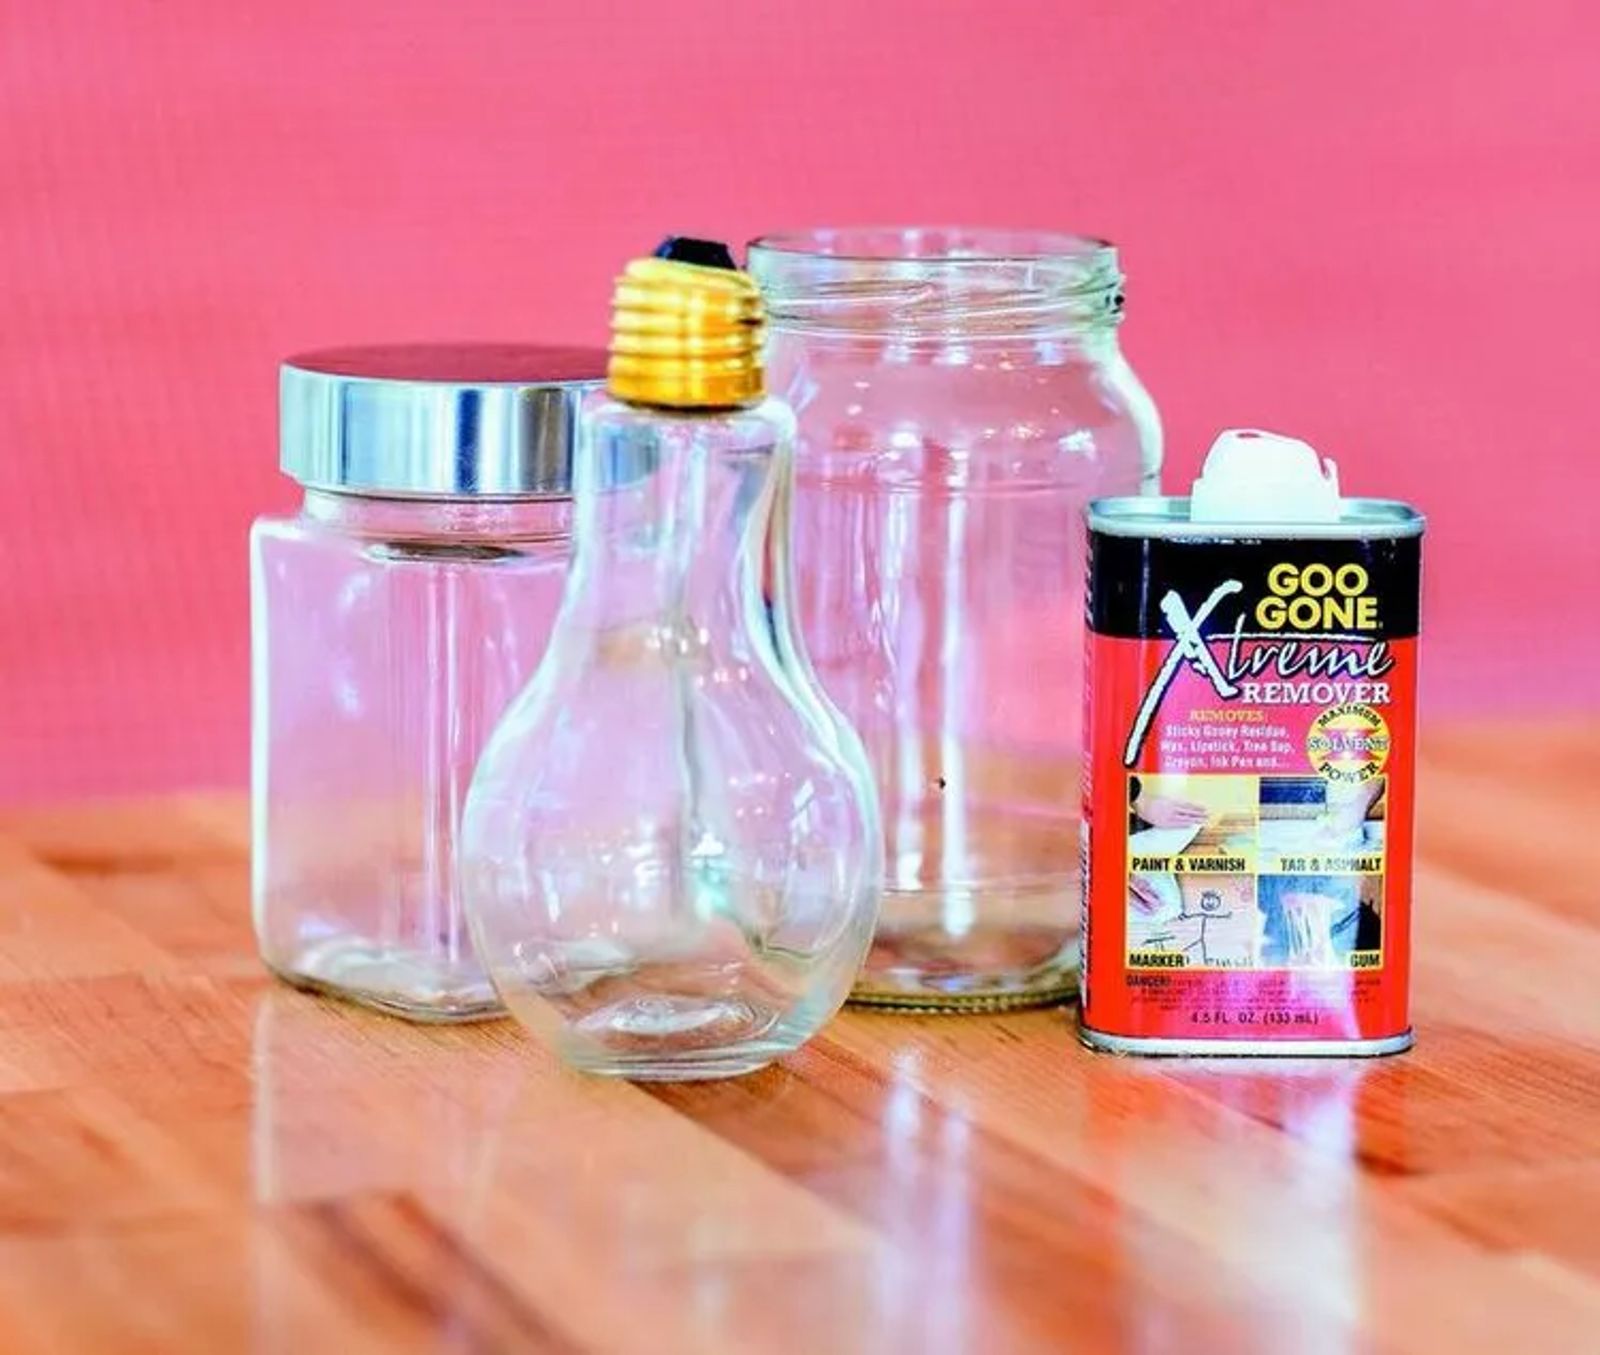
Set aside those pickle, salsa or even jelly jars. Wash thoroughly and use an adhesive remover to get rid of the jars' labels and sticky residue.
Once your jars are clean and ready to go, measure the diameter of the bottom of the jar. That's how wide you want your family photo to be. Measure from the bottom of the jar to the point where it begins to taper and that's how tall your photo should be.

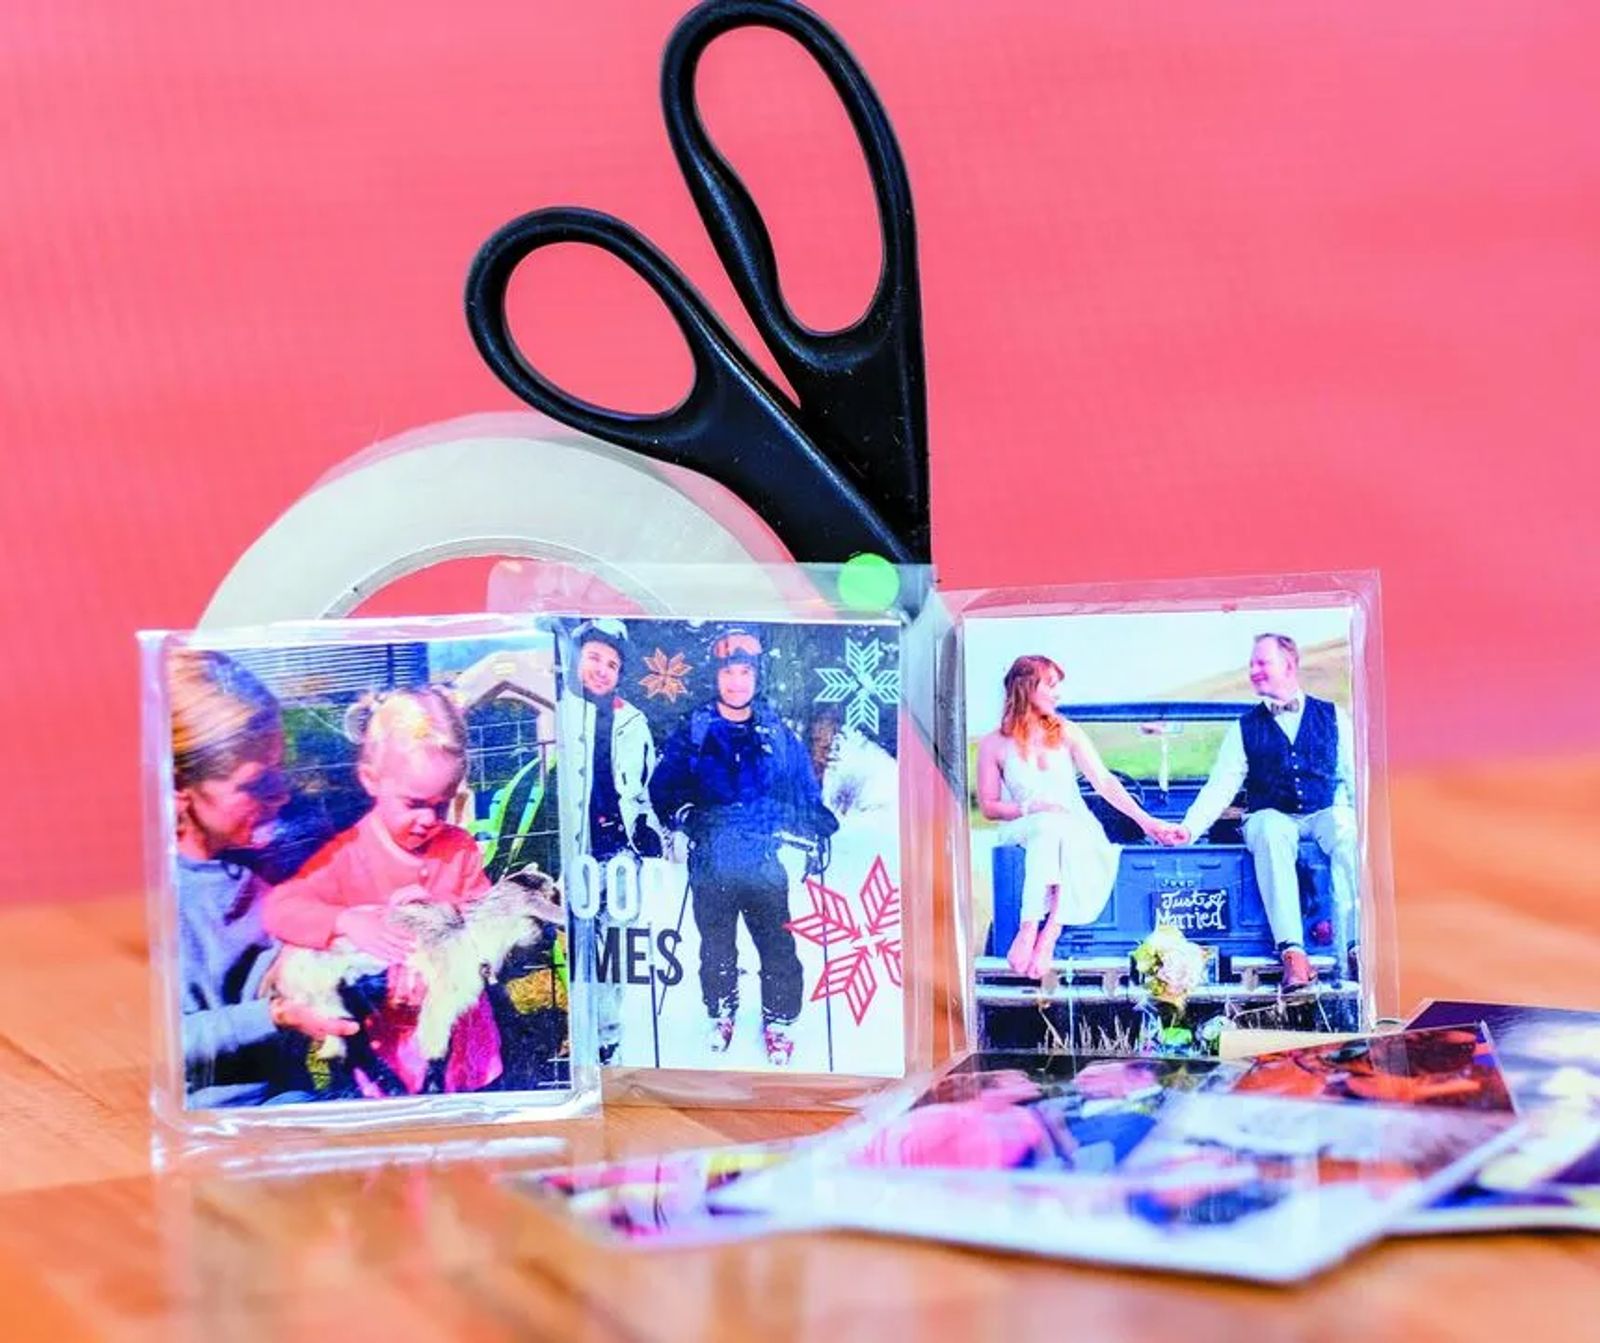
Choose your family photos and then laminate them. You can do this by sandwiching your photo between two strips of packing tape, or laminate them. Don't just chose a single-sided image, double up images for a front and back scene, laminating the images back to back.
Trim the laminate/tape on the image down to roughly 1/4" all the way around your photo. This will make sure that the seal stays tight, protecting your photos from water damage.

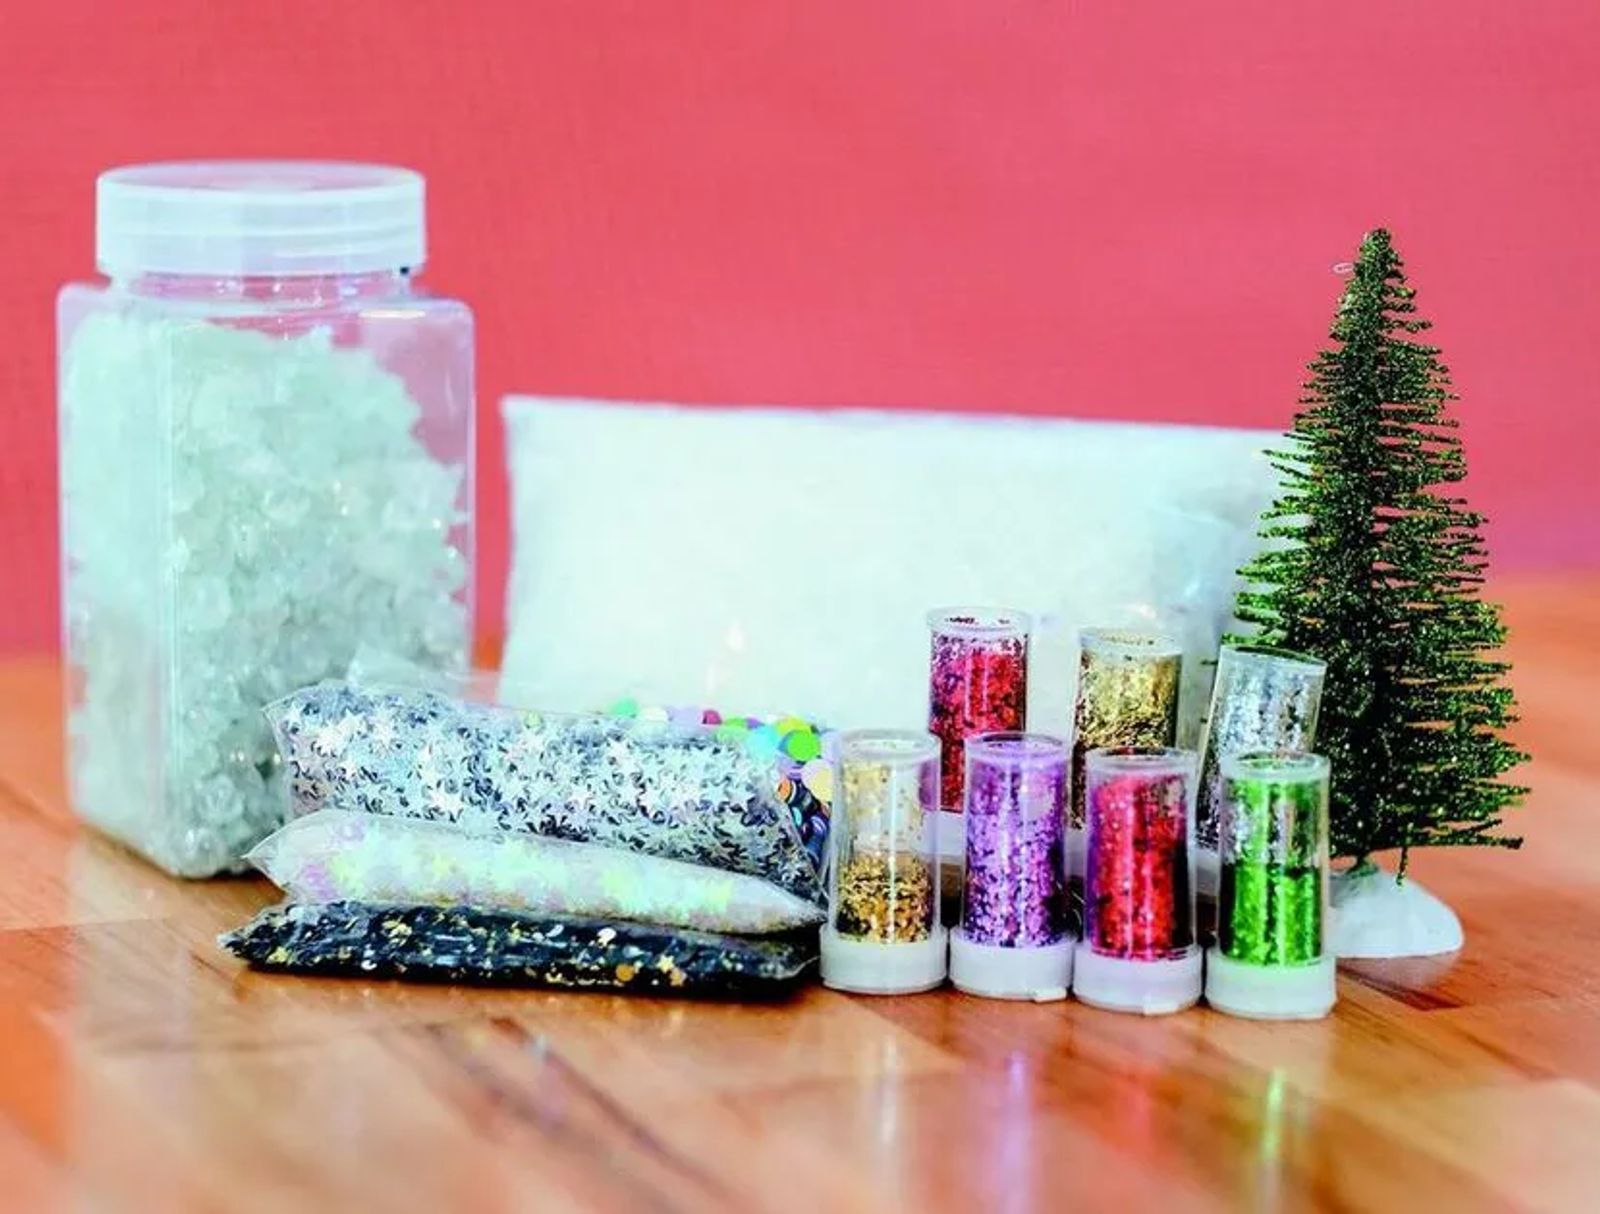
Choose your accents! Pick your favorite color of glitter or confetti. Look for those small, Christmas-themed figurines or accents like mini bottlebrush trees. Using a silicone glue, adhere the figurine to the inside of the lid and let dry. NOTE: Since these figurines will be submerged, test your item to make sure its color won't leach into the water. You can do this by setting the figurine in a glass of water overnight, or simply seal the item with a clear coat of spray paint. Before you glue your item to the lid, test out the item to also make sure it will fit properly after the lid is screwed on tight.
Once you've set your photos and optional figurines inside, add your splash of sparkle. Add glitter, confetti, artificial snow or sparkly rocks.

Mix up the liquid that will give your glitter some lift by mixing 1 part of light corn syrup with 1 part of distilled water. This mixture will initially appear goopy, but don't worry, the corn syrup just needs some time to blend with the water. As Cassie says, "Within time, it's a perfect balance and the mixture won't separate over time." Fill your jar with this mixture almost to the top. If you are using a figurine, don't overfill, you'll need to leave a little room in the jar for the bulk of the figurine.
If you are using a jar with a rubberized lid, you don't have to seal it. If, however, your lid is metal without any rubber reinforcement, you'll need to add a bit of silicone glue around the inner edge to properly seal your creation. After adding a bead of glue all the way around, screw the lid on tight and let your snow globe sit upside down to let it properly set.
Now that the inside of your creation is finished, you can always dress up the outside by painting the lid, or decoupaging it with fun decorative papers or even wrapping paper. Add a snippet of ribbon, or a dash of twine with a few jingle bells. The options truly are endless!
Turn the jar over and let it snow!
MAKE A DIY SNOW GLOBE & LET SOMEONE ELSE CLEAN UP THE MESS
Join Better To Gather for their Make & Take Project
If you'd like a little helping hand in making this project, expertise can be found in downtown Billings at Better To Gather located at 2402 Montana Avenue. The shop will offer this project all December long as a Make & Take during their open studio hours every Tuesday, Wednesday or Thursday from 3 to 7 PM. Bring your own jar, any figurines you like along with $20 and Cassie's team will show you step by step how to finish this project just in time for the holidays. All additional supplies will be provided. For more crafty fun, log onto bettertogather.com and click on the Get Creative! tab for more on workshop events.


