Jazz Up Your Walls
Create textile wall art for under 20 bucks
Winter doldrums have you down? Here’s an easy winter project to jazz up your living space for under $20. Normally, textile wall art costs a pretty penny, but you can make your own and customize it to fit you and your home style.
WHAT YOU WILL NEED
● New or vintage textile
● Old inexpensive wall art (think thrift store)
● Spray glue
● Spray paint
● Masking tape
● Screwdriver
Head to your favorite thrift store and start looking for inexpensive wall art. Don't look at the pictures or at the colors. The art itself doesn't matter. Look instead for a nice frame that’s the right scale for the area you plan to hang your DIY art.
While you’re at the thrift store, check out fabric or material. The thrift store often has great finds. I chose to look for something with a unique texture. Look for vintage T-shirts, curtains, bathmats, blankets, tablecloths, whatever you find interesting. Just remember the size of the frame should be comparable to the amount of fabric.
Begin by taking apart the frame. Flip it over. If there is a paper backing, use a sharp knife or razor blade to carefully slice and remove it. From here, bend back the staples holding in the artwork by using a screwdriver. Remove the art and glass, setting everything aside.
Wipe down the frame, cleaning to remove any grime. Spray paint the frame and let it dry. I chose a mat black paint for my frame. Now it’s time to paint the artwork. I chose a bright white because I thought it would complement my textile, but I could also have used a deep blue, black or even a shade of mustard yellow. Spray several light coats, letting them dry in between. You will want a solid color without any variations of shade.
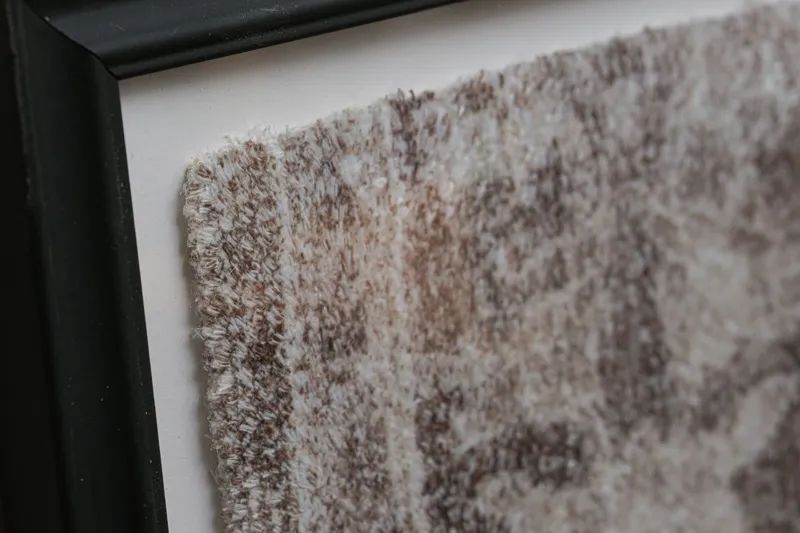
While everything is drying, clean the glass. I'm always surprised how dirty the glass can be. Be careful, the edges of the glass can be sharp. We will use the glass as a kind of template to figure out the size and area we want to use of the textile we chose. Choose an interesting spot of your textile, even if there is a thin spot, a rip or an unraveled edge. Use it.
For my textile, I loved the space where two lines appeared next to a flower. I chose to cut the lines off center and cut off just a touch of the flower. I started by marking the area and then cut. Using the glass as your guide, you can see what you’re cutting and if you have the right scale. Don’t forget to cut your textile two inches less than the frame all the way around. This will create a dead space that looks like your textile is floating on a matted area.
When cutting, I didn’t want a straight line. If the fabric allows, you can even try ripping it for extra interest. Be brave!
Now, gather the freshly spray painted matting, and spray glue your textile onto it. You might want to set it down prior to gluing just to get a visual on where it might fit best. Once you’ve found the right spot, turn the textile over and spray the back with spray adhesive. Quickly flip it over and set it in place. You will have a couple seconds to move things around before the glue sets. Once in place, press down firmly.
Now let's assemble your work of art. Start by placing the glass (cleaned of fingerprints or smudges), the art and then the backing. Bend the staples back to hold your art in place and use masking tape to secure the edges in place. Flip over and admire your work.
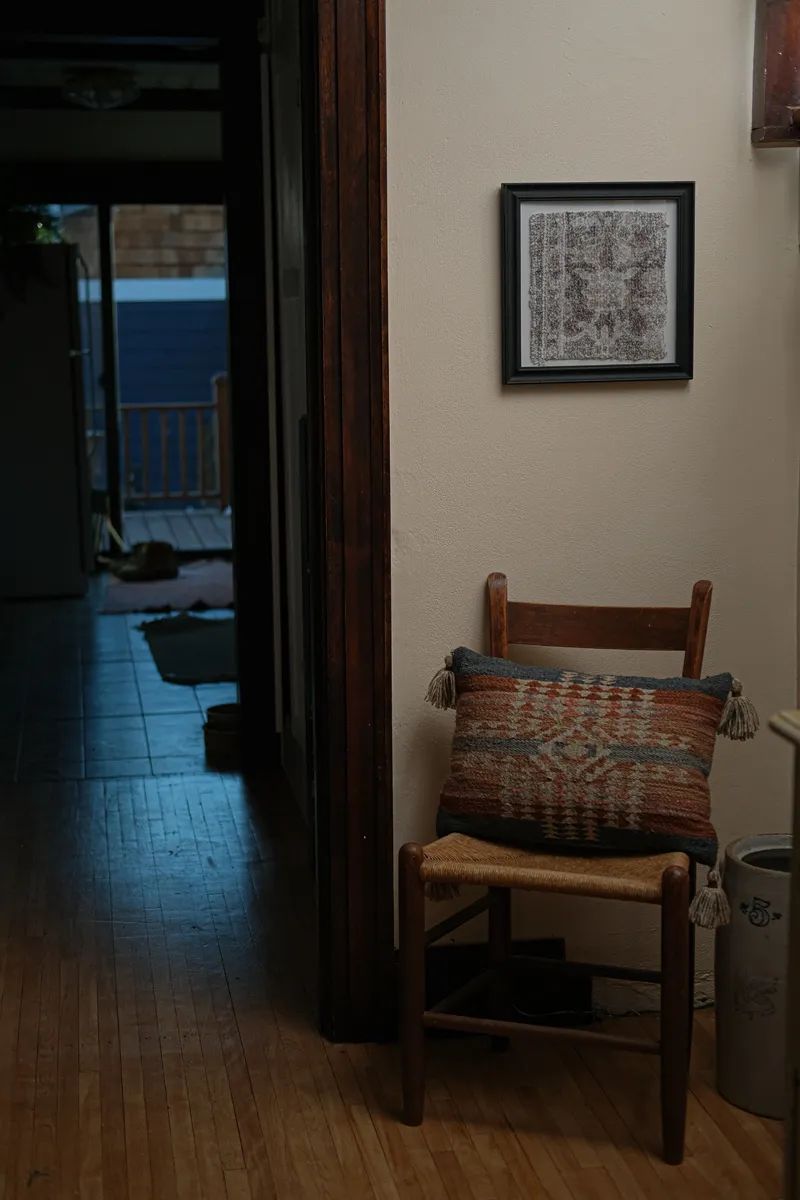
I've seen art like this in catalogs and online for hundreds of dollars. This art fits you, your family and your home. It won't be found in anyone else’s home. It's unique to you which makes it a fun way to give your home a custom created showpiece for less than $20.