

Light up the Night
Do It Yourself lanterns cast the perfect glow
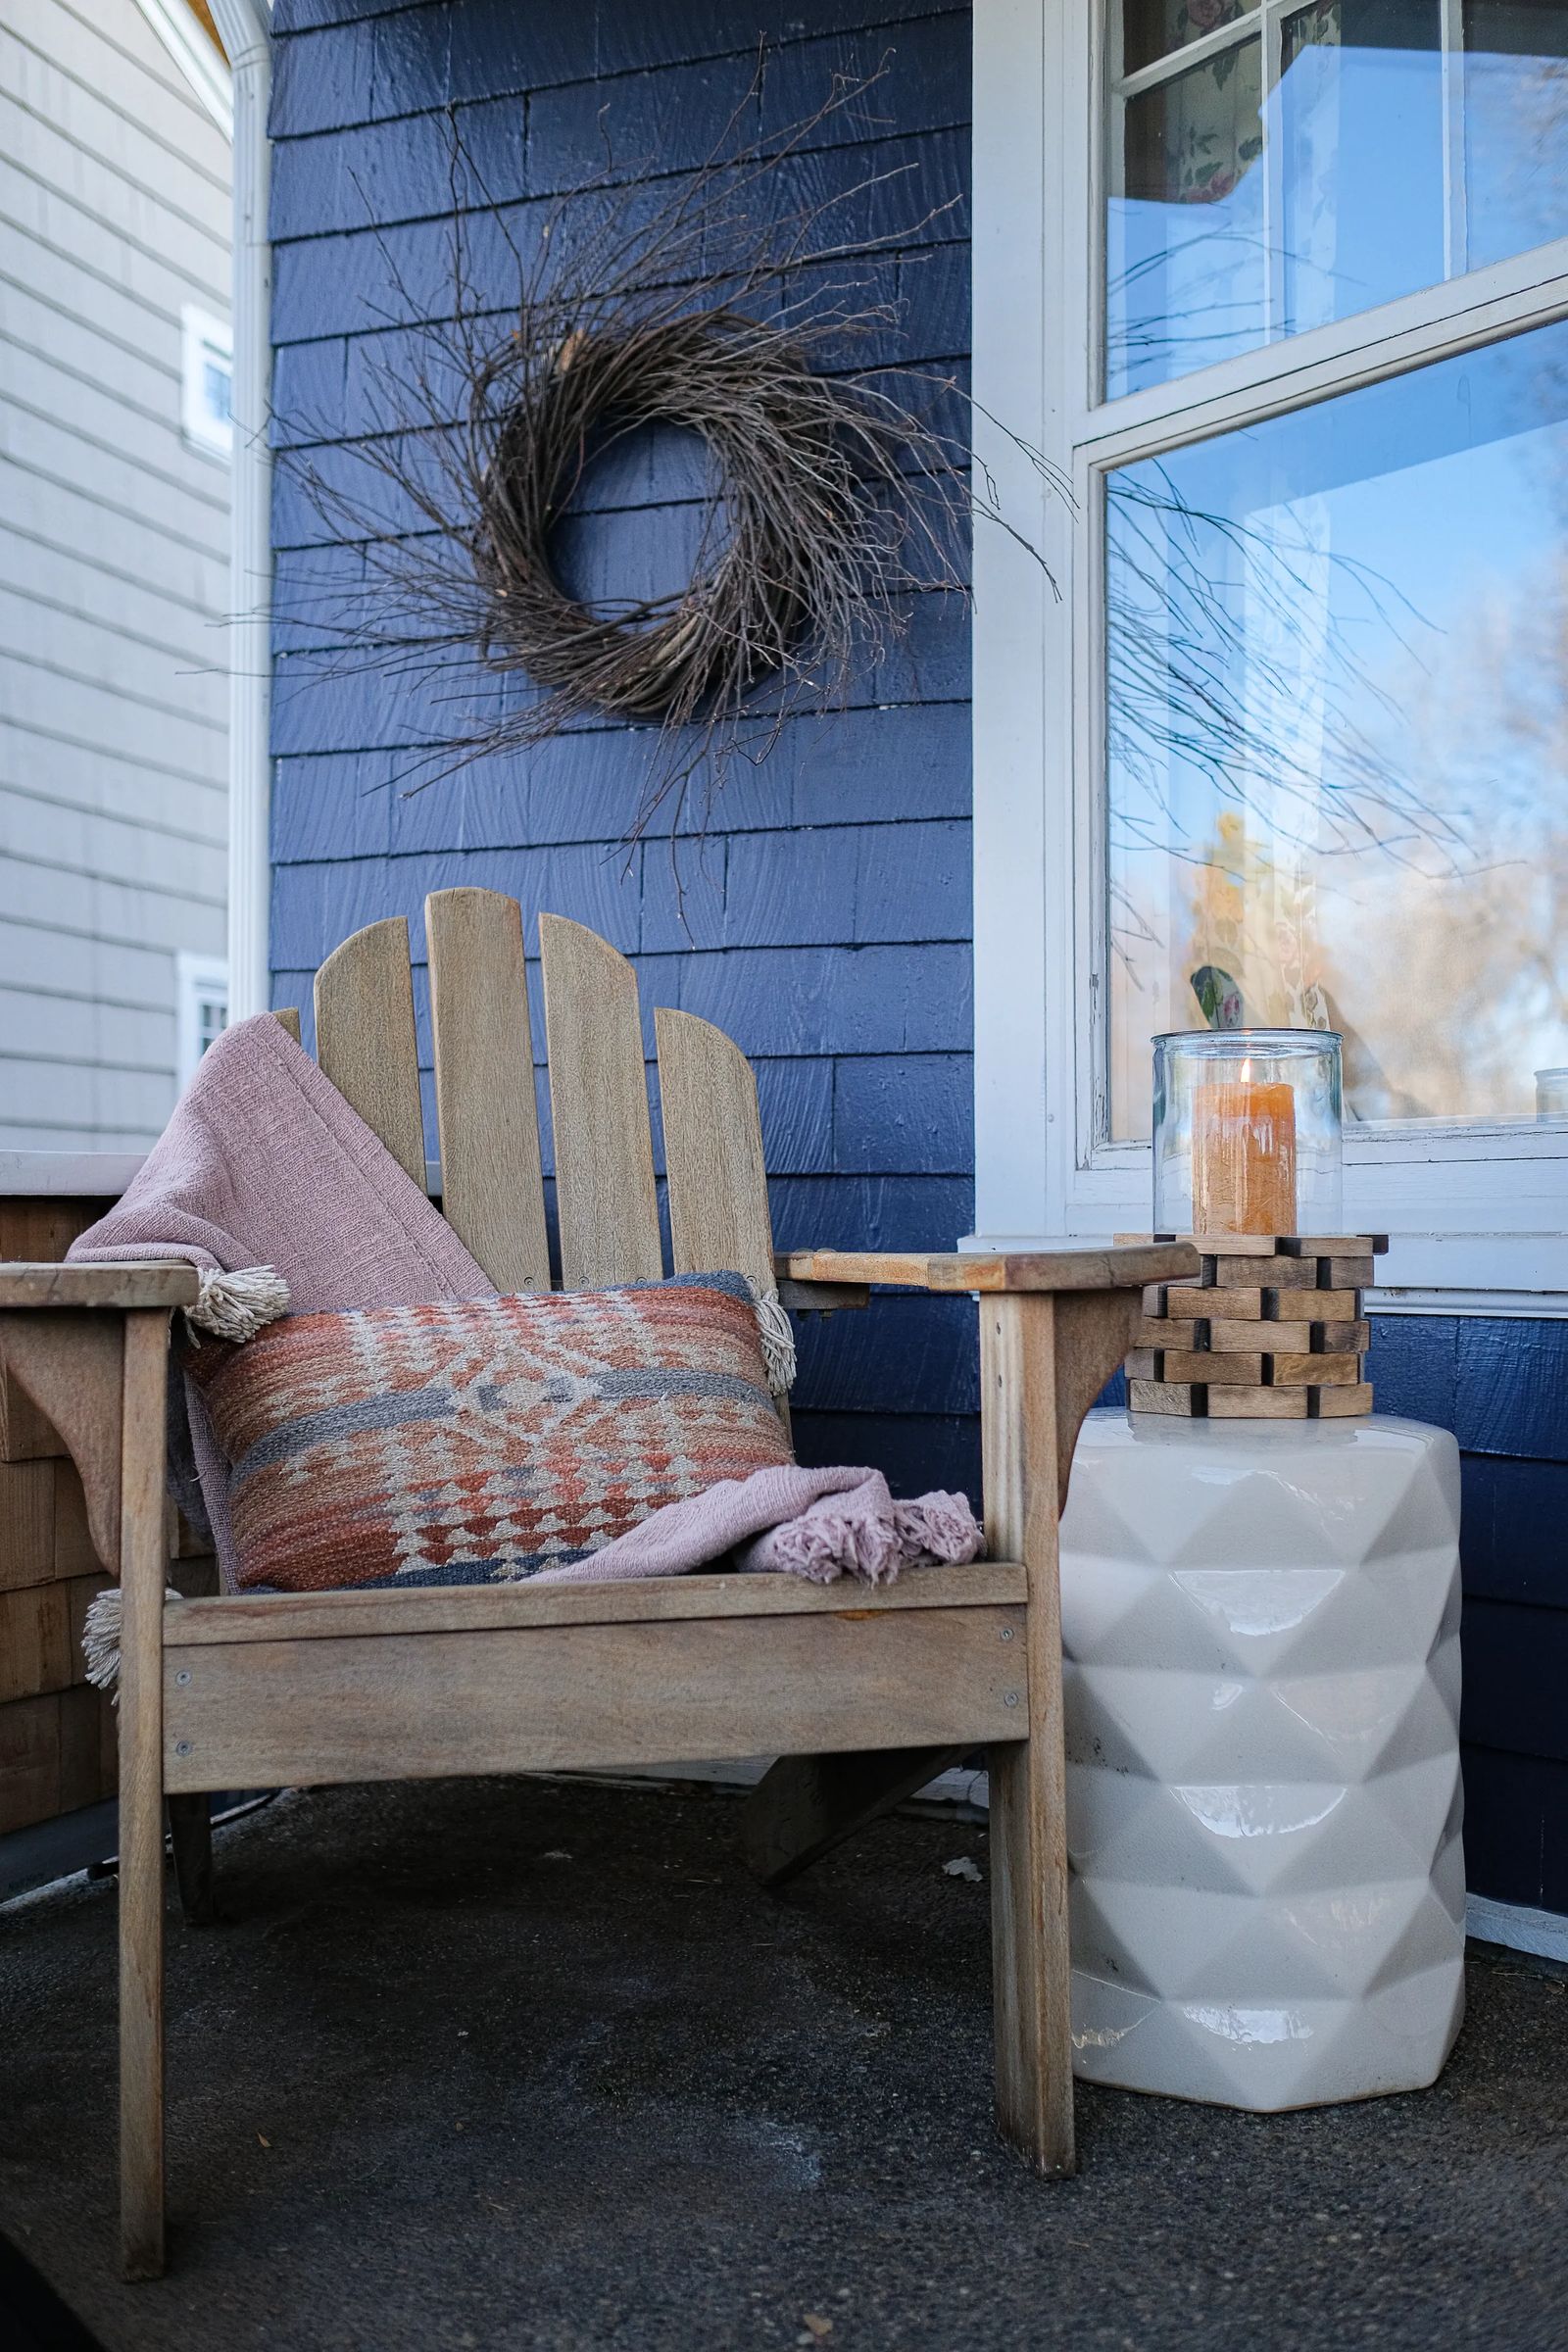
Spending summer nights on my backyard patio is one of my favorite things. This summer, I’m making them even better with a little lantern ambiance. This DIY uses one of the most unlikely supplies — a children’s game. So, dive in and elevate not only your patio, but the time you spend enjoying it. With a little glue, stain, Jenga game pieces and a glass container, you’ll be sitting all aglow, enjoying every minute of our warmer weather.
HERE’S WHAT YOU WILL NEED
● Jenga game
● Hot glue gun and glue sticks
● Stain/paint
● Sandpaper
● Candle
● Tall glass container
Let’s start with a glass container. As always, don’t forget to scout out thrift or dollar stores for a bargain. There’s always a wide variety of goodies in both stores with great price tags.
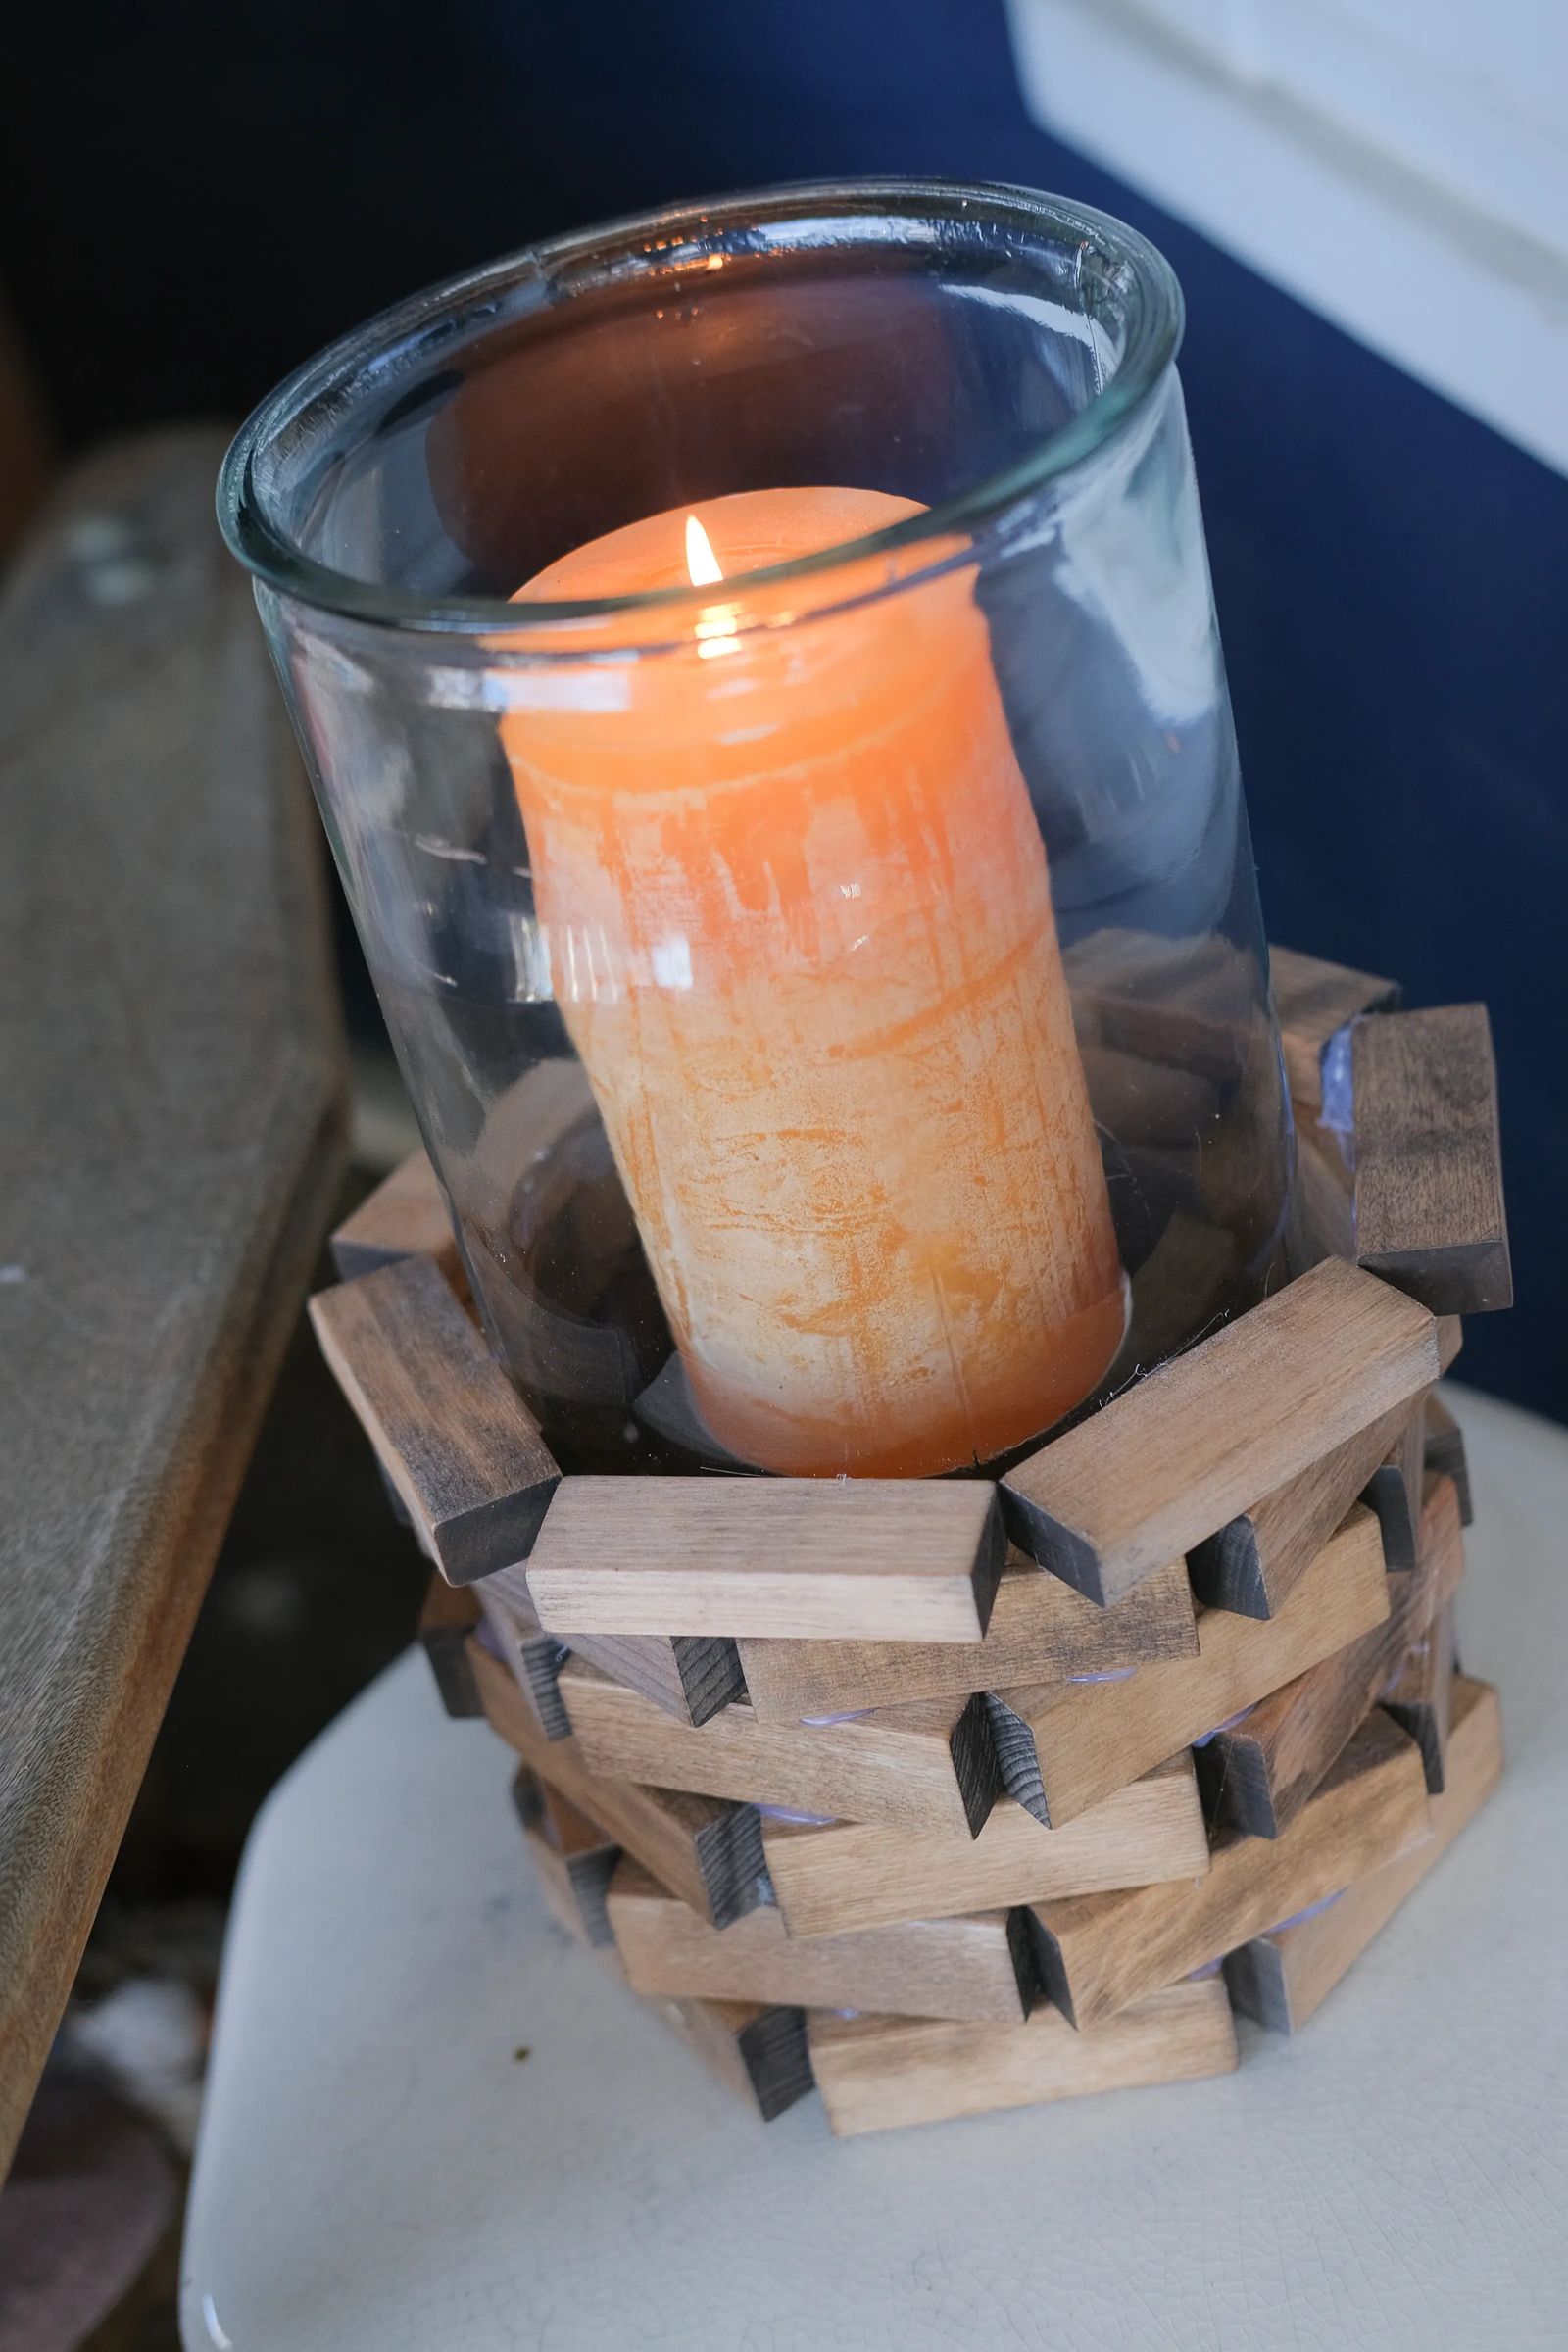
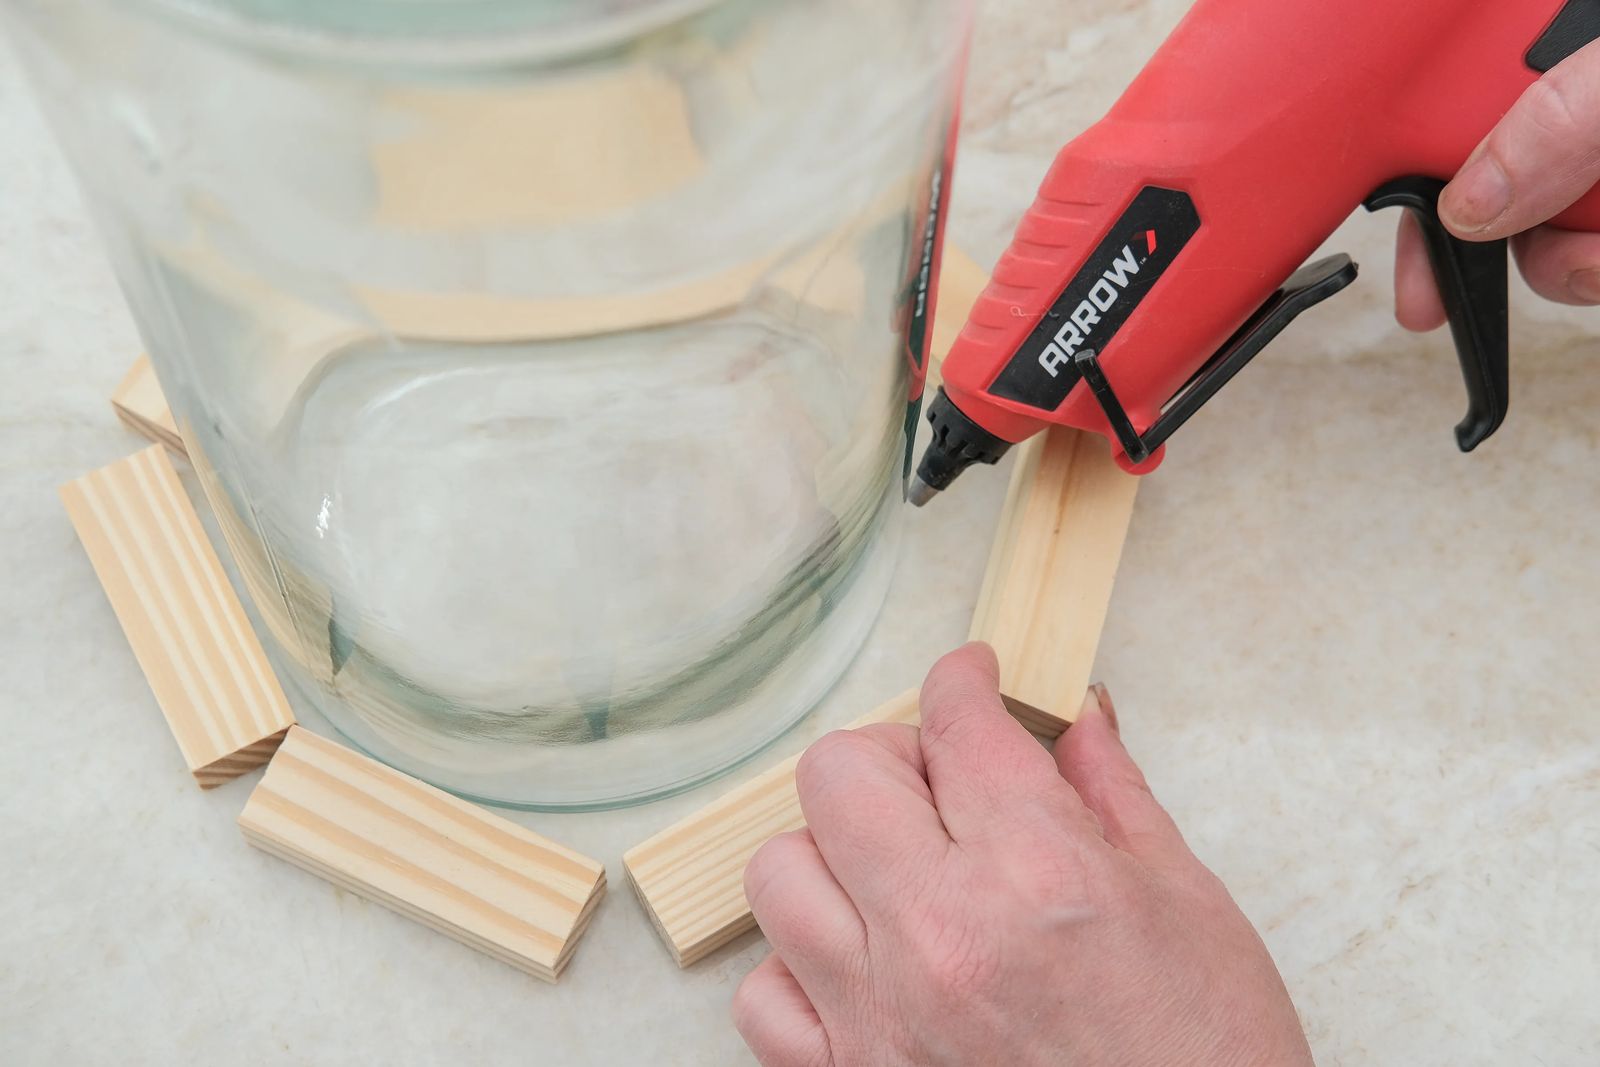
Here’s where the project gets fun. The base of this lantern is constructed with Jenga tiles glued to the glass container base. I started by laying the tiles around the glass to check spacing and placement. I found that the size of wood Jenga tiles is perfect and the tiles don’t require a ton of sanding.
Using a bricklaying method, I started placing my first row around the base of the container, again to practice spacing. For the second row, I centered the tile over the middle of a joint on the first row, repeating the row all the way around. I continued this process, staggering the tiles with each new row. I completed my lantern midway through the glass container so I would still be able to see the glow of my candle and some of the glass, but feel free to take the tiles all the way to the top of the glass. It’s simply personal preference.
The very top row will be a cap row. Instead of placing the tile on its side, lay these “cap” tiles flat on existing rows. Once I knew how many tiles my project would use, I sanded the Jenga logo from one side of the cap tiles. Because I am staining these tiles, I don't want it to show through. Don’t feel like staining? This project looks just as nice with a natural tile look.
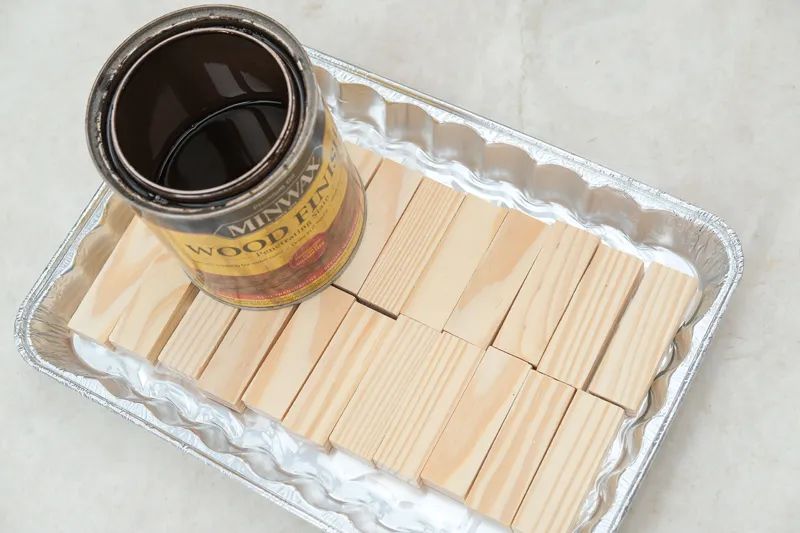
To stain, I put a half cup of stain in a disposable roasting pan. I let it sit a couple minutes and then flipped the tiles and waited the same amount of time. Once done, I removed the tiles from the stain and placed them on a paper towel to rub off the excess. After I was done, I separated out each tile to dry for up to 24 hours. I then poured the remaining stain from the pan back into the stain jar.
Once the dry time was over, it was time to heat up the glue gun. I placed all my tiles row by row adding glue to the back of the tile to secure to the glass container. On the first row, I placed the glue on the back side of the tile where it touches the glass. The second row, I placed glue on the back where it touches the glass and on the bottom where it touches the first row. The other rows I put the glue at the bottom of each tile where it touches the previous row of tile. For the cap row I placed the glue on the side touching the glass and the flat side touching the previous row of tile.
Once the gluing was complete, all I needed was to add my candle and head outside to enjoy it. Summer nights will now have a little extra flair thanks to these candle holders that don’t break the bank. It’s the little things!


