

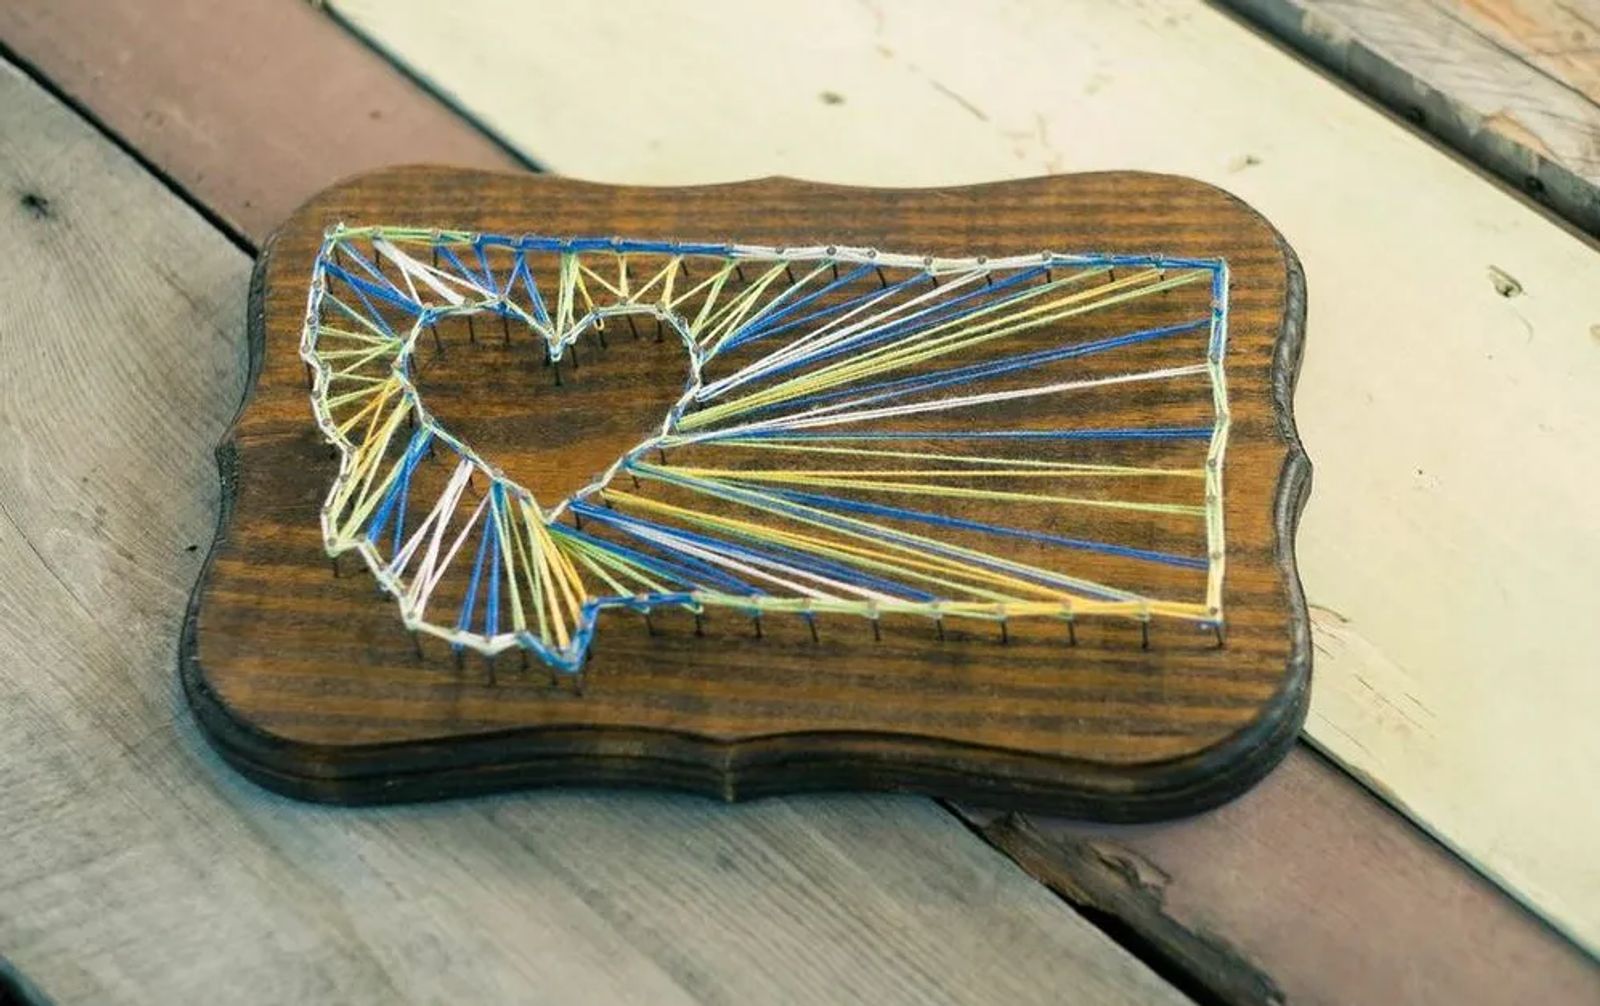
String it Up!
Fun & crafty throwback to 60s Style
What do you get when you mix a slab of wood, some nails and colorful thread? You get an artistic expression with graphic impact. Remember string art? This popular craft from the 60s is making a big and bold comeback and Better To Gather's studio is one place you can bring this project to life from start to finish.
"All the older guests that come in say, 'Oh my gosh, this is coming back?' I find that is holding true with a lot of the applied arts and crafts," says Better to Gather owner Cassie LaGreca. "We are rediscovering a lot of that stuff and putting a new twist on it."
Laura Wemple, a Rocky Mountain College student who has been shadowing Cassie, came up with the idea after seeing a bunch of different takes on string art in a magazine profiling flea market finds. She's loved watching customers' creativity take hold saying, "This is just a very simple project for those people who might not be the artsy and craftsy type. They can come in, create and then take something home and say, 'Look what I made!'" She adds, "Handmade things are really starting to make a big comeback, especially with sites like Pinterest." And, with plenty of inspiration and about $20, you too can turn some string, wood and nails into works of art from the heart.

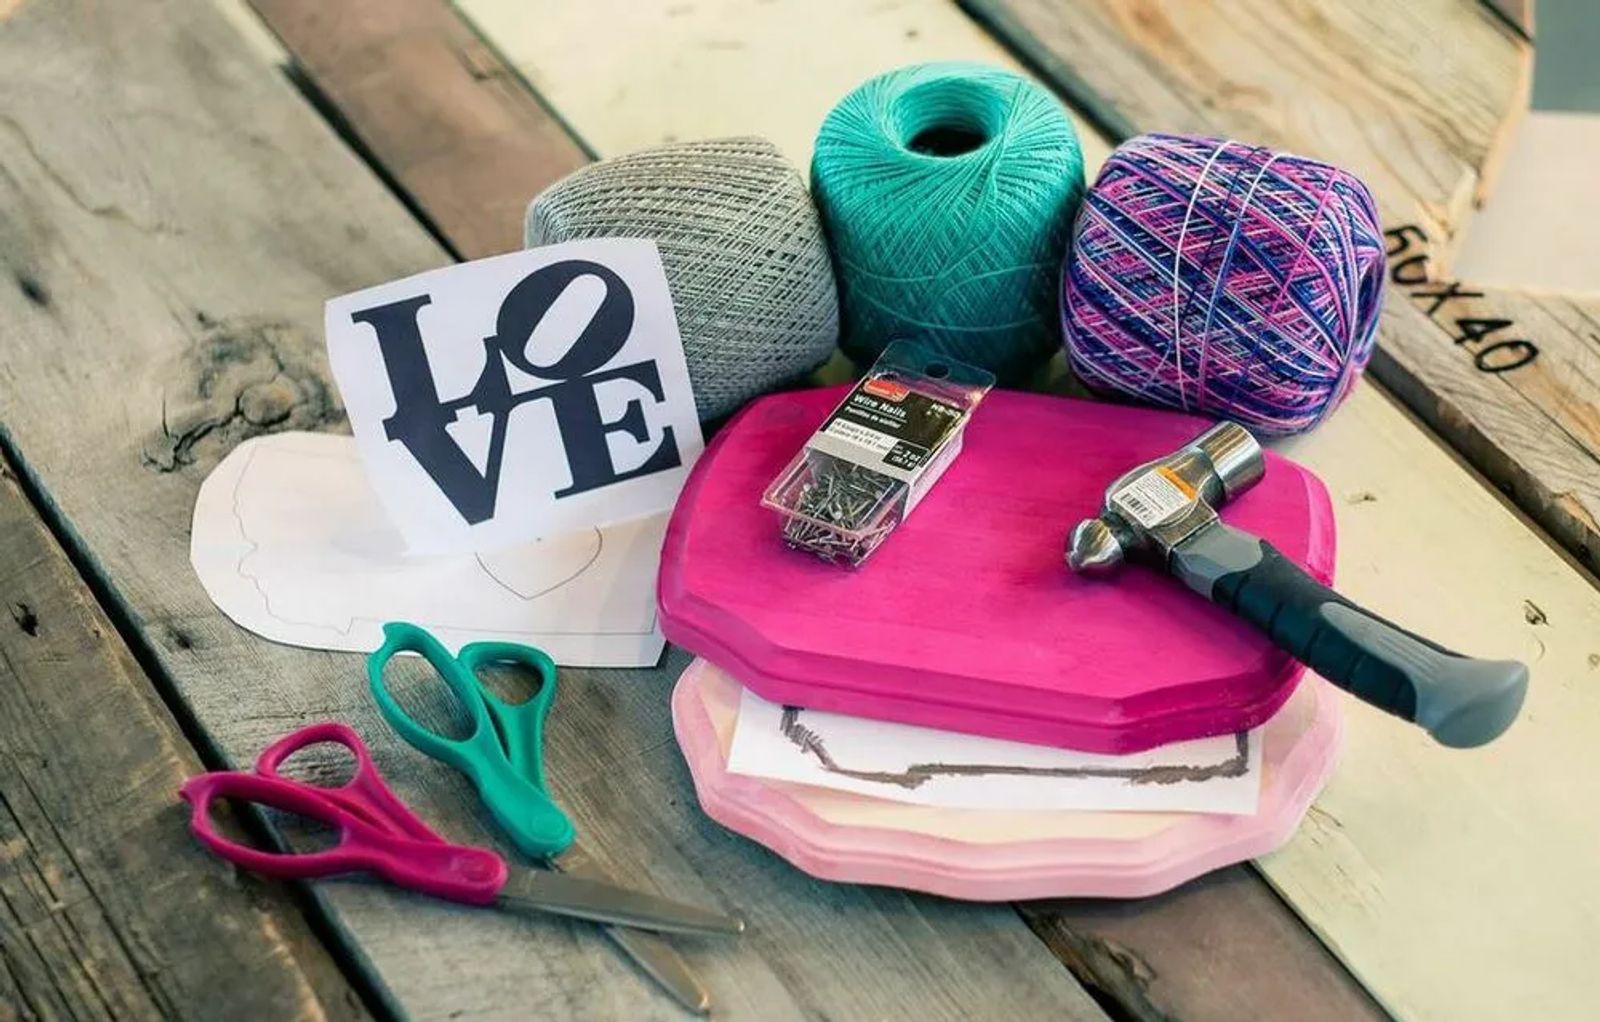
WHAT YOU NEED
String
Crochet thread in colors of choice
Piece of wood
Hammer
Finishing Nails
Scissors
Graphite pencil to transfer image
TACKLING THIS PROJECT
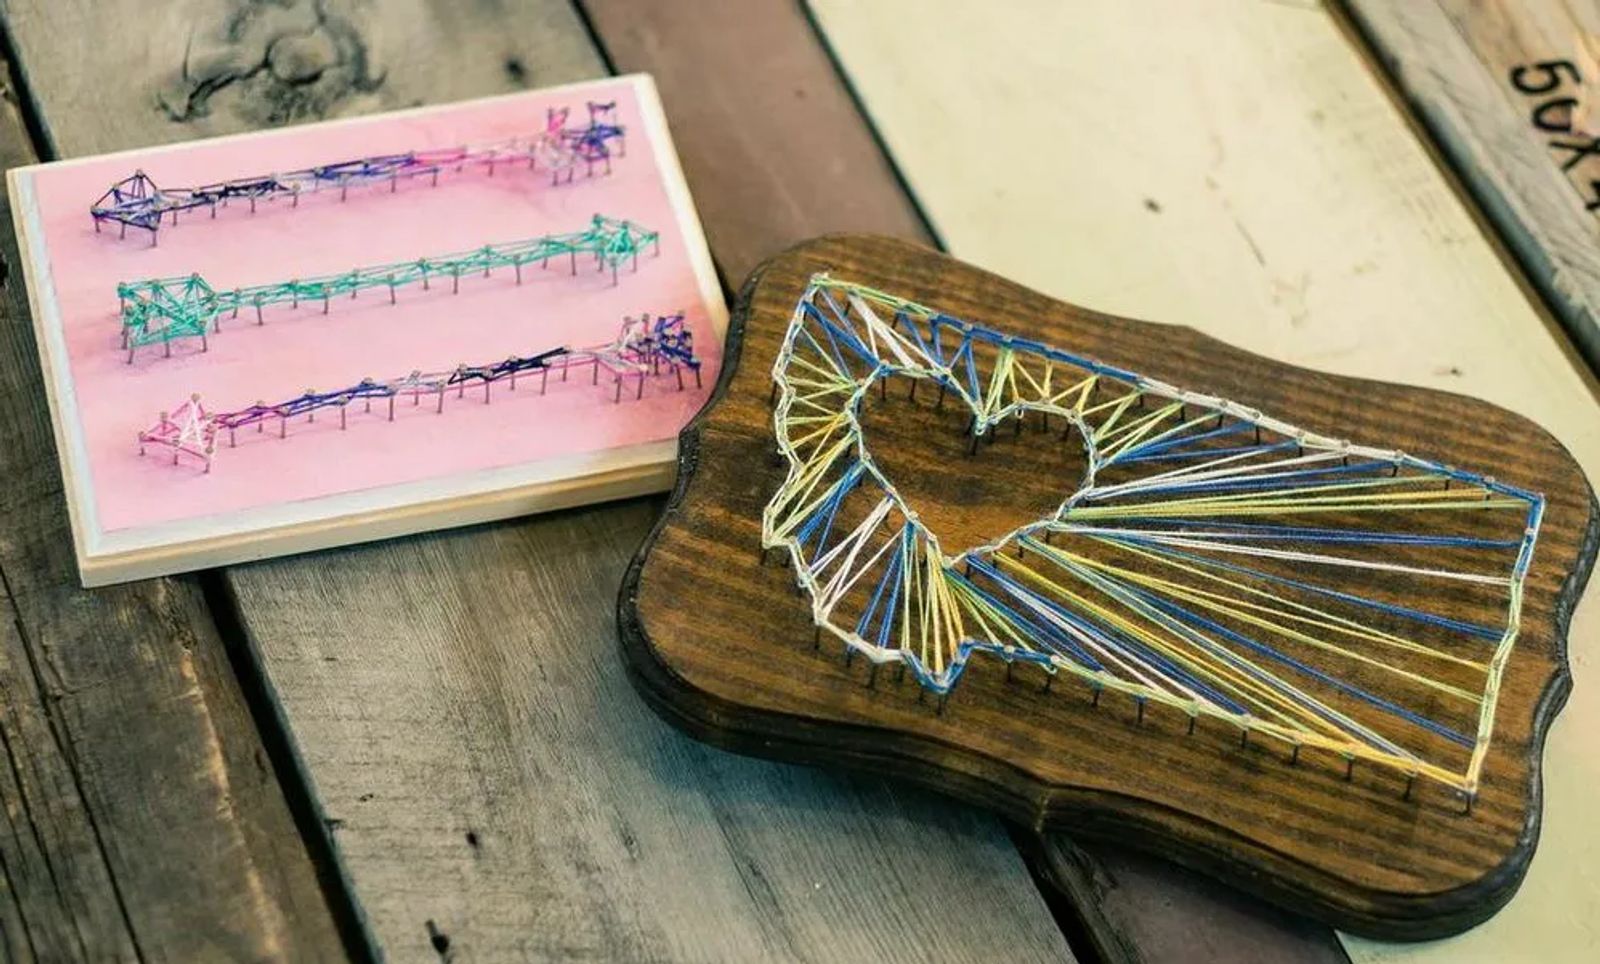
Start by finding an image you'd like to use to create your string art and print the image off.
To transfer, simply use a pencil and scribble along the lines of the image on the back side of the paper. Flip paper onto the wood and trace the outline of the image. Instead of purchasing graphite paper, you're using the lead from the pencil to help transfer the image onto your wood block. If you want to use a rather large wood slab, try tracing your image onto the wood using a projector.
Take nails (make sure the nail head isn't too large), and hammer them using your outlined image as your guide. If you want the string art to be dense, you want your nails to be closer together. You also want to make sure that you hammer the nails straight down so they don't sit in the wood at any kind of an angle. If you do have a slip up with a nail, simply use needle nose pliers to remove the nail and start over. When it comes to spacing the nails, no need to measure, just use visual spacing.
Choose the color of crochet thread you'd like to use and then, start stringing! You'll want to tie and knot the thread onto the first nail leaving a bit of a tail. You can create an outline of your image with string or you can choose nails on opposite ends of your image moving the string back and forth in a diagonal fashion until all of the nails have been wrapped. To wrap the nail, you want to bring your string around the nail in a full circle before continuing on to the next nail.
When you've reached the last nail, knot the end of the thread around the last nail. If you finish back at the same nail that you used to start your design, you can use the starting thread's tail to knot and secure your thread in place. On the backside, attach wire or picture hanging brackets in order to hang your work of art on the wall.

NEED A LITTLE HELP CREATING YOUR STRING ART?
Join Better To Gather for their Make & Take Project
If you'd like a little helping hand in making this project, expertise can be found in downtown Billings at Better To Gather located at 2402 Montana Avenue. The shop will offer this project for a small fee all April long during their open studio hours every Tuesday, Wednesday or Thursday from 3 to 7 PM. For more crafty fun, log onto bettertogather.com and click on the Get Creative! tab for more on workshop events.


