

Tied Up In Knots
The macrame plant hanger comeback!
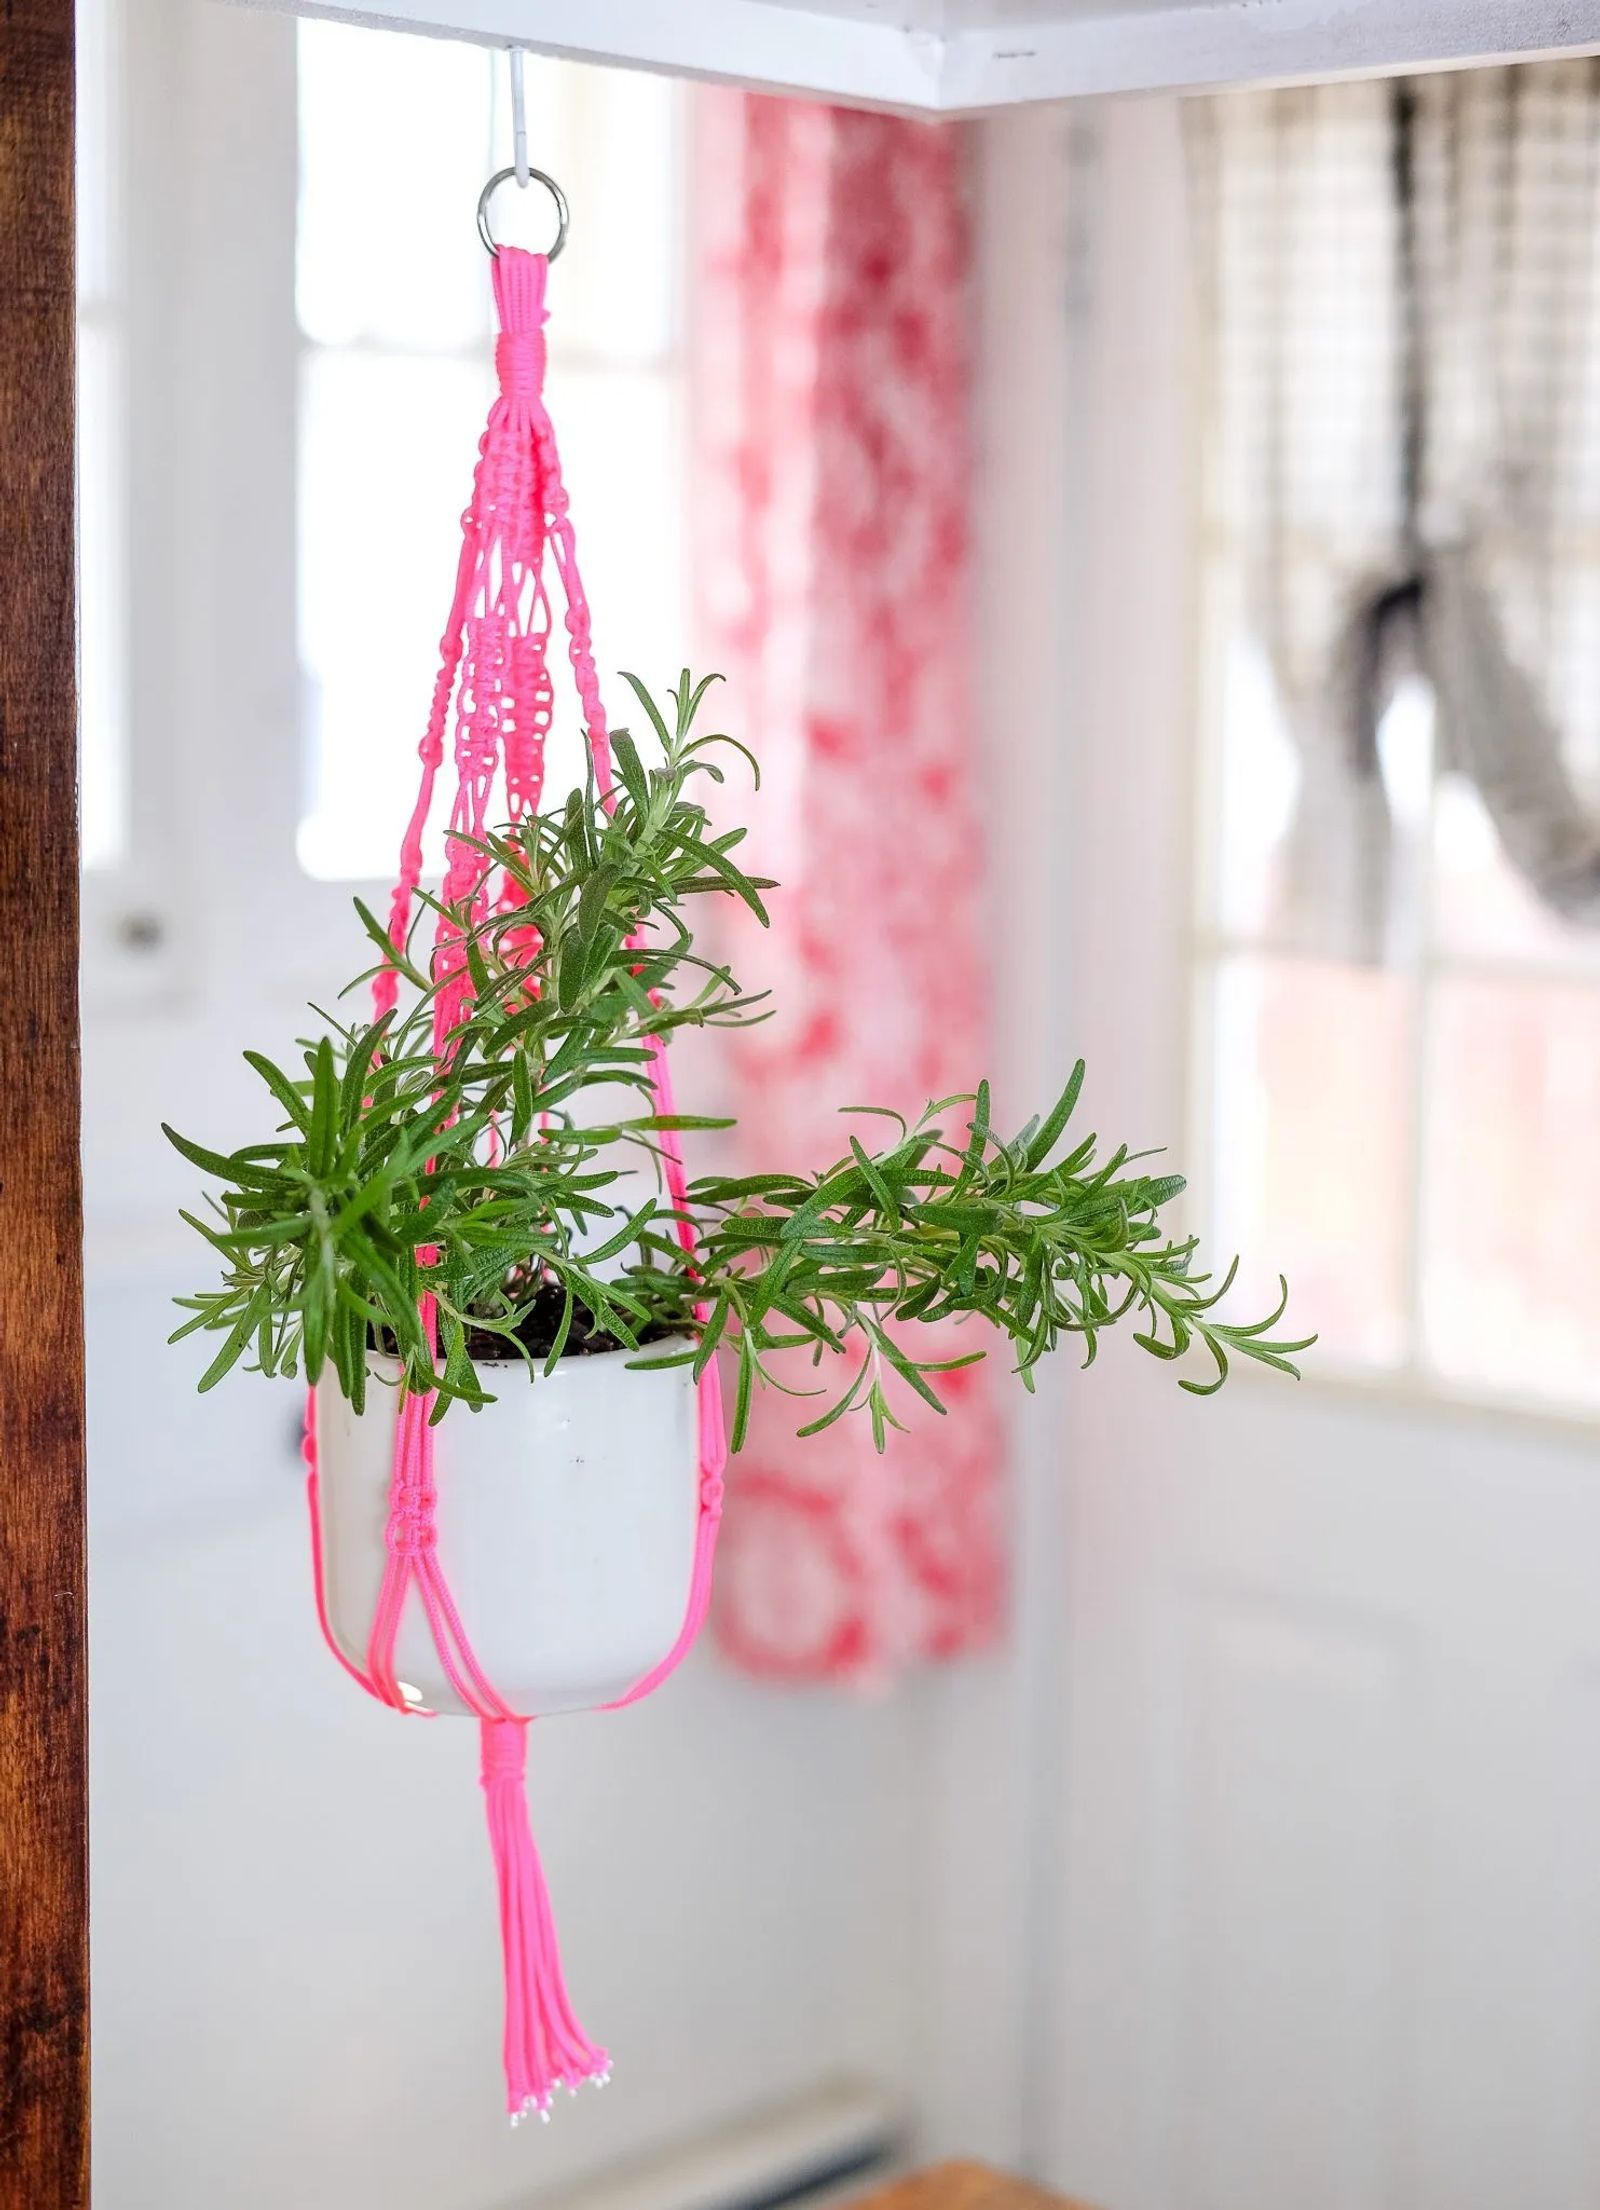
Love it or hate it the décor of the 1970s is sneaking its way back into our homes. Design trends these days includes neutral wood tones and plants in all shapes and sizes. Don’t forget macramé. This knotty craft is also making a comeback. Instead of shunning this 70s vibe, why not embrace it with a little DIY mini macramé plant hanger! Updated colors and types of cording give this project a fresh new look, dare I say modern look.
I have to say that I never thought that I would create a macramé project for my home. Who knew that tying knots and pulling string could be both fun and relaxing? I am planning to do a set of three plant hangers of different colors and knots. I guess the moral of this DIY story is to, “Never say never.”

WHAT YOU WILL NEED
Cording (jute, macramé cording, paracord)
Brass ring
If you are concerned about not being able to get the knack of tying a good macramé knot, it is important to note, there are so many variations of knots that it is almost impossible to mess up this DIY project. Your “take” on a certain knot might just make it all the more unique. The few knots I am demonstrating are very basic, allowing you to make your own pattern as you go.
HOW TO GET THE LOOK
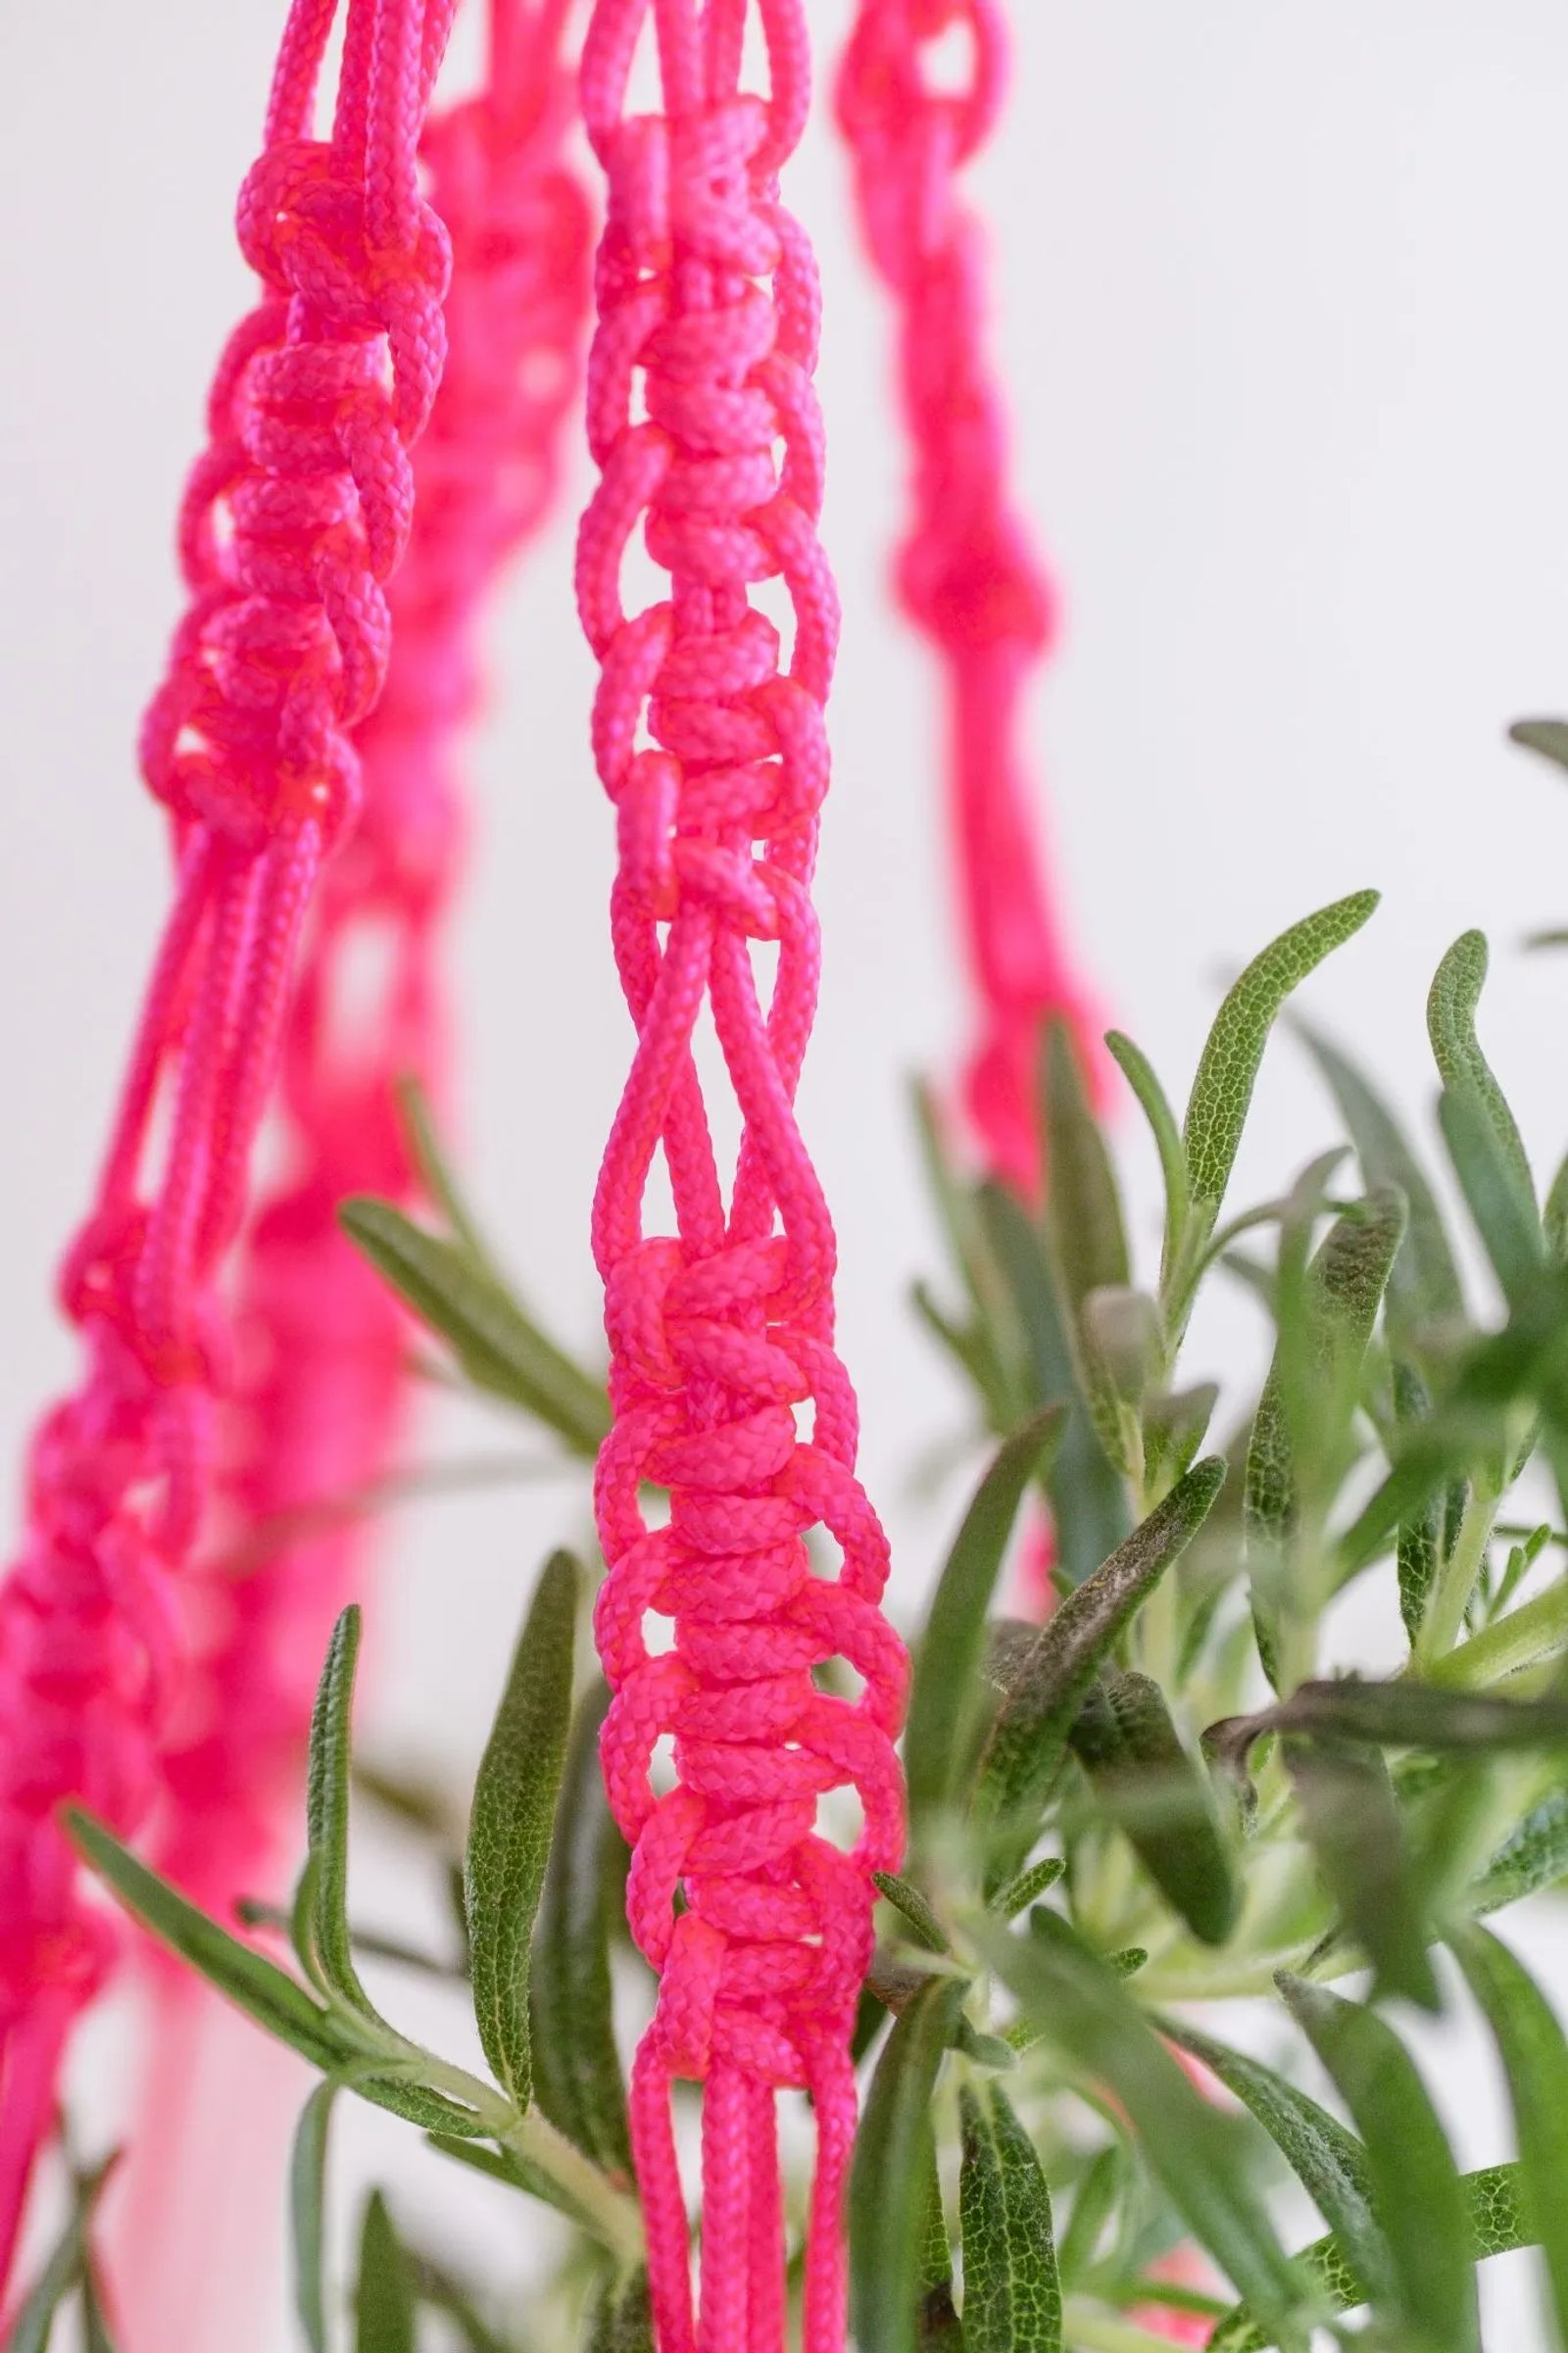
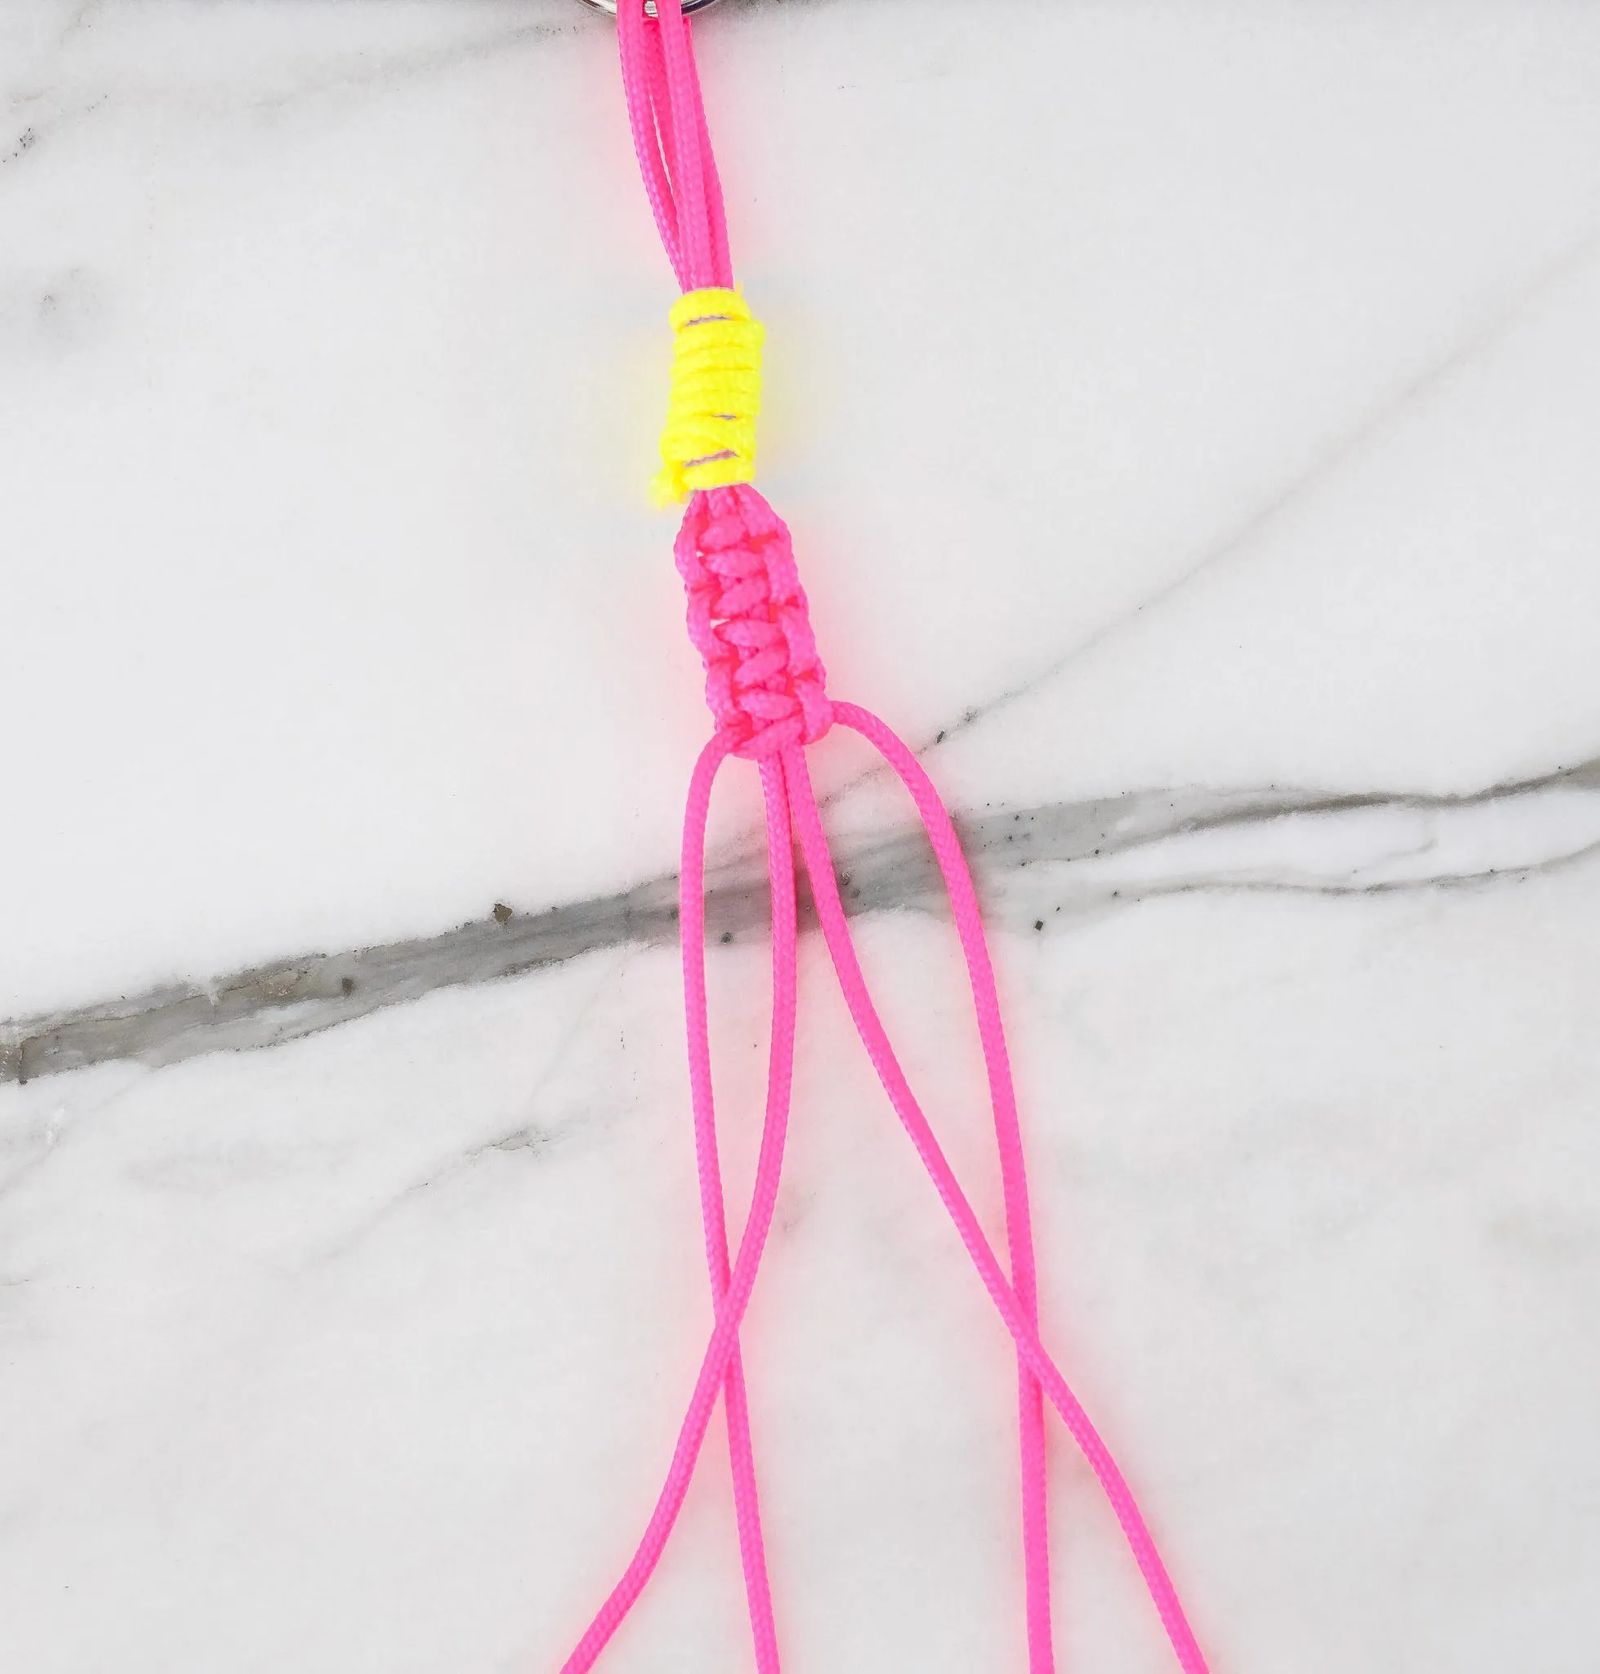
Start by cutting 8 strands of cording, each measuring 75” long. I chose paracord because it is durable and came in solid bright colors. It also came at a great price, just $2.99 for 50 feet of cording. Thread all eight pieces of cord through the brass ring and fold all at the center of the cording. Cut a piece of cord to measure 20”. This will be used for the Gathering Knot, which will be placed to secure your work at the base of the ring.

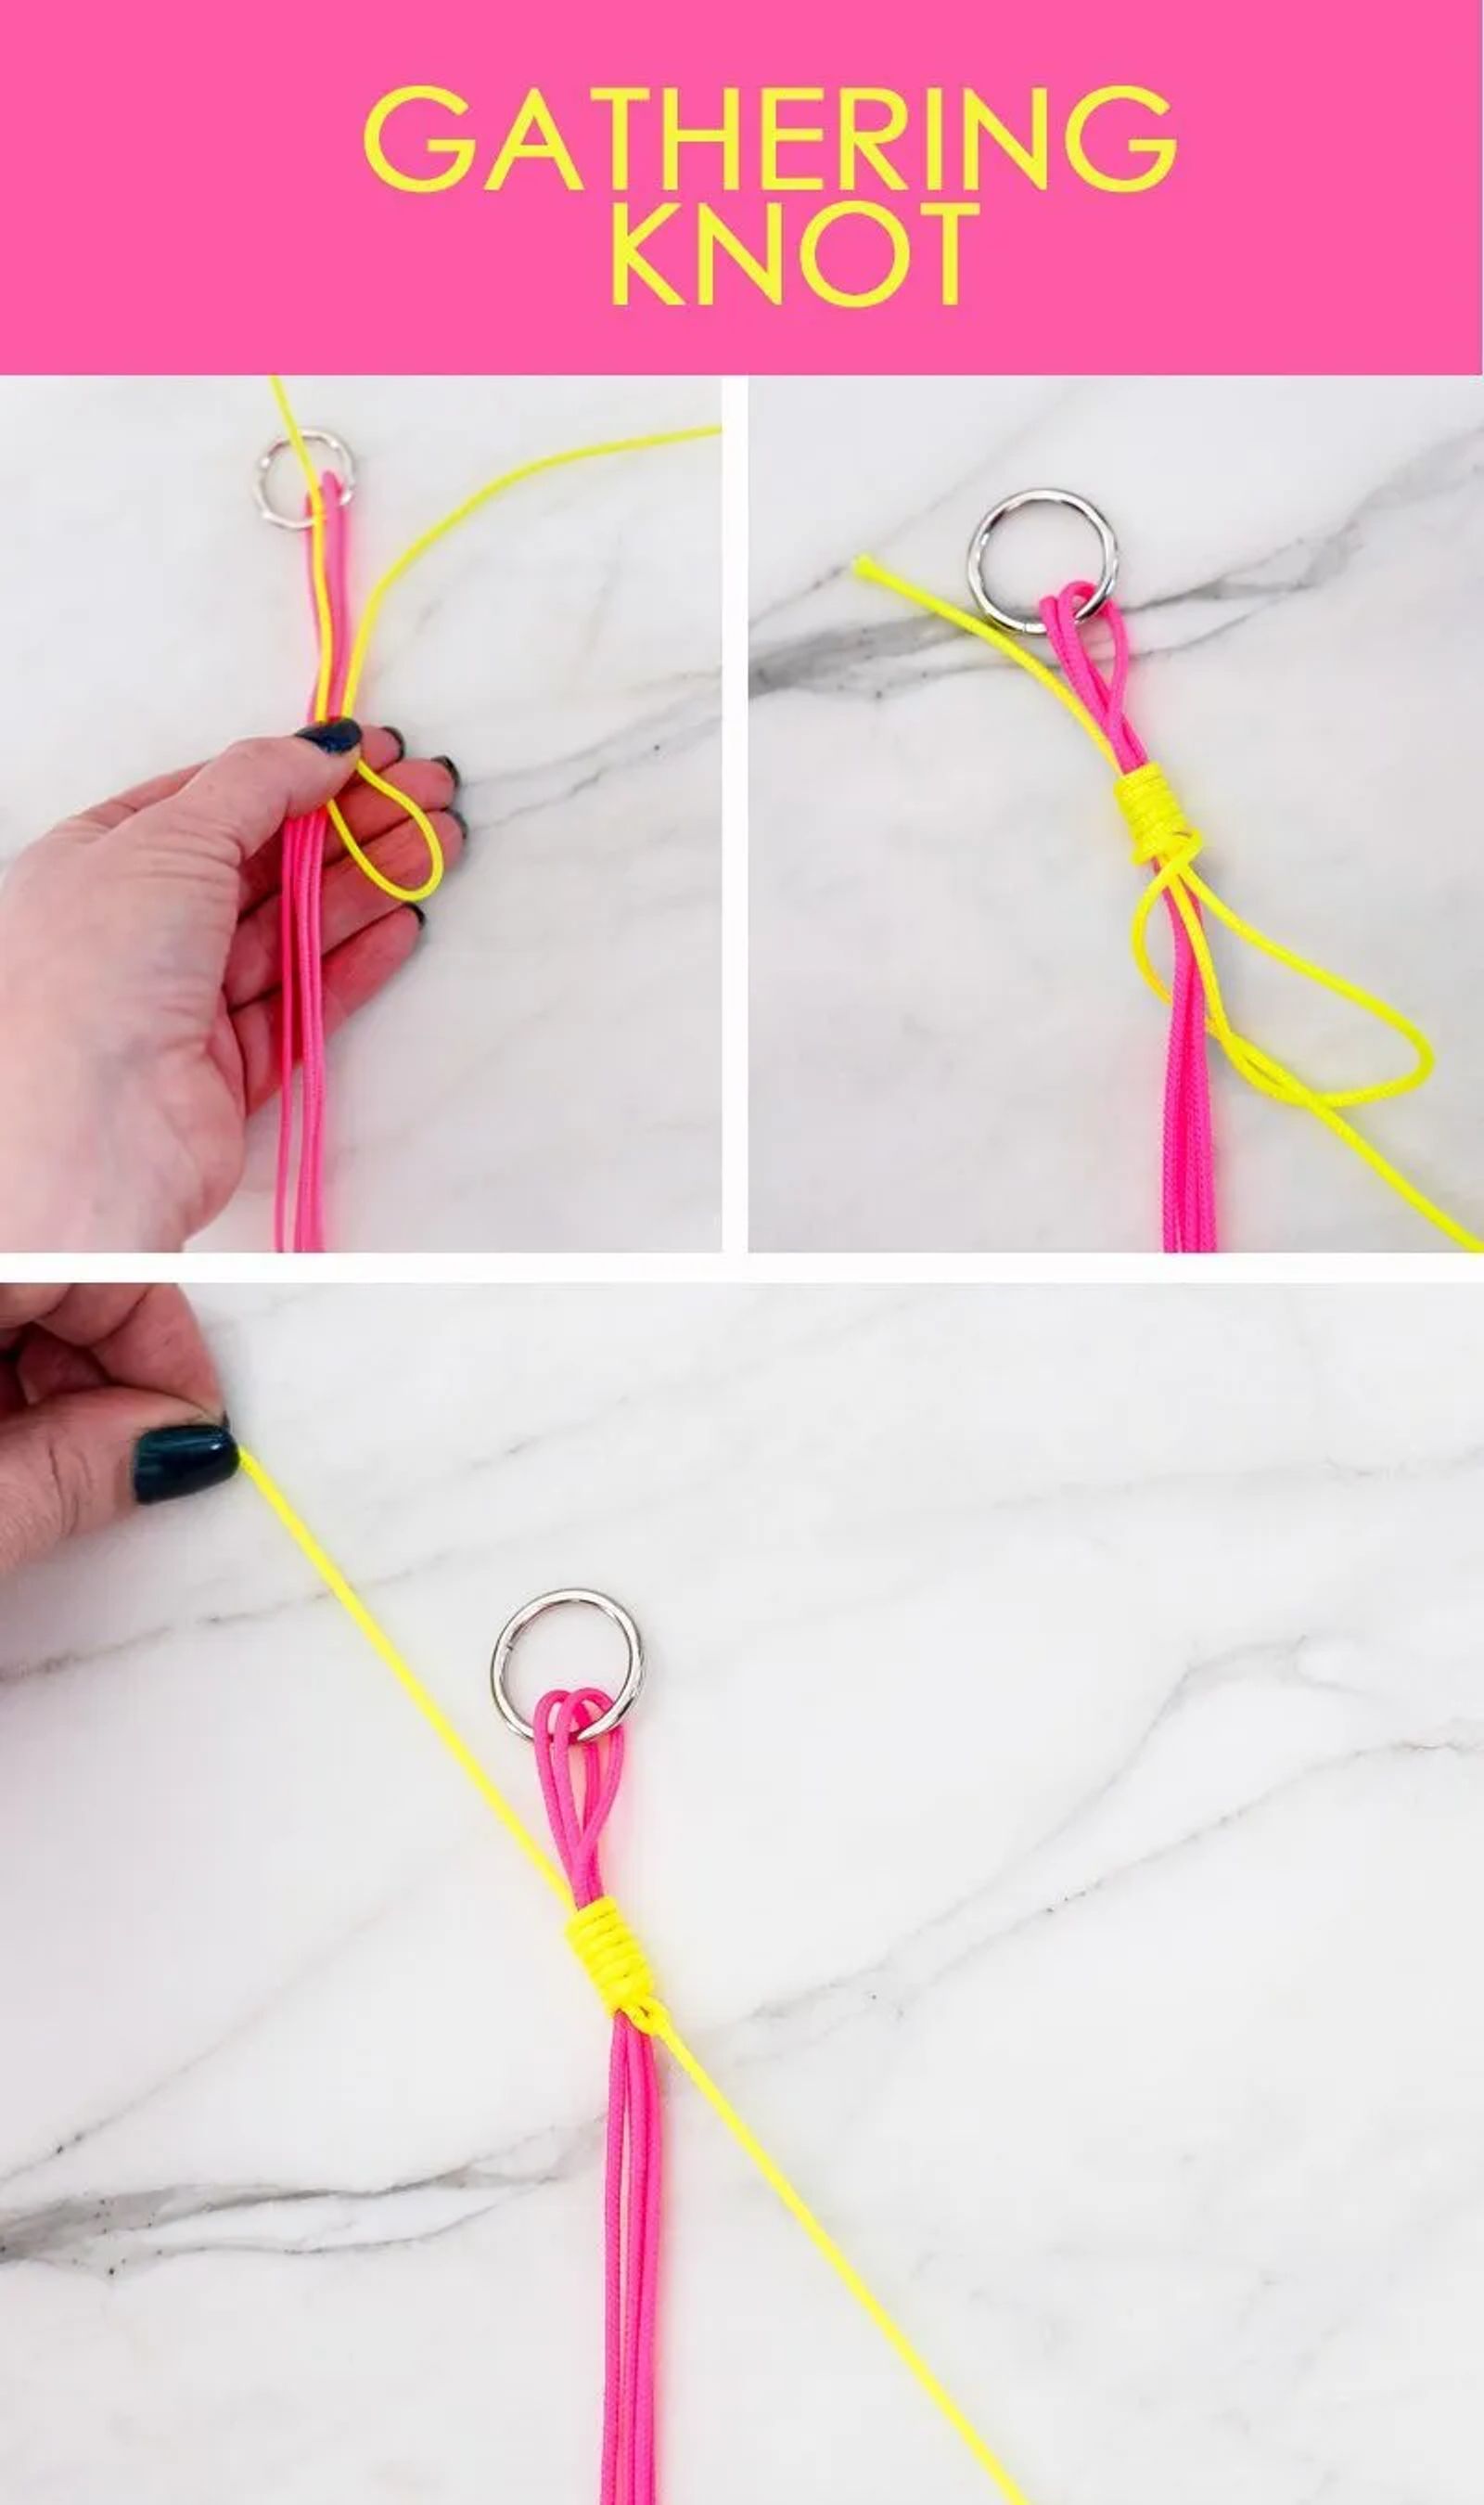
GATHERING KNOT
1. Hold the end of the 20-inch string roughly 1” above the ring.
2. Bring the loop down about 2-3 inches, and then loop around your pinky Bring back up to the base of the ring and begin wrapping around the 16 cords 6-8 times.
3. As you wrap, bring the cord up to fit snuggly up against the previous wrap.
4. With your last wrap, thread the end through the loop, grabbing both ends to pull and tighten. Feel free to trim up the loose ends, cutting as close as you can to the wrap.
From here, group the cords into four groups of four. Tie a loose knot in these to keep them separate from the others. Next, you’ll take one group of four and make five square knots.

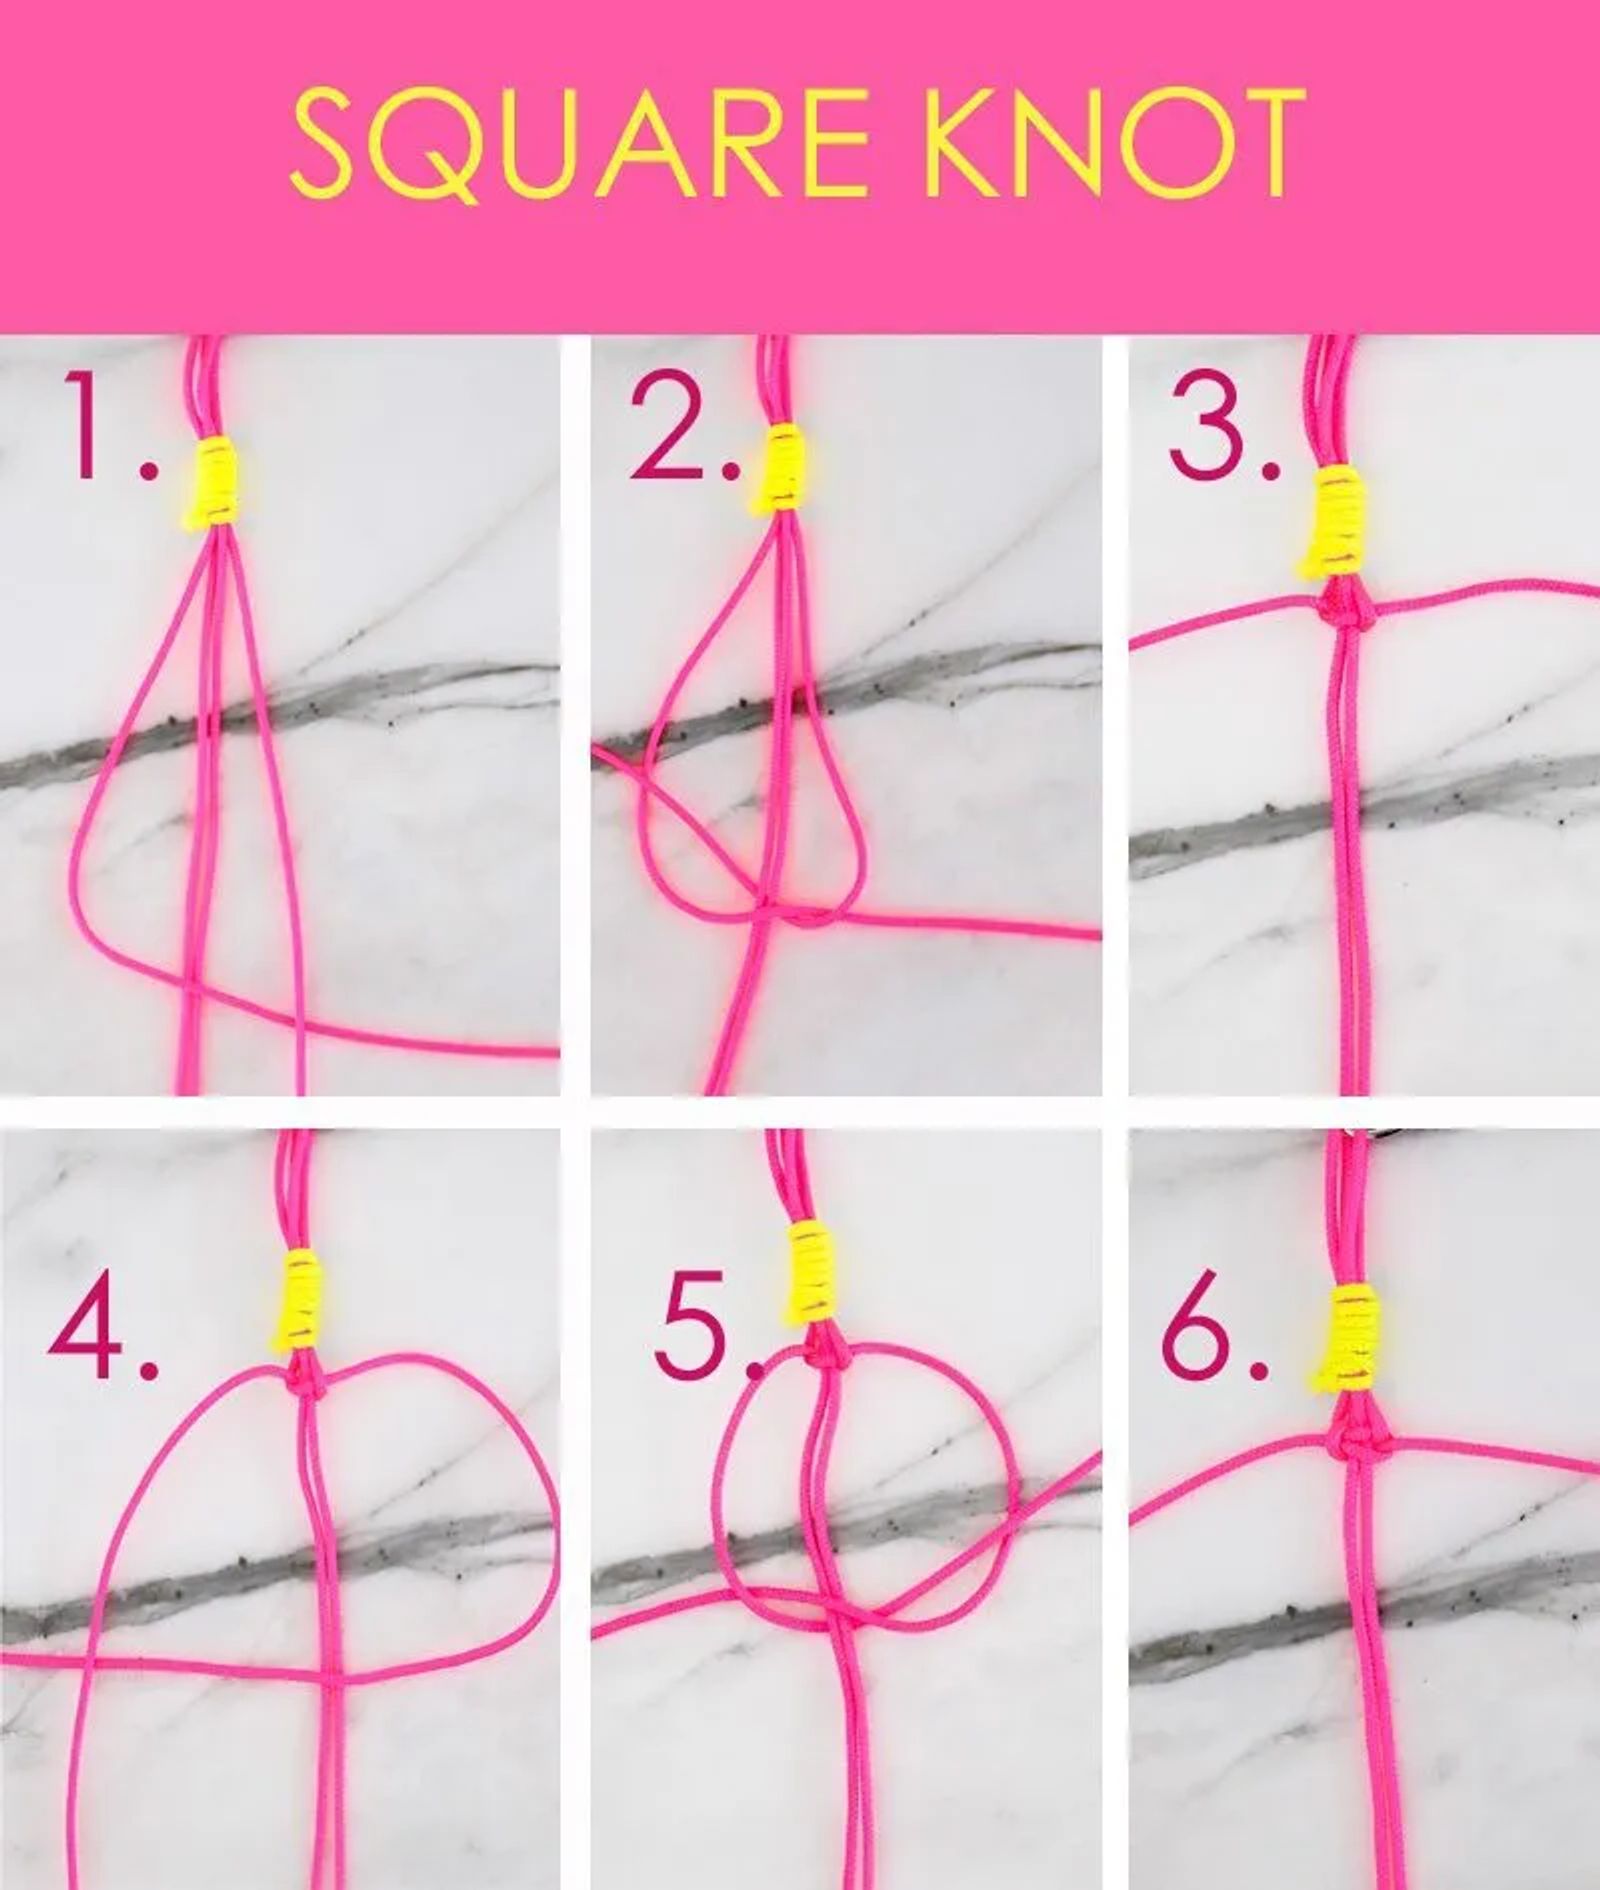
SQUARE KNOT
1. If you were to number the strands left to right from 1 to 4, you’ll take strand 1 over 2 and 3 (the middle two cords), passing it under 4.
2. Grab 4 and move it under 2 and 3 and over 1.
3. Tighten to create a half knot. NOTE: cords 1 and 4 have now switched places.
4. Bring 4 under 2 and 3 and over 1.
5. Bring 1 over 2 and 3 and under 4.
6. Tighten to finish knot. Repeat four more times and continue on to do the same with all four sections.
Once finished with the square knot section, take the center cords and move them to the outside. These will now be your working cords. Move down about 2” on your unworked section. It should look like the middle cords are crossing over the other cords like the photo below.

Make two square knots and five alternating half hitch knots.


ALTERNATING HALF HITCH KNOTS
1. Take the left working cord wrap over and around the holding cords and through the loop
2. Tighten
3. Do the same thing from the right side.
4. Tighten and continue to alternate left and right sides keeping knots close.
After completing the 5 alternating half hitch knots, make 2 square knots. Again, take the middle holding cords and move them to the outside. Move down 2 inches on the piece, make 2 square knots followed by 5 alternating half hitch knots and another 2 square knots. Switch holding cords to working cords, drop down 5 inches and make 2 square knots. You will repeat this pattern from the beginning with the three remaining cord groups.

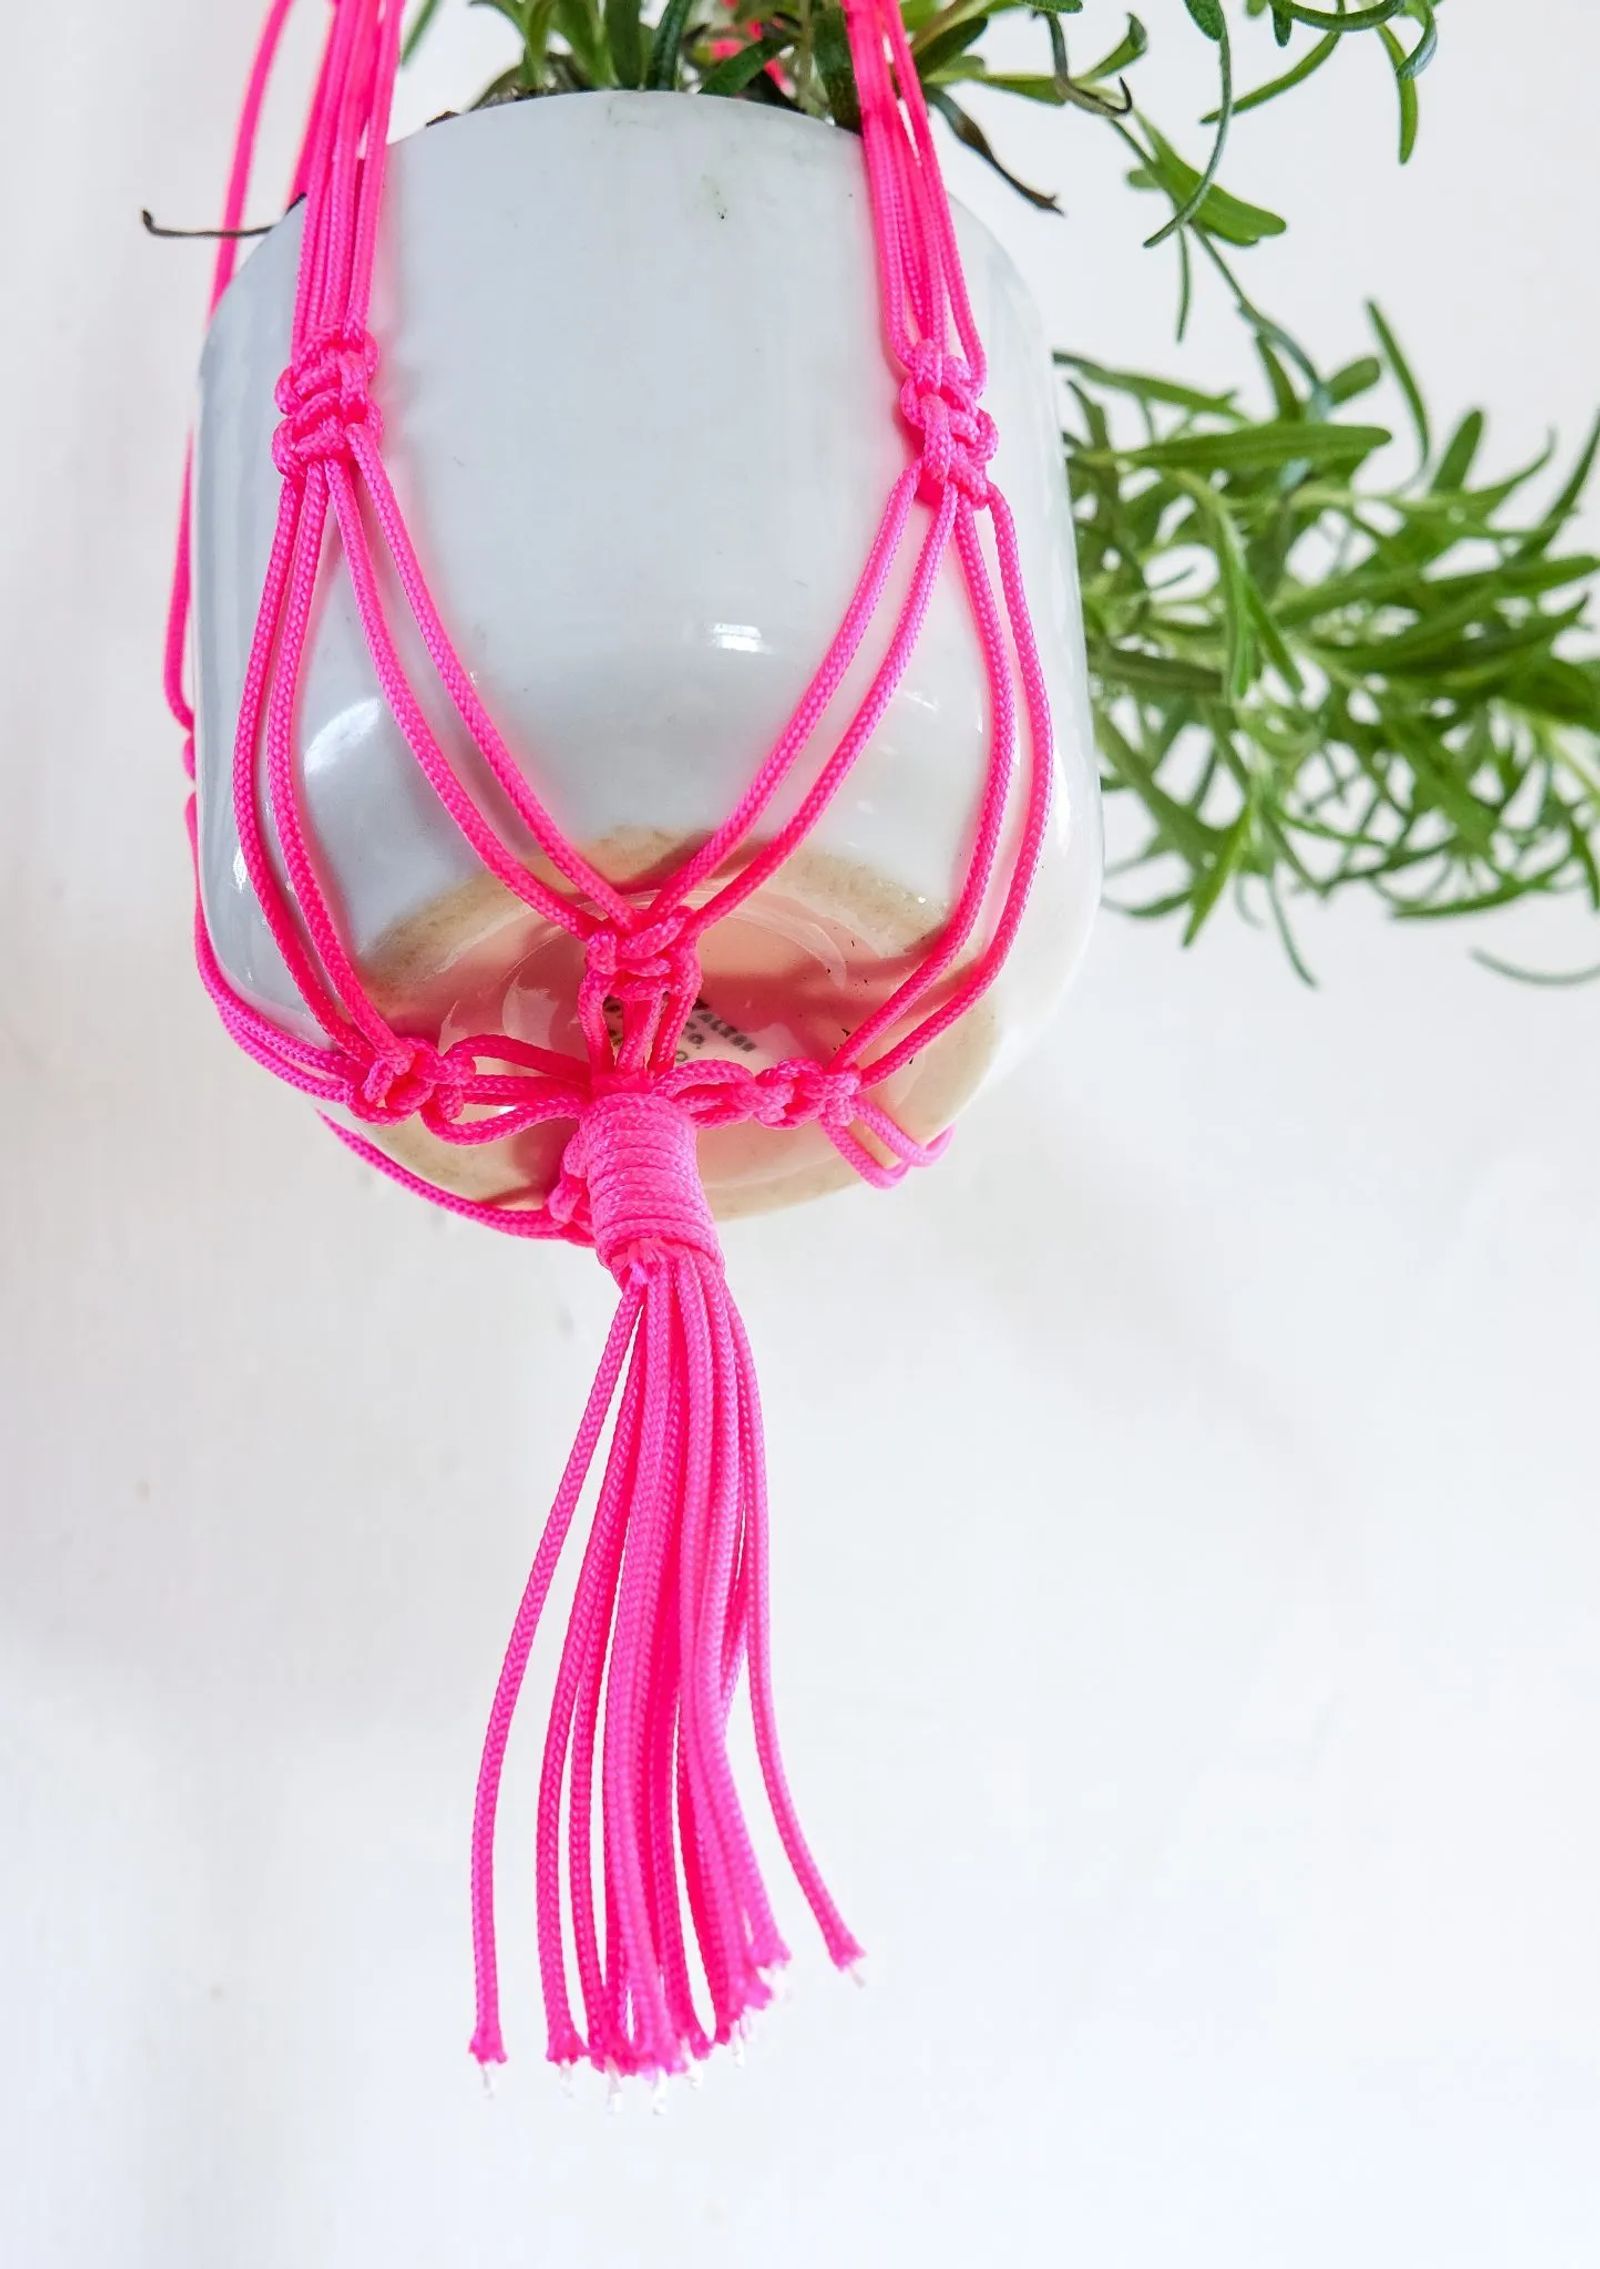
FINISHING YOUR MACRAME HANGER
Take two of the finished groups of cords, making sure they are side-by-side neighbors at the ring. Measure down 3 to five inches on your unworked cord sections (depending on your desired length). Use the 2 right cords on the left group and 2 left cords on the right group and connect the two segments with these 4 cords. The 2 outer cords are now your working cords. Make 2 square knots. Repeat 3 times until all cords are connected. Cut another 20-inch cord for another gathering knot 1-3 inches below your last square knots.


